
How Far Should You Sight In a .22LR?

Sighting in a small rimfire barrel is nothing to stress over because the ideal distance is already well settled. For almost every rifle, fifty yards is the sweet spot to align your sights. At that yardage, the bullet stays within half an inch of where you aim from fifteen yards all the way out to fifty-five yards, keeping your shots predictable.
A couple of simple factors can change that choice. Handguns and casual backyard target setups do better with a twenty-five-yard mark, especially when shooting closer steel plates or soda cans. Slower standard-speed ammunition also curves downward sooner than faster hunting rounds. Here is how to choose the right number for your gun and lock in your aim without wasting boxes of ammunition.
Why 50 Yards Is the Sweet Spot for Most .22LR Rifles
A .22LR bullet travels along a curved arc rather than a flat, laser-straight line. When you pull the trigger, gravity begins pulling the small lead bullet toward the ground immediately. To hit a target downrange, the barrel points slightly upward relative to the sight line on top of the gun. The bullet travels up across your line of sight, reaches the peak of its flight path, and then curves downward back toward the ground. Zeroing, which simply means adjusting the dot so your shots land exactly where the dot points at a set distance, requires picking a distance where that curved flight path causes the least amount of trouble.
For almost every .22LR rifle, that ideal distance is 50 yards. When you zero at 50 yards using common high-velocity hunting ammo or standard-velocity target loads, the bullet stays within half an inch of your aiming point from 15 yards all the way out to roughly 55 yards. The bullet crosses your sight line on the way up around 15 yards, rises roughly half an inch high around 30 to 35 yards, and drops right back onto the center of your dot at 50 yards.
This flat window makes shooting small targets remarkably simple. Whether you are plinking soda cans on a dirt berm, knocking down steel plates, or hunting tree squirrels, a half-inch variance is smaller than the target itself. You do not need to calculate holdover, guess bullet drop, or aim high or low. You simply place the aiming dot on the target, press the trigger smoothly, and the bullet connects.
Sighting in at 100 yards, by contrast, creates serious problems at closer ranges. Because a small rimfire round drops rapidly past 60 yards, zeroing at 100 yards forces the barrel to point significantly higher. That upward angle causes the bullet to rise three to four inches above your crosshairs or dot around 45 to 60 yards. If you aim dead-center at a small pest at 50 yards with a 100-yard zero, your shot will fly cleanly over its back. Setting your initial zero at 50 yards gives you the most forgiving, practical trajectory for everyday shooting.
When to Choose a 25-Yard Zero for Handguns and Short Ranges
While 50 yards works wonders for shoulder-fired rifles, setting your zero at 25 yards is often the smarter choice for handguns, indoor shooting lanes, and backyard plinking setups. Handgun barrels are much shorter, usually between four and six inches compared to the sixteen inches or more found on a typical rifle. That shorter barrel yields lower bullet speed, meaning gravity pulls the bullet down sooner. Handgun sights also sit closer to the bore line, which changes the angle at which the bullet crosses your visual path.
Most rimfire handgun shooting happens between 10 and 25 yards. Balancing a lightweight pistol with your arms extended is naturally wobblier than resting a rifle against your shoulder, making fine target hits past 25 yards tricky for everyday practice. If you shoot a dedicated target pistol, such as mounting a red dot sight for Ruger Mark pistols, a 25-yard zero places your point of aim and point of impact in dead alignment right where your eyes and hands perform best.
A 25-yard zero is also the most practical choice if you shoot primarily at indoor ranges. Many indoor facilities only offer lanes out to 25 yards. Trying to estimate a 50-yard zero on a short indoor lane leads to frustrating guesswork once you finally get outdoors. Zeroing dead-on at 25 yards gives you reliable accuracy for paper bullseyes and steel spinners within normal pistol distances.
If you zero a rifle at 25 yards instead of 50, keep in mind what the bullet flight path will do. The bullet crosses the sight line at 25 yards, continues climbing upward, and will strike roughly an inch high around 45 to 50 yards before falling back down past 65 yards. For banging full-sized steel targets, an inch high does not matter much. But if you hunt squirrels or shoot tight paper groups, that one-inch mid-range hump can cause missed shots.
How to Sight In Your Optic Step by Step Without Wasting Ammo
Sighting in should not burn through boxes of ammunition. You can get locked on target with fewer than fifteen shots if you follow a methodical process. Before doing anything with your optic, safety comes first: always clear the firearm chamber, remove magazines, and visually confirm the firearm is completely unloaded before handling or mounting hardware.
Ensure your optic mount is locked down securely on standard Picatinny or 20mm slotted accessory rails. Use an inch-pound torque tool to tighten the base screws to the manufacturer rating, and apply a small drop of thread-locking fluid so normal firing vibration does not shake the screws loose. If your rifle or pistol also uses backup iron sights, verify whether you prefer absolute co-witness, which centers the dot directly on the front post, or a lower-third view that keeps the iron sights in the bottom third of the optic window. You can check our breakdown on iron sights for cowitness with red dot sights to see how to align both sighting systems properly.
- Start close at 10 or 15 yards. Never start your sighting process straight at 50 yards. If your optic is misaligned by even a fraction of an inch from the factory, your shots can miss a large cardboard backer entirely at 50 yards. Starting close ensures your initial shots land on the paper, giving you an immediate visual baseline.
- Shoot from a solid bench rest. Do not attempt to sight in while standing offhand or resting your elbows loosely on a wobbly table. Sit behind a solid shooting bench and rest the firearm forearm on a sandbag or shooting block. Your hands should only support and steady the grip, not hold up the weight of the firearm.
- Fire a consistent three-shot group. Keep your aiming dot centered on the exact same bullseye for three consecutive shots. Do not move your aim to where the first bullet hit. A group of three shots reveals the true cluster center, filtering out any minor shooter error or wind drift.
- Adjust your windage and elevation click dials. The top dial controls elevation (up-and-down adjustments) while the side dial controls windage (left-to-right adjustments). Optics measure movement in Minutes of Angle (MOA), which describes how much of the target the adjustment moves. At 100 yards, 1 MOA equals roughly one inch. At 50 yards, 1 MOA equals half an inch, and at 25 yards, 1 MOA equals one-quarter of an inch. If your optic dials move 1/2 MOA per click, it takes eight clicks to move your bullet impact one inch at 25 yards. Turn the dials in the direction indicated by the arrows stamped on the caps until the group centers on your mark.
- Move the target back to your final distance. Once your shots land dead-center at close range, move your target out to your final 25-yard or 50-yard mark. Fire one more steady three-shot group. Because you already corrected major alignment errors up close, you will only need a few fine clicks to lock your point of impact perfectly under the aiming dot.
Common Sighting Mistakes to Avoid
Keep this short checklist in mind before heading to the firing line to prevent common headaches:
- Chasing single shots: Never touch the adjustment dials after firing a single round. Always fire a three-shot group first to find the true center of impact.
- Switching ammo mid-session: Different rimfire ammunition brands and bullet weights fly at different speeds. Zero your gun with the exact ammo you intend to hunt or compete with.
- Shooting unsupported: Trying to sight in while standing up introduces body sway that makes it impossible to tell if errors come from the sight or your stance.
- Ignoring loose screws: If your groups suddenly spread out across the paper with no pattern, stop shooting immediately and verify that your mount screws have not rattled loose.
- Skipping the close-range step: Starting immediately at 50 yards risks missing the entire target board, turning zeroing into expensive, frustrating guesswork.
Using a Bore Sight Tool to Save Range Time and Ammo
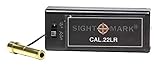
If you want to speed up the process and save your live rimfire rounds for real practice, a dedicated laser barrel tool, commonly called a bore sight, is one of the handiest accessories you can keep in your range bag. Instead of firing live ammunition to see where your barrel is pointing, this tool projects a bright red laser beam directly down the bore and onto your target backer. This allows you to bring your red dot or crosshair onto the laser point before you even load a magazine.
When selecting a bore sight tool for .22LR firearms, choose an end-barrel design rather than a chamber cartridge insert. Rimfire chambers have tiny dimensions and delicate extractors, which can make cartridge-shaped laser tools difficult to insert, extract, or keep straight without jamming. An end-barrel tool features a precision-machined arbor or expanding pin that slides directly into the muzzle end of the barrel. This design centers the beam along the internal rifling and works seamlessly across rifles, revolvers, and semi-automatic handguns without touching the chamber.
Look for a model with an integrated physical on-and-off switch. Many older designs force you to unscrew the battery cap and pull out microscopic button cells to turn the beam off, which creates a hassle on the firing line and leads to dropped batteries in the dirt. A clean switch makes toggling the beam simple while you adjust your left-to-right and up-and-down dials.
Verify that the tool uses a certified Class IIIA laser beam. This power level remains eye-safe under normal handling precautions while providing a clear red dot visible between 15 and 50 yards under shaded range conditions or indoors. Above all, maintain strict muzzle awareness: always verify the laser tool is completely removed from the barrel end before loading live rounds, and verify the firearm chamber remains completely empty whenever the tool is attached.

- ARS Mark8.8
ARS Mark is a ranking system developed by bestairriflescopes.com. ARS Mark has no relationship or impact from any manufacturers or sales agent websites. Learn more
- BrandBefbox
- ARS Mark8.8
ARS Mark is a ranking system developed by bestairriflescopes.com. ARS Mark has no relationship or impact from any manufacturers or sales agent websites. Learn more
- BrandSightmark

- ARS Mark8.6
ARS Mark is a ranking system developed by bestairriflescopes.com. ARS Mark has no relationship or impact from any manufacturers or sales agent websites. Learn more
- BrandTipfun

- ARS Mark8.6
ARS Mark is a ranking system developed by bestairriflescopes.com. ARS Mark has no relationship or impact from any manufacturers or sales agent websites. Learn more
- BrandStrongTools

- ARS Mark8.6
ARS Mark is a ranking system developed by bestairriflescopes.com. ARS Mark has no relationship or impact from any manufacturers or sales agent websites. Learn more
- BrandGotical

- ARS Mark8.6
ARS Mark is a ranking system developed by bestairriflescopes.com. ARS Mark has no relationship or impact from any manufacturers or sales agent websites. Learn more
- BrandAngeebin

- ARS Mark8.6
ARS Mark is a ranking system developed by bestairriflescopes.com. ARS Mark has no relationship or impact from any manufacturers or sales agent websites. Learn more
- BrandSSI

- ARS Mark8.4
ARS Mark is a ranking system developed by bestairriflescopes.com. ARS Mark has no relationship or impact from any manufacturers or sales agent websites. Learn more
- BrandBOOLIT EYE

- ARS Mark8.2
ARS Mark is a ranking system developed by bestairriflescopes.com. ARS Mark has no relationship or impact from any manufacturers or sales agent websites. Learn more
- BrandMOSANDON

- ARS Mark8.0
ARS Mark is a ranking system developed by bestairriflescopes.com. ARS Mark has no relationship or impact from any manufacturers or sales agent websites. Learn more
- BrandARKSight
Last update on 2026-10-01 / Affiliate links / Images, Product Titles, and Product Highlights from Amazon Product Advertising API
FAQs
What happens if I sight in my .22LR at 100 yards?
Sighting in at 100 yards forces the barrel to point upward at a steep angle to compensate for heavy bullet drop. Because the bullet arcs upward, your shots will strike three to four inches higher than your aiming dot at 50 yards. That high mid-range flight path causes clean misses over the top of small game, tin cans, and steel spinners at everyday shooting distances.
Does ammo speed change my zero distance?
Yes, changing between standard-velocity target loads and high-velocity hunting rounds will noticeably shift where your bullets land. High-velocity ammunition flies faster, generating a slightly flatter trajectory that impacts higher on paper than subsonic target rounds. Whenever you switch brands, bullet weights, or velocity ratings, fire a three-shot confirmation group to see if your dials require a minor tweak.
How many shots should I fire before turning adjustment dials?
Always fire a group of at least three shots before touching your adjustment click dials. A single shot can stray slightly due to wind, trigger anticipation, or resting instability, which leads to chasing random holes around the target. A tight three-shot cluster shows the true point of impact so you can adjust your windage and elevation with total confidence.


12 Best 22 Pcp Air Rifle For Hunting of 2026 With Quiet Power

7 Best 22 Pcp Air Rifle Under 300 of 2026 For Backyard Pest Control

10 Best 22 Break Barrel Air Rifles of 2026 For Backyard Pest Control

10 Best 30 Caliber Pcp Air Rifle of 2026 For Medium Game

Top Best 177 Air Rifle Under 100: Budget-Friendly Picks for 2026

How to Safely Reload Shotgun Shells at Home

11 Best Co2 Air Rifle For Pest Control of 2026 To Ensure Humane Dispatch

12 Best Inexpensive Air Rifles of 2026 For Dependable Backyard Accuracy






