
How to Adjust a Crossbow Sight Without Losing Arrows

Set up a target at twenty yards and place the crossbow on a firm rest before touching any adjustment knobs. Steadying the stock eliminates human wobble, allowing you to turn the dials in the direction your arrow needs to move. Turn the top dial up when shots land low, and click the side dial right when shots hit left.
The exact process changes slightly depending on the glass mounted on your rail. A basic single-dot sight zeros cleanly at one distance, while multi-reticle scopes with speed dials need extra steps to match arrow drop out to forty or fifty yards. Shooting arrows with matching weights and identical tips also matters, because mixed gear will never cluster in a tight group. Here is how to line up your aim step by step without losing arrows in the grass.
Understanding Dial Direction and Setting Up a Sturdy Shooting Rest
Adjusting a crossbow sight becomes simple once you follow one basic rule: always turn the dials in the direction you want the arrow to move. Sights have two adjustment knobs protected by screw-off caps. The up-and-down dial, often labeled elevation, sits on top of the optic housing. The left-to-right dial, often labeled windage, sits on the right side. If your arrow strikes two inches below the bullseye, turn the top dial toward the mark labeled UP. If your arrow hits to the left of your aiming mark, turn the side dial toward the mark labeled R or RIGHT. The letters on the dials show the direction of arrow movement on the target, not the direction the glass inside the sight is shifting.
Many shooters lose arrows in the dirt because they try to adjust their sight while holding the crossbow freehand. A modern hunting crossbow carries substantial weight out toward the limbs, making it front-heavy. Even small muscle twitches or heavy trigger pulls will throw an arrow several inches off target at twenty yards. Before you touch a single dial, you must remove human movement from your shooting setup. A sturdy shooting bench combined with sandbags or a dedicated shooting vise holds the rail completely steady so every shot reflects true sight alignment rather than your body sway.
Arrow consistency is just as important as a steady rest. Shooting a mix of different arrow brands, varying grain weights, or mismatched practice points will cause arrows to scatter across the target face even when your sight is perfectly aligned. Sighting in requires identical arrows from the same manufacturer, equipped with matching practice tips that weigh the same as your intended broadheads. Take a moment to verify your setup with this quick preparation checklist before releasing your first arrow:
- Solid shooting rest: Support both the stock and the front forearm on sandbags or a bench rest so the crossbow stays completely still during your trigger squeeze.
- Matched arrows and points: Use three identical arrows with undamaged fletching vanes and matching field point weights, such as 100-grain or 125-grain tips.
- Generous target backstop: Place a large, high-density foam target bag directly in front of an earthen dirt mound to stop stray shots safely.
- Tight optic mounting screws: Check that your scope rings clamp firmly onto the standard Picatinny or 20mm slotted accessory rails using an inch-pound torque tool so bow vibration does not shake the sight loose.
Sighting in Your Crossbow at Twenty Yards Step by Step
Twenty yards is the universal baseline distance for zeroing a crossbow. Zeroing simply means adjusting the aiming dot or crosshair so your arrows land exactly where you aim at that chosen distance. Starting closer than twenty yards can damage your arrows because high arrow speeds may bury them past the fletchings in soft targets. Starting farther out, such as thirty or forty yards, creates a high risk of missing the target backing completely and burying an expensive arrow deep into the turf. Sighting in at twenty yards establishes a reliable foundation that keeps all subsequent adjustments predictable.
When you are ready to adjust your sight, follow these five steps in order:
- Cock and load with care: Cock your crossbow evenly using a rope cocker or integrated crank handle. Lay an arrow in the flight track, ensuring the index vane rests flat in the groove and the nock sits firmly seated against the bowstring. Always point the crossbow downrange in a safe direction while loading.
- Fire a three-arrow group: Rest the crossbow securely on your bench. Place the top crosshair or primary aiming dot directly on the center of the bullseye. Squeeze the trigger smoothly without jerking. Repeat this process with two more identical arrows, aiming at the exact same bullseye every time. Never adjust your dials after a single shot; you need a cluster of three arrows to reveal your true point of impact.
- Measure the distance to the bullseye: Walk downrange to your target. Find the geometric center of your three-arrow cluster. Use a pocket tape or ruler to measure how many inches that cluster sits above, below, to the left, or to the right of the center dot.
- Click the adjustment dials: Unscrew the protective dial caps. Crossbow scopes use internal click dials to move the reticle. On many scopes, it takes four clicks to move the arrow impact one inch at one hundred yards, which means it takes roughly twenty clicks to move the arrow impact one full inch at twenty yards. Check your scope manual or dial cap markings to confirm your sight's click value. Turn the top dial UP or DOWN and the side dial LEFT or RIGHT based on your measurements.
- Confirm with a follow-up group: Return to the bench and fire three more arrows at the center dot. If your arrows now cluster inside the bullseye, your twenty-yard zero is complete. If the group remains slightly off center, make a fine correction of two or three clicks and fire one final confirmation group.
Learning how adjustment dials interact with arrow flight takes only a few rounds of practice, much like mastering the basics of how to use a bow sight on standard vertical archery gear. Once your arrows hit dead center at twenty yards, screw the dial caps back on firmly to seal the internal mechanics against moisture and dirt.
Calibrating Yardage Markers and Curing Inconsistent Arrow Groups
Crossbow arrows shed speed quickly as they travel downrange, causing them to drop significantly past twenty yards. To compensate for this downward curve, modern crossbow sights use multi-line reticles or stacked aiming dots inside the glass. The top horizontal crosshair or top aiming dot serves as your twenty-yard marker. The markings stacked directly below it represent thirty, forty, and fifty yards. On basic fixed-power sights, these lower marks are spaced for average arrow weights, so you simply step back to thirty yards and confirm where the second mark lands on the target.
Many advanced scopes feature an adjustable speed dial ring on the magnification collar, calibrated in feet per second. This dial does not make your crossbow shoot faster; instead, it changes the spacing between your reticle lines to match your bow's specific arrow speed. To calibrate a speed ring, step back to forty yards after completing your twenty-yard zero. Place the forty-yard crosshair directly on the bullseye and fire a group of three arrows. If your arrows hit lower than the bullseye, turn the speed dial to a slightly lower speed rating, which widens the distance between the reticle marks. If your arrows hit high, turn the dial to a higher speed rating. Once the forty-yard mark hits dead center, your intermediate thirty-yard and fifty-yard marks will align automatically.
If your arrows scatter across the target rather than forming tight clusters, mechanical inconsistencies are almost always the cause. Crossbows generate intense vibration upon release, which can loosen mounting hardware or alter your shooting form. Before second-guessing your sight dials, inspect these common trouble spots:
Uneven cocking is the most frequent reason arrows drift left or right. If your cocking rope pulls the bowstring even one-sixteenth of an inch farther to the left side of the rail, the string will push the arrow left upon release. Take a silver permanent marker and mark the bowstring serving on both sides directly against the flight track while the bow is uncocked. When you draw the string back, verify that both silver marks align identically with the flight rail.
Loose mounting hardware can also cause wandering arrow groups. Bow vibration easily loosens the cross-bolts holding your optic to the rail. Inspect your scope rings and base clamp. Tighten all screws to manufacturer specifications with an inch-pound torque tool, and apply a small drop of blue thread-locking fluid to screw threads to stop them from backing out during repeated shooting sessions.
Always inspect your arrows for structural wear. Damaged plastic half-moon or flat nocks, cracked carbon shafts, and warped fletching vanes destabilize arrow flight instantly. Check each nock for small cracks, and discard any arrow that shows signs of splintering or bent inserts.
Aligning Sights With a Laser Bore Tool Before Shooting
One of the biggest anxieties for crossbow shooters is firing the very first shot with an unaligned optic. When you mount a brand-new scope or red dot sight onto a rail, the crosshairs may point several feet away from where the arrow actually launches. Firing a live arrow on an unadjusted setup often results in arrows sailing completely over the target backstop or skipping off hard ground into dense brush, resulting in broken equipment or lost investments.
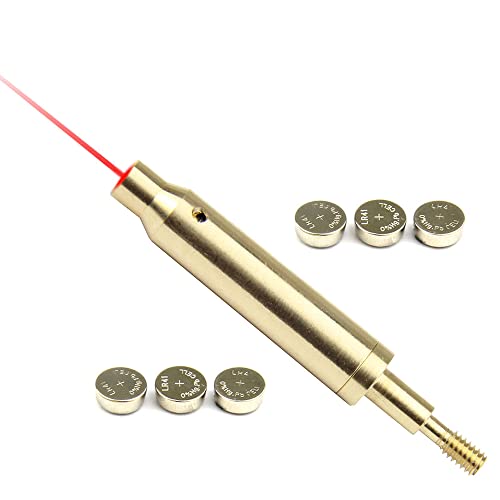
A crossbow laser bore sight solves this problem without releasing a single live shot. These compact tools fit neatly into your arrow track or thread directly onto standard arrow inserts. When switched on, they project a focused red aiming beam directly down the centerline of your flight rail toward your target backstop. This red laser dot shows you where your crossbow rail is pointing before you ever pull the cocking rope.
To use an alignment tool, place your crossbow on a level shooting bench at ten or fifteen yards from your target in low light or indoors. Turn the unit on and set it into the rail groove so the beam strikes your target bag. Look through your optic and turn your up-and-down and left-to-right dials until your crosshair or primary aiming dot sits directly on top of the red laser dot. This simple pre-alignment step ensures your very first live arrow at twenty yards will land safely on the target face, saving your arrows and cutting down your zeroing time.
When selecting a sighting tool for your archery setup, prioritize durable aluminum alloy or brass housings that resist bending when resting in the arrow channel. Look for models featuring an accessible on-off switch so you do not have to remove tiny watch batteries between adjustments. Ensure the tool provides a crisp red aiming beam visible at fifteen yards and comes with clear thread compatibility for standard crossbow arrow inserts.

- ARS Mark8.8
ARS Mark is a ranking system developed by bestairriflescopes.com. ARS Mark has no relationship or impact from any manufacturers or sales agent websites. Learn more
- BrandTipfun

- ARS Mark8.6
ARS Mark is a ranking system developed by bestairriflescopes.com. ARS Mark has no relationship or impact from any manufacturers or sales agent websites. Learn more
- BrandMidTen

- ARS Mark8.4
ARS Mark is a ranking system developed by bestairriflescopes.com. ARS Mark has no relationship or impact from any manufacturers or sales agent websites. Learn more
- BrandMidTen
- ARS Mark8.4
ARS Mark is a ranking system developed by bestairriflescopes.com. ARS Mark has no relationship or impact from any manufacturers or sales agent websites. Learn more
- BrandTACFUN

- ARS Mark8.2
ARS Mark is a ranking system developed by bestairriflescopes.com. ARS Mark has no relationship or impact from any manufacturers or sales agent websites. Learn more
- BrandMidTen

- ARS Mark8.2
ARS Mark is a ranking system developed by bestairriflescopes.com. ARS Mark has no relationship or impact from any manufacturers or sales agent websites. Learn more
- BrandTPO

- ARS Mark8.2
ARS Mark is a ranking system developed by bestairriflescopes.com. ARS Mark has no relationship or impact from any manufacturers or sales agent websites. Learn more
- BrandGotical

- ARS Mark8.0
ARS Mark is a ranking system developed by bestairriflescopes.com. ARS Mark has no relationship or impact from any manufacturers or sales agent websites. Learn more
- BrandGRG MFG

- ARS Mark7.8
ARS Mark is a ranking system developed by bestairriflescopes.com. ARS Mark has no relationship or impact from any manufacturers or sales agent websites. Learn more
- BrandGotical

- ARS Mark7.6
ARS Mark is a ranking system developed by bestairriflescopes.com. ARS Mark has no relationship or impact from any manufacturers or sales agent websites. Learn more
- BrandGotical
Last update on 2026-09-30 / Affiliate links / Images, Product Titles, and Product Highlights from Amazon Product Advertising API
FAQs
Which way do I turn the dials if my arrow hits low and to the left?
Turn the top up-and-down dial toward the UP mark and the side dial toward the R or RIGHT mark. Crossbow sight dials are calibrated to move the arrow impact point across the target. Turning toward UP lifts your shot pattern, while turning toward RIGHT shifts your arrows back toward the center bullseye.
What distance should I start at when sighting in a crossbow?
Start your live shooting at twenty yards while using a solid bench rest. Starting at twenty yards keeps your arrows safely on the target face while providing a flat flight path that makes dial adjustments easy to calculate. Sighting in closer than twenty yards can drive arrows too deeply into targets, while starting farther out increases the chance of missing the backstop entirely.
Why do my arrows scatter even after adjusting the dials?
Scattering arrow groups usually stem from uneven string cocking, loose mounting screws, or inconsistent arrow weights rather than sight defects. If you pull the cocking rope slightly crooked, the bowstring releases uneven energy that shifts arrows left or right. Check that your scope mount screws are secure on the rail, verify that your string is drawn evenly, and shoot only identical arrows with matching field point weights.


12 Best 22 Pcp Air Rifle For Hunting of 2026 With Quiet Power

7 Best 22 Pcp Air Rifle Under 300 of 2026 For Backyard Pest Control

10 Best 22 Break Barrel Air Rifles of 2026 For Backyard Pest Control

10 Best 30 Caliber Pcp Air Rifle of 2026 For Medium Game

Top Best 177 Air Rifle Under 100: Budget-Friendly Picks for 2026

How to Safely Reload Shotgun Shells at Home

11 Best Co2 Air Rifle For Pest Control of 2026 To Ensure Humane Dispatch

12 Best Inexpensive Air Rifles of 2026 For Dependable Backyard Accuracy






