
How to Adjust an IQ Bow Sight for Tight Groups

Zero your top pin first. Adjusting the alignment dot too early only locks in poor shooting form. Shoot at twenty yards and move your physical pin to follow your arrows until they hit dead center. Once your arrows hit where you aim, draw back to your natural anchor point (the steady spot where your hand touches your jaw). Keep that comfortable hold, look at the top window, and center the dark dot inside the green circle using the adjustment knobs.
A few details will shape your setup. Some sight models use tool-free adjustment dials, while others need a small hex wrench to loosen locking screws. Shooting without a peep sight on the string also demands extra consistency, since twisting your bow hand can push the dot out of position. Here is how to complete the process smoothly from your first shot.
The Short Version
- Sight in your physical pins first: Mount the sight, step back to 20 yards, and tune your top pin to hit the center ring using standard windage and elevation adjustments while ignoring the alignment dot window entirely.
- Calibrate the alignment dot second: Once your 20-yard pin hits dead center, draw the bow to your natural anchor point and turn the Retina Lock adjustment dials until the black dot sits directly inside the green ring.
- Set longer distances with individual pins: Step back to 30, 40, and 50 yards and move only the individual fiber pins up or down, leaving the main sight housing and the alignment dot untouched.
- Use the dot to correct shooting form: If the black dot drifts during a shot, relax your bow hand to eliminate grip torque and check that your face is not pressing hard into the bowstring.
Why You Must Zero Your Top Pin Before Touching the Alignment Dot
The Retina Lock system works like an onboard shooting coach. It features an alignment dot window built directly above your pin housing. Inside that window, you see a floating black dot and an outer green ring. When your grip, hand pressure, and anchor point (the spot where your release hand touches your jaw or cheek) are consistent, the black dot centers inside the green circle. If you twist your wrist even slightly, the dot shifts out of the circle to warn you.
Many archers make the mistake of adjusting the alignment dot right out of the box. They draw the bow, notice the black dot is sitting high or off to the side, and immediately start turning the micro-adjust dials on the dot window. Doing that forces your sight to calibrate around whatever grip torque (twisting the bow grip with your hand) or poor posture you have at that exact moment. You end up locking bad shooting habits directly into your equipment before your arrows ever strike a target.
Your physical sight pins must match the true flight of your arrow first. Think of the sight housing as the steering wheel and the alignment dot window as your lane-centering sensor. You have to point the vehicle down the middle of the road before you calibrate the electronic sensor. By grouping your arrows at 20 yards with your natural form and locking the pin housing in place, you establish a baseline of genuine accuracy. Only then do you tune the alignment dot window to match that repeatable anchor position.
Step-by-Step: Sighting In Your 20-Yard Pin
Zeroing your top pin gives you the anchor for the rest of your sight setup. Grab your bow, field-point arrows, and a hex wrench if your sight model does not use tool-less locking knobs. Set up at an archery range or a safe backyard target with an adequate backstop.
- Center your top pin in the housing: Set your top pin roughly in the upper third of the sight ring. Make sure the individual pin screw is snug so it cannot slip while you shoot.
- Step to 20 yards and shoot a three-arrow group: Draw your bow, settle into your normal, comfortable anchor point, and place that top pin in the center of the bullseye. Completely ignore the alignment dot window at the top of the housing for now. Release three arrows using smooth, consistent form.
- Chase your arrow impacts: Walk to the target and check where the group landed. In archery, you always chase your arrows with your sight housing. If your arrows land low, move your sight housing down. If your arrows land to the left, move your sight housing to the left. Learning how to use a bow sight with better accuracy starts with this simple rule of following your misses.
- Adjust windage and elevation: Windage controls side-to-side adjustment, while elevation controls up-and-down adjustment. Loosen the main gang-adjustment locking knobs on your sight bracket. If your sight features micro-adjust dials, turn the marked knobs to nudge the entire housing toward your arrow group. If it uses standard slide tracks, loosen the screws, slide the housing slightly, and snug the screws back down.
- Shoot and verify: Step back to the 20-yard line and shoot three more arrows. Continue adjusting the main housing until your three-arrow cluster punches the center dot. Once your arrows hit dead center, tighten the gang-adjustment lock knobs firmly so bow vibration cannot shake the housing loose. Do not move the main housing again.
Calibrating the Retina Lock Alignment Dot
With your 20-yard pin dialed dead center, your bow is officially shooting straight. Now you can set the Retina Lock alignment dot window to recognize your ideal shooting posture.
- Nock an arrow and draw to your anchor: Stand on the shooting line with an arrow loaded and pointed safely downrange. Draw back to your exact, natural anchor point. Rest your jawbone against your release hand just like you did when shooting your tight 20-yard group. Keep your bow hand relaxed, letting the grip rest against the fleshy pad at the base of your thumb.
- Glance at the alignment dot window: Without moving your bow arm, tilting your head, or twisting the grip, shift your eyes up to the small window above the pins. Check the position of the black dot relative to the green ring. Is the black dot high, low, or pushed to one side?
- Let down safely and adjust the dials: Let the bow down with control. Locate the micro-adjust dials on the Retina Lock housing. These small knobs control horizontal and vertical movement for the internal dot prism. Turn the dials to move the black dot toward the center of the green ring. If the dot was sitting too high, turn the vertical dial to lower it. If it sat to the right, turn the horizontal dial to move it left.
- Draw back to confirm alignment: Draw the bow again, settle into your natural anchor, and check the window. Continue making minor turns on the Retina Lock dials until the black dot sits perfectly dead center inside the green ring the moment you reach full draw.
- Confirm with live shots: Settle the top pin on the bullseye at 20 yards. Check that the black dot is centered in the green ring, then focus your eye back on the pin and release. Your arrow should hit the center. If the dot is centered but your arrow misses, your grip pressure or anchor moved during the release.
Fine-Tuning Additional Pins for Longer Distances
After zeroing the 20-yard pin and locking the alignment dot, never touch the main gang windage or elevation knobs again. Moving the main housing moves the Retina Lock window with it, which ruins your alignment calibration.
Step back to 30 yards. Draw your bow, check that the black dot sits centered in the green ring, and aim with your second pin. Shoot a group of three arrows. Because your main windage (side-to-side adjustment) was locked at 20 yards, your arrows should already be aligned left-to-right.
If your 30-yard arrows land low, loosen only the individual pin screw holding that second fiber pin in place. Slide that single pin downward inside the track to chase the arrow impact, then tighten the screw back down. If the arrows land high, slide the individual pin upward.
Repeat this individual adjustment process for 40 and 50 yards. If you notice arrows drifting left or right at longer ranges, resist the urge to turn the sight housing. A left or right miss at 40 yards usually means the bow is tilted or your hand is torquing the riser. Archers setting up gear like the best bow sight for Mathews bows know that keeping the sight housing square to the riser preserves consistency at extended ranges. Keep your sight bubble level centered and verify your alignment dot before blaming the sight pins.
Fixing Alignment Drift: Grip Torque and Anchor Pressure
The Retina Lock dot is sensitive. A shift as small as 1/16 of an inch at your anchor point can throw the black dot halfway out of the green ring. When the dot wanders away from center during practice, check these common form issues:
- Grip torque from a tight hand: Squeezing the bow handle like a hammer twists the riser to the side. Relax your fingers and let the bow grip press against the base of your thumb. Your knuckles should rest at a relaxed 45-degree angle.
- Excessive face pressure: Pressing your cheek, nose, or lips hard against the bowstring deflects the string to the left or right. Rest the string gently against the tip of your nose and the corner of your mouth without pushing into it.
- Collapsed bow-arm shoulder: Letting your front shoulder shrug upward toward your ear shortens your draw length and pulls the alignment dot high. Roll your shoulder down and back into its natural pocket before drawing.
- Creeping off the back wall: If you allow your release hand to creep forward even a fraction of an inch before firing, the string angle changes. Keep firm, steady back tension pulling into the bow stops until the shot breaks.
- Shooting without a peep sight: The sight works well peepless because the alignment window replaces the rear reference string aperture. But without a peep sight to look through, you must remain disciplined about keeping your jawbone locked against the exact same spot on your release hand on every shot.
Choosing the Right Bow Sight and Setup Tools
Setting up and adjusting a multi-pin sight with an alignment window requires solid hardware that stays put under heavy bow vibration. When selecting a bow sight or sighting accessories, look for all-metal housings machined from aluminum rather than flexible plastic brackets. Sturdy aluminum construction prevents your pins and alignment windows from shifting when bumped against brush or treestand rails.
Models with tool-free micro-adjust dials for windage and elevation make field tuning much simpler. Micro-dials save you from digging through your backpack for tiny Allen wrenches when your arrow groups drift during target practice. Look for clear yardage markings and fully captured fiber-optic pins that protect delicate light fibers from snagging on limbs.
For archers shooting steep angles from a tree or across rugged terrain, 2nd and 3rd axis adjustability is a critical feature to check. A sight that allows you to level the housing along both axes ensures your bubble level and alignment dot remain accurate when aiming steeply uphill or downhill. Pairing your sight with a simple bow string level and arrow level tool during initial mounting ensures your riser, arrow rest, and sight bracket sit square before you shoot your first arrow. If you hunt from elevated platforms, matching your gear with the best bow sight for treestand hunting gives you the durability and pin visibility needed in low timber light.
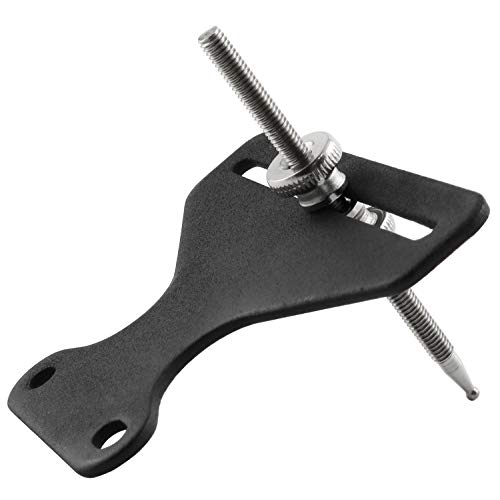
- ARS Mark9.0
ARS Mark is a ranking system developed by bestairriflescopes.com. ARS Mark has no relationship or impact from any manufacturers or sales agent websites. Learn more
- BrandSQXBK
- ARS Mark8.8
ARS Mark is a ranking system developed by bestairriflescopes.com. ARS Mark has no relationship or impact from any manufacturers or sales agent websites. Learn more
- BrandTrophy Ridge
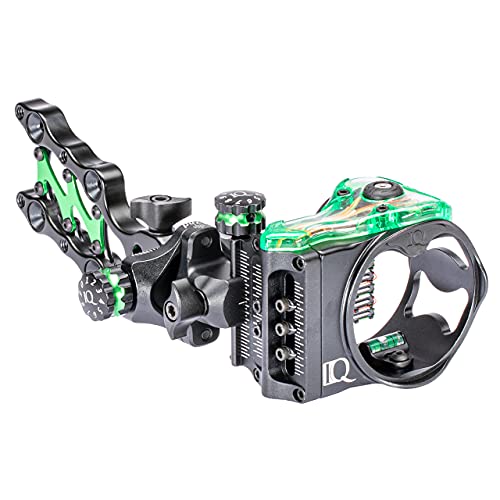
- ARS Mark8.6
ARS Mark is a ranking system developed by bestairriflescopes.com. ARS Mark has no relationship or impact from any manufacturers or sales agent websites. Learn more
- BrandIQ BOW SIGHT
- ARS Mark8.4
ARS Mark is a ranking system developed by bestairriflescopes.com. ARS Mark has no relationship or impact from any manufacturers or sales agent websites. Learn more
- BrandTrophy Ridge

- ARS Mark8.0
ARS Mark is a ranking system developed by bestairriflescopes.com. ARS Mark has no relationship or impact from any manufacturers or sales agent websites. Learn more
- BrandIQ BOW SIGHT

- ARS Mark8.0
ARS Mark is a ranking system developed by bestairriflescopes.com. ARS Mark has no relationship or impact from any manufacturers or sales agent websites. Learn more
- BrandSOPOGER

- ARS Mark7.4
ARS Mark is a ranking system developed by bestairriflescopes.com. ARS Mark has no relationship or impact from any manufacturers or sales agent websites. Learn more
- BrandAolamegs

- ARS Mark4.8
ARS Mark is a ranking system developed by bestairriflescopes.com. ARS Mark has no relationship or impact from any manufacturers or sales agent websites. Learn more
- BrandZSHJGJR
Last update on 2026-09-30 / Affiliate links / Images, Product Titles, and Product Highlights from Amazon Product Advertising API
Frequently Asked Questions
Do I adjust the pins or the Retina Lock dot first?
You must always adjust your physical pins first. Shoot at 20 yards and move the main sight housing to center your arrow groups on the bullseye. Once your bow shoots dead center with your natural anchor, adjust the micro-dials on the Retina Lock window to center the black dot inside the green ring.
Which direction do I turn the knobs if my arrows hit left or low?
Always chase your arrow impact when adjusting the sight housing. If your arrows hit to the left, move the sight housing to the left. If your arrows hit low, move the housing downward. Moving the housing toward the miss brings your aiming pins into alignment with where the arrow actually launches.
Can I shoot an IQ sight without a peep sight on my string?
Yes, you can shoot an IQ sight without a peep sight on your bowstring. The Retina Lock window acts as your rear alignment guide, revealing grip torque and head tilt just like a traditional string peep. Sighting without a peep provides a brighter field of view in low light, provided your anchor point remains consistent.
Why does the dot move out of alignment when I squeeze the trigger?
The dot drifts out of alignment when your grip or draw arm shifts during the release. This usually happens when an archer tenses their bow hand right before the shot, introduces grip torque, or anticipates the shot and punches the trigger. Keep your bow hand relaxed, maintain firm back tension, and allow the release to surprise you.


12 Best 22 Pcp Air Rifle For Hunting of 2026 With Quiet Power

7 Best 22 Pcp Air Rifle Under 300 of 2026 For Backyard Pest Control

10 Best 22 Break Barrel Air Rifles of 2026 For Backyard Pest Control

10 Best 30 Caliber Pcp Air Rifle of 2026 For Medium Game

Top Best 177 Air Rifle Under 100: Budget-Friendly Picks for 2026

How to Safely Reload Shotgun Shells at Home

11 Best Co2 Air Rifle For Pest Control of 2026 To Ensure Humane Dispatch

12 Best Inexpensive Air Rifles of 2026 For Dependable Backyard Accuracy






