
How to Adjust a Romeo Zero Sight Without Stripping Screws

A shooter stands at the firing bench squinting at a washed-out target, holding a tiny metal wrench and wondering which screw actually moves the red dot. The fix is straightforward: tap the small button right behind the lens to brighten the dot, and use a 0.050-inch hex wrench on the top and side screws to align your point of impact.
How you handle the sight depends on your specific goal and your tools. Adjusting the glow takes nothing more than a fingertip, but moving your bullet holes requires that exact wrench size to avoid stripping the delicate screw heads. Target distance also changes the math, since every turn shifts your hits farther apart at fifteen yards than at five. With the right grip and a light touch, dialing in your optic is safe, simple, and quick.
Find the hidden button inside the lens housing to set your brightness
Before you adjust anything on your optic, clear your firearm completely. Remove the magazine, pull the slide back, and visually check the empty chamber. Lock the slide open so the firearm cannot fire while your fingers are near the optic frame.
Unlike many large red dot sights that feature bulky pushbuttons on the outer sides of the frame, the RomeoZero uses a single low-profile control button hidden on the inside of the optic hood. It sits directly behind the clear lens on the bottom edge, right in front of the small red dot emitter window. Because it sits tucked against the inside glass, many owners overlook it at first glance.
Follow these steps to adjust your brightness level:
- Hold the pistol with the optic pointed safely away from your body, looking through the rear of the lens just as you would when aiming.
- Locate the tiny raised rubber button nestled directly behind the bottom edge of the front lens.
- Use the tip of your index finger or a clean wooden toothpick to press the button straight down. Avoid using metal tools or screwdrivers here, as a slip can gouge the lens.
- Press and release the button once to jump to the next brightness level. Each press cycles the red dot up by one step through its brightness range.
- Continue pressing the button until the dot reaches peak brightness. The next press will loop the illuminated dot back down to its lowest visible setting.
- To power the dot off manually, press and hold the button for about three seconds until the illuminated dot vanishes. A single quick tap will turn it back on.
The sight also uses a motion-sensing auto-on system. If you leave the optic on, it goes into a low-power sleep mode when the pistol stays still for a few minutes. As soon as you draw the gun or pick it up from a nightstand, the dot wakes up instantly at your chosen brightness level.
Grab the exact 0.050-inch hex wrench before touching any adjustment screws
The adjustment screws on this optic are exceptionally small and sit directly inside a lightweight polymer body. Using the wrong tool is the single fastest way to strip the screw heads and ruin your ability to adjust your aim. A standard Torx driver, a jeweler's flathead, or a metric Allen key that feels close will wobble inside the screw socket and shave off the corners.
Prepare these items before you turn any screws on your sight:
- The factory 0.050-inch hex wrench: This is the small L-shaped turning tool that came in the original packaging. If you misplaced it, buy a hardened 0.050-inch imperial hex wrench from a hardware supplier rather than guessing with random tools.
- A well-lit work table: Good overhead lighting or a small desk lamp helps you confirm that the tool sits all the way down at the bottom of the screw head before you apply any turning force.
- A soft bench mat: Placing your pistol on a clean, padded work mat prevents slips and protects the finish of your firearm while you make small adjustments.
- A clean microfiber cloth: Keep grease, gun oil, and solvent away from the wrench tip so the tool maintains a firm, slip-free bite on the tiny screw walls.
Never force a 1/16-inch wrench into these sockets, because it is slightly too thick. Likewise, a 1.2mm or 1.3mm metric tool will fit loosely and round off the edges under the slightest turning pressure. Stick strictly to the 0.050-inch measurement.
Turn the top and side screws carefully to guide your bullet impact
Zeroing aligns your aiming dot with where the bullet actually hits your target. The RomeoZero uses two adjustment screws: the top screw controls elevation (up-and-down aim), and the right-side screw controls windage (left-and-right aim). Both screws are clearly marked with small directional arrows and letters cast into the polymer frame.
The arrow marked on the optic always shows which way you must turn the screw to move your bullet impact, not the dot itself. If your shots hit low on paper and you need them to climb higher, turn the screw in the direction of the arrow marked "UP." If your shots hit to the left and you need them to drift right, turn the side screw in the direction marked "R."
Follow these exact steps to dial in your elevation and windage:
- Insert the short end of your 0.050-inch hex wrench straight into the adjustment screw socket. Push gently until you feel the tool bottom out fully in the recess.
- To move your bullet impact higher, turn the top screw counter-clockwise in the direction of the "UP" arrow.
- To move your bullet impact lower, turn the top screw clockwise, against the direction of the arrow.
- To move your bullet impact to the right, turn the side screw on the right flank counter-clockwise in the direction of the "R" arrow.
- To move your bullet impact to the left, turn the side screw clockwise, opposite the "R" arrow.
- Make your adjustments in small increments of one-quarter to one-half turn. These screws do not feature loud, heavy clicks like full-size rifle scopes, so turn smoothly and feel for smooth, gentle resistance.
Keep your turning tool perpendicular to the screw face at all times. Angling the wrench while twisting will chew through the soft metal of the screw head.
Shoot steady groups from a bench rest to zero your aim
Never try to zero your red dot while standing unsupported. Hand tremble and trigger pull errors will make your shots scatter across the paper, leaving you guessing whether the optic or your grip caused the shift. Always settle into a seated bench rest position at your shooting range.
Set up a steady shooting rest using sandbags or a dedicated bench support. Rest your wrists and the bottom of your pistol frame firmly on the bags so the gun stays rock-solid on the target. For a compact carry pistol, a target distance of 10 to 15 yards is ideal. It matches realistic defensive distances while keeping your bullet groups tight enough to read small adjustments clearly.
Fire a deliberate group of three shots at the center bullseye. Take your time, squeeze the trigger smoothly, and keep your red dot centered on the exact same spot for each shot. Walk downrange to inspect the target. Find the center of your three-hole group and measure how many inches it sits away from your point of aim.
At 15 yards, a half-turn of the adjustment screw typically shifts your bullet impact by about one to two inches. Make your calculated quarter-turn or half-turn adjustments with your 0.050-inch wrench while the gun rests safely on the bench. Fire another three-shot group to confirm the change. Repeat this steady process until your three-shot clusters punch directly through the bullseye behind your red dot.
If your handgun has tall iron sights that remain visible through the lower portion of the optic window, verify your sight picture through both systems. Setting up backup iron sights that cowitness with red dot sights gives you an instant reference point. While your red dot does not have to sit glued to the front iron sight post, seeing both align naturally helps you confirm that your optic has not shifted in its mount.
Protect the soft polymer housing and lens from accidental damage
The RomeoZero achieves its featherweight carry profile by using an ultralight polymer housing and a specialized polymer lens instead of heavy machined aluminum and thick glass. While this keeps your everyday carry pistol light and agile, it demands a gentle touch during maintenance and adjustments.
The most common damage happens when an owner reaches the end of the screw travel and continues turning. The internal adjustment mechanism has a limited range. As you turn the elevation or windage screw, pay close attention to the turning resistance. If the screw suddenly feels stiff or stops turning freely, stop immediately. Forcing the wrench past that wall will strip the internal threads, push the lens assembly off its track, and permanently break the sight.
Avoid touching or rubbing the front polymer lens with your fingers or rough shirts. Finger oils attract dust, and wiping the lens with dry paper towels or coarse fabric can leave fine swirl marks on the coated surface. When you press the brightness button behind the lens, point your fingernail away from the glass. If the lens picks up dust or carbon residue from shooting, blow the loose dirt away first, then wipe it gently using a moist microfiber optics cloth.
Check your slide mounting screws every few hundred rounds as well. If the optic itself wiggles on the slide cut, turning your windage and elevation screws will never produce consistent results. Tighten slide mounting screws with an inch-pound torque tool to the manufacturer's listed torque rating, and use a small dab of non-permanent thread-locking fluid on the mounting threads to stop slide recoil from vibrating the unit loose.
Add a protective cover or metal shroud to guard the lightweight optic
If you carry your pistol daily or run frequent training drills at the range, adding physical armor to your micro dot sight prevents unexpected knocks from knocking your zero out of alignment. Because compact reflex sights sit exposed on the top of the reciprocating slide, they take direct impacts whenever you bump against door frames, seat belts, or range benches.
A form-fitting external steel or aluminum shroud slides over the optic body and anchors under the existing mounting screws. This creates a rigid metal roll cage around the sight that absorbs impacts without transferring force to the internal adjustment gears. When shopping for an optic shield, confirm that it leaves open access to the side windage screw and top elevation port so you can dial in your aim without removing the guard.
A soft rubber or silicone slip-on cover is another practical addition. Putting a fitted cover over the sight during storage or transport protects the polymer lens from scratches, dust, and loose range bag clutter. Before buying any cover or shield, check your pistol slide cut dimensions to make sure the accessory clears your holster opening cleanly.

- ARS Mark9.4
ARS Mark is a ranking system developed by bestairriflescopes.com. ARS Mark has no relationship or impact from any manufacturers or sales agent websites. Learn more
- BrandSig Sauer

- ARS Mark9.2
ARS Mark is a ranking system developed by bestairriflescopes.com. ARS Mark has no relationship or impact from any manufacturers or sales agent websites. Learn more
- BrandSig Sauer

- ARS Mark9.0
ARS Mark is a ranking system developed by bestairriflescopes.com. ARS Mark has no relationship or impact from any manufacturers or sales agent websites. Learn more
- BrandVisiofire

- ARS Mark9.0
ARS Mark is a ranking system developed by bestairriflescopes.com. ARS Mark has no relationship or impact from any manufacturers or sales agent websites. Learn more
- BrandSig Sauer

- ARS Mark8.8
ARS Mark is a ranking system developed by bestairriflescopes.com. ARS Mark has no relationship or impact from any manufacturers or sales agent websites. Learn more
- BrandMidTen

- ARS Mark8.6
ARS Mark is a ranking system developed by bestairriflescopes.com. ARS Mark has no relationship or impact from any manufacturers or sales agent websites. Learn more
- BrandAISUNOUTDOOR

- ARS Mark8.6
ARS Mark is a ranking system developed by bestairriflescopes.com. ARS Mark has no relationship or impact from any manufacturers or sales agent websites. Learn more
- BrandCELEHOMER
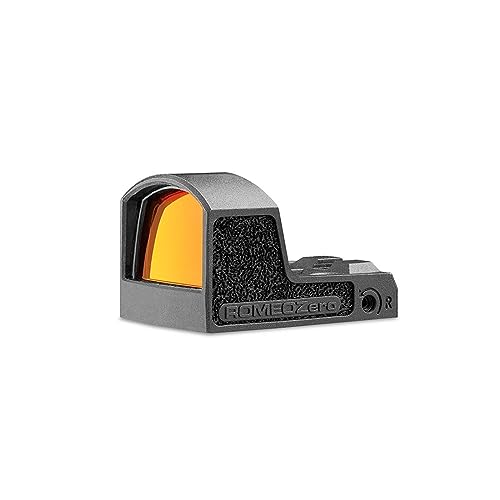
- ARS Mark8.2
ARS Mark is a ranking system developed by bestairriflescopes.com. ARS Mark has no relationship or impact from any manufacturers or sales agent websites. Learn more
- BrandSig Sauer

Sig Sauer Durable Protective Abrasion Damage Reduction Easy-Installation ROMEOZero Red
View on Amazon- ARS Mark8.2
ARS Mark is a ranking system developed by bestairriflescopes.com. ARS Mark has no relationship or impact from any manufacturers or sales agent websites. Learn more
- BrandSig Sauer
Last update on 2026-09-30 / Affiliate links / Images, Product Titles, and Product Highlights from Amazon Product Advertising API
FAQs
Why is my red dot not moving when I turn the adjustment screw?
At close distances such as 10 or 15 yards, a minor turn of the screw moves your bullet impact only a fraction of an inch on the target paper. You may not notice the dot shift inside the window with your bare eyes, but the bullet impact will change. If the screw spins freely with no resistance at all, the internal threads may be stripped or disconnected from over-tightening.
Can I use a 1.3mm hex wrench if I lost the 0.050-inch tool?
Do not use a 1.3mm metric tool on these adjustment screws. A 1.3mm wrench measures roughly 0.0512 inches, making it slightly too large to seat all the way down into the socket. Forcing an oversized or slightly mismatched wrench rounds the delicate edges of the screw socket instantly. Always order an exact 0.050-inch imperial replacement tool.
How do I know if I have reached the end of the adjustment range?
You will feel the turning resistance increase distinctly when the adjustment screw reaches the end of its internal travel. The screw will stop turning smoothly and feel firm against the wrench. Never apply extra pressure or lean into the tool when you feel this resistance, as forcing it past the stop point will destroy the adjustment mechanism.
How do I turn off the RomeoZero red dot to save the battery?
Locate the small brightness button tucked directly behind the bottom edge of the lens and hold it down continuously for about three seconds. The red dot reticle will switch off completely. You can also leave the sight alone, as its built-in motion sensor will put the illuminated reticle into sleep mode after a few minutes of total stillness.


12 Best 22 Pcp Air Rifle For Hunting of 2026 With Quiet Power

7 Best 22 Pcp Air Rifle Under 300 of 2026 For Backyard Pest Control

10 Best 22 Break Barrel Air Rifles of 2026 For Backyard Pest Control

10 Best 30 Caliber Pcp Air Rifle of 2026 For Medium Game

Top Best 177 Air Rifle Under 100: Budget-Friendly Picks for 2026

How to Safely Reload Shotgun Shells at Home

11 Best Co2 Air Rifle For Pest Control of 2026 To Ensure Humane Dispatch

12 Best Inexpensive Air Rifles of 2026 For Dependable Backyard Accuracy






