
How to Adjust a Trophy Ridge Bow Sight

Most archers assume that when an arrow misses the center, the sight pin should move toward the bullseye to fix the shot. Doing that actually doubles the error, because the real secret is to chase the arrow by sliding the pin straight toward where the shaft landed. Getting on target starts at twenty yards, where moving the entire sight housing lines up your top pin before you touch any other settings.
How you make those moves depends on the specific setup on your bow. Some models feature hand-turned knobs that click into place, while simpler frames require an Allen wrench to loosen tiny locking screws. Traditional brackets require setting every distance pin one by one, while smart mechanical setups automatically gap your farther pins once your first two marks are locked in. A simple, step-by-step routine keeps the job quick and saves you from losing arrows in the grass.
The Short Version
- Chase the arrow: Always move your sight pins or housing toward the spot where your arrow struck the target. If you hit low and left, move the sight down and left.
- Zero at 20 yards first: Lock your top pin in place and adjust the entire sight housing together using gang adjustments, leaving individual pins untouched.
- Tune longer distances: Step back to 30 or 40 yards to adjust individual pins, or turn the master calibration dial if your sight features automatic pin spacing.
- Check your bubble level: Align your 2nd and 3rd axis levels before locking down mounting screws so your arrows stay true on steep uphill or downhill shots.
The Golden Rule: Why You Always Chase the Arrow
When an arrow lands away from the bullseye, your first instinct is usually to push the aiming pin toward the center of the target. That natural reaction is the most common mistake in archery, and it instantly doubles your error. Bow sights do not guide the arrow like a laser pointer. Instead, they act as an alignment tool between your eye, your peep sight, and your target.
To understand why this happens, picture your posture at full draw. When you look through the peep sight on your bowstring, your eye centers the sight ring. If you lower your sight pin inside the housing, you must lift your bow arm higher to put that pin back on the center of the target. Lifting your bow arm points the arrow higher in the air, raising your point of impact on the target.
The exact same geometry controls your windage (left and right adjustment). If your arrows strike four inches to the right of your aiming spot, you must shift your sight housing to the right. Moving the sight to the right forces you to swing your bow hand slightly to the left to put the pin back on the bullseye. That slight pivot steers the arrow back into the center ring.
Archers call this rule chasing the arrow. Moving your sight pin toward where the arrow landed fixes your point of impact every single time. If your arrows hit high, move the sight up. If they hit low, move the sight down. If they hit left, move the sight left. If they hit right, move the sight right. Memorizing this single rule saves hours of frustration and protects your arrows from smashing into target frames.
Step 1: Zero Your Top Pin at 20 Yards with Gang Adjustments
Before you touch individual pins, you must set your primary zero distance. For almost every compound bow setup, 20 yards serves as the starting mark. Dialing in this distance requires a gang adjustment (moving the entire sight housing together) rather than shifting individual fiber-optic pins.
- Set your top pin in position: Look at your sight housing before you nock an arrow. Your top pin should sit in the upper third of the circular housing. This placement leaves plenty of room underneath for your longer-range pins. Tighten this top pin securely so it cannot slide. You will not move this individual pin during the initial zeroing process.
- Step up to 20 yards: Stand exactly 20 yards from a broad, reliable target face. Draw your bow, center your circular sight housing inside your rear peep sight, and rest your top pin directly on the center dot. Solid shooting form is essential here. Reviewing how to use a bow sight can help ensure your anchor point and grip remain steady before you start loosening hardware.
- Shoot a three-arrow group: Never make a sight adjustment based on a single shot. A minor lapse in your release technique or a slight torque of your wrist can push an arrow off mark. Shoot three arrows at the same spot using your best form to establish a clear pattern.
- Chase the arrow with the sight housing: Examine where the group landed. If your arrows hit three inches low and two inches left, you need to adjust your elevation (up and down adjustment) downward and your windage to the left. If your sight has tool-less micro-click dials (small dial clicks that make tiny moves without tools), turn the elevation knob down and the windage knob left. If your model uses standard hex bolts, use an Allen wrench to loosen the main housing locks, slide the housing along the laser-etched marks, and snug the screws back down.
- Confirm and lock: Shoot another three-arrow group. Repeat small shifts until your top pin places arrows dead center at 20 yards. Once the group sits in the middle, firmly tighten the main gang adjustment locks. Your entire sight housing is now married to your 20-yard zero. Do not loosen the gang adjustment brackets for the rest of the sighting process.
Step 2: Set Your Farther Pins or Calibrate the React Dial
Once your 20-yard pin is locked, you can set your aiming points for 30, 40, 50, and 60 yards. How you handle these longer distances depends directly on the mechanical design of your sight. Standard multi-pin sights require adjusting each pin by hand, while auto-spacing models use an interconnected gear system.
Adjusting Standard Multi-Pin Sights
On standard multi-pin sights, every pin underneath your 20-yard pin adjusts individually along a vertical metal track. Step back to 30 yards and use your second pin down as your aiming point. Shoot a three-arrow group.
Because your gang adjustment already locked in your left-and-right windage at 20 yards, you should only need to adjust elevation on individual pins. Loosen the small Allen bolt holding the 30-yard pin in its slot. If your group hits low, slide that individual pin down slightly toward the miss. If your group hits high, slide the pin up. Tighten the bolt and confirm the zero with another group.
Repeat this step-by-step process for your 40-yard, 50-yard, and 60-yard pins. As you move back, you will notice that the physical gap between pins gets wider. Arrows lose speed as they travel downrange, causing them to drop more steeply past 40 yards. A wider gap between lower pins is completely normal and mirrors the natural curved flight of your arrow.
Calibrating Auto-Spacing React Sights
Sights equipped with React technology eliminate the tedious chore of measuring and setting individual pin gaps. These models house an internal mechanical drive that links all pins together. The movement of the pins matches the mathematical drop curve of modern compound bow arrows.
After you zero your 20-yard pin using the main housing gang adjustments, step back to a longer calibration distance. You can use 30 yards, but calibrating at 40 or 50 yards provides significantly better precision. Aim at the bullseye using the pin designed for that specific yardage and shoot a group.
If your group hits high or low at 40 yards, do not touch the gang adjustment screws and do not loosen individual pin screws. Instead, turn the master React calibration knob. Turning this single dial moves all your pins simultaneously, expanding or contracting their spacing at precise mathematical ratios. Once your 40-yard pin hits the bullseye, your 30, 50, and 60-yard pins are automatically set to the exact right positions.
Setting Single-Pin Slider Sights
If you use an adjustable single-pin sight, you only have one aiming dot to manage. Zero the single pin at 20 yards using your gang elevation and windage brackets. Once centered, unlock the slider mechanism and move back to 40 or 60 yards. Turn the elevation wheel to lower the pin until your arrows hit dead center at that distance.
Your sight includes a set of pre-printed yardage tapes. Look at the distance your pointer traveled between your 20-yard mark and your 60-yard mark. Find the numbered tape in the kit whose scale matches that exact physical distance. Stick that tape onto the sight dial, and your pointer will indicate accurate yardage for any distance along the scale.
Checking 2nd and 3rd Axis Leveling for Uneven Terrain
A sight can hit dead center on a flat target range and still cause baffling misses in the woods. This happens when the sight's built-in bubble level is out of alignment with the bow riser or the shooting angle. Proper leveling requires setting both the 2nd and 3rd axis.
- 2nd Axis (Flat Ground Alignment): The 2nd axis ensures your sight pins and housing sit perfectly vertical when your bow is held upright on flat ground. Mount your bow in a vise and use a small level to make the bow string plumb. Look at the bubble level in your sight housing. If the bubble is not centered while the string is plumb, loosen the 2nd axis screws on your sight bracket, rotate the housing until the bubble sits between the lines, and lock it down.
- 3rd Axis (Uphill and Downhill Angles): The 3rd axis acts like the hinge on a door, controlling whether the sight housing angles forward toward the target or backward toward you. On flat ground, an uncalibrated 3rd axis causes zero error. But when you aim steep uphill or downhill, a tilted 3rd axis causes the bubble level to lie to you. If you pick the best bow sight for treestand hunting, calibrating this axis is critical because steep downward angles will push your arrows wide left or right if the bubble is false.
- How to verify the 3rd axis: Aim your bow up at a 45-degree angle and down at a 45-degree angle while viewing a plumb doorframe or a specialized leveling tool. If the bubble drifts away from center as you tilt the bow up or down, adjust the 3rd axis pivot screws until the bubble stays centered at every angle.
Common Sighting Mistakes That Cause Headaches
Sighting in your bow should be a predictable process. When things go wrong, it is usually due to one of four common mechanical or physical errors.
- Overtightening screws and stripping aluminum: Sight housings and mounting brackets use lightweight aluminum to keep bow weight down. Aluminum threads strip easily if you crank down on them with heavy force. Snug your screws firmly, but avoid using excessive leverage. Adding a small drop of blue non-permanent thread locker prevents bow vibration from shaking screws loose without damaging delicate threads.
- Making huge adjustments at one time: Sighting in is a game of millimeters. Moving a pin just one-sixteenth of an inch can move your arrow impact several inches at 20 yards, and even further at longer ranges. Make tiny adjustments, take your time, and verify every shift with at least three clean shots.
- Chasing arrows while your form breaks down: Drawing a bow repeatedly causes arm and shoulder fatigue. As your muscles tire, your bow hand drops early, your anchor point shifts, or your release punches the trigger. If your groups suddenly open up or drift, stop adjusting your sight. Rest your muscles and come back the next day with fresh form.
- Running out of vertical adjustment: If your arrows hit low at 20 yards and your sight housing cannot slide any lower on its track, your mounting bracket is likely mounted too high on the bow riser. Most sights offer several sets of mounting holes where the bracket bolts to the bow. When fitting the best bow sight for Mathews or other modern compound bows, unbolt the sight from the riser, lower it to the bottom set of holes, and restart your 20-yard zero. This restores full upward and downward travel.
Hardware Features That Simplify Sight Adjustments
If adjusting tiny hex screws on an open range feels frustrating, specific hardware upgrades can make the entire tuning process much smoother. Bow sights range from simple fixed brackets to advanced tool-less systems designed to eliminate guesswork.
When selecting a sight that is easy to adjust, look for tool-less micro-click knobs on both windage and elevation brackets. These knobs let you make fine, measured adjustments at the target line without searching your pack for lost Allen wrenches. Each distinct click represents an exact fraction of an inch, making it easy to track your movements and return to previous settings if needed.
Another valuable feature is an automatic pin-spacing system. Sights that use internal drive gears calculate arrow drop curves mechanically. This eliminates the time-consuming trial of measuring, loosening, and nudging individual pins for 30, 40, and 50 yards. Finally, ensure any sight you choose includes clear laser-etched hash marks and multi-axis leveling bolts, giving you complete control over your shot alignment in any shooting environment.
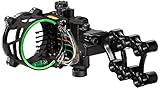
- ARS Mark9.2
ARS Mark is a ranking system developed by bestairriflescopes.com. ARS Mark has no relationship or impact from any manufacturers or sales agent websites. Learn more
- BrandTrophy Ridge

- ARS Mark9.2
ARS Mark is a ranking system developed by bestairriflescopes.com. ARS Mark has no relationship or impact from any manufacturers or sales agent websites. Learn more
- BrandTrophy Ridge

- ARS Mark9.2
ARS Mark is a ranking system developed by bestairriflescopes.com. ARS Mark has no relationship or impact from any manufacturers or sales agent websites. Learn more
- BrandTrophy Ridge
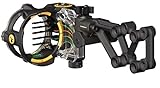
- ARS Mark9.0
ARS Mark is a ranking system developed by bestairriflescopes.com. ARS Mark has no relationship or impact from any manufacturers or sales agent websites. Learn more
- BrandTrophy Ridge
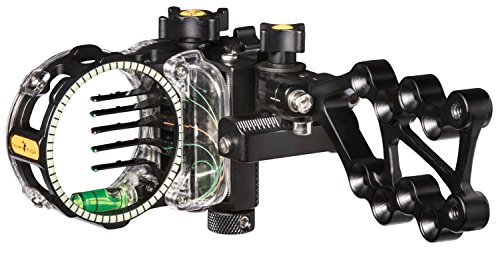
- ARS Mark9.0
ARS Mark is a ranking system developed by bestairriflescopes.com. ARS Mark has no relationship or impact from any manufacturers or sales agent websites. Learn more
- BrandTrophy Ridge

- ARS Mark8.6
ARS Mark is a ranking system developed by bestairriflescopes.com. ARS Mark has no relationship or impact from any manufacturers or sales agent websites. Learn more
- BrandTrophy Ridge

- ARS Mark8.6
ARS Mark is a ranking system developed by bestairriflescopes.com. ARS Mark has no relationship or impact from any manufacturers or sales agent websites. Learn more
- BrandTrophy Ridge
- ARS Mark8.4
ARS Mark is a ranking system developed by bestairriflescopes.com. ARS Mark has no relationship or impact from any manufacturers or sales agent websites. Learn more
- BrandTrophy Ridge
Last update on 2026-09-30 / Affiliate links / Images, Product Titles, and Product Highlights from Amazon Product Advertising API
FAQs
What should I do if my bow sight runs out of vertical adjustment?
If your housing is maxed out at the bottom of its track and your arrows still hit low, check the mounting holes where the bracket attaches to your bow riser. Most sights feature two or three sets of vertical mounting holes. Unbolt the bracket, drop it down to the lower set of holes, and tighten it securely. This lowers your entire sight profile and restores your elevation adjustment range.
Why do my arrows hit off-center even when the sight bubble is level?
If your bubble level looks centered but arrows consistently miss to the left or right, your 2nd or 3rd axis is likely misaligned. A misaligned 2nd axis causes horizontal drift on flat ground, while a crooked 3rd axis causes misses when shooting up or down hills. Bow torque caused by gripping the bow handle too tightly can also twist the riser during your shot.
Do I need hex wrenches to adjust my bow sight?
It depends on your specific sight design. Basic multi-pin models require standard Allen wrenches to loosen the housing brackets and individual pin tracks. Upgraded sights feature tool-less micro-click knobs, allowing you to loosen locking levers and dial in your windage and elevation adjustments by hand without carrying any tools.
How many arrows should I shoot before adjusting a pin?
Always shoot a minimum of three arrows before making any physical adjustment to your sight. Shooting a single arrow does not give you reliable feedback because a poor release or flinched grip can easily push an arrow off target. A tight three-arrow cluster reveals your true point of impact and shows you exactly which way to chase the arrow.


12 Best 22 Pcp Air Rifle For Hunting of 2026 With Quiet Power

7 Best 22 Pcp Air Rifle Under 300 of 2026 For Backyard Pest Control

10 Best 22 Break Barrel Air Rifles of 2026 For Backyard Pest Control

10 Best 30 Caliber Pcp Air Rifle of 2026 For Medium Game

Top Best 177 Air Rifle Under 100: Budget-Friendly Picks for 2026

How to Safely Reload Shotgun Shells at Home

11 Best Co2 Air Rifle For Pest Control of 2026 To Ensure Humane Dispatch

12 Best Inexpensive Air Rifles of 2026 For Dependable Backyard Accuracy






