
How to Aim Iron Sights to Hit Your Target

Center the front sight post directly inside the rear notch and focus sharply on that front blade. Human eyes cannot keep three different depths in crisp focus at once, so letting the target and the rear opening blur slightly is completely natural. Keep the top of the front peg level with the rear notch, leave equal light on either side, and place that balanced view over what you want to hit.
A few details will adjust how you hold this view. Handguns use an open rear notch, whereas many rifles feature a small round peep hole that centers your eye automatically. Consistent aiming also depends on lining the sights up with your dominant eye and adjusting for target distance. Here is how to line up your view cleanly every single time.
Understanding Sight Alignment and Why Your Eye Must Focus on the Front Sight
Every clean shot with iron sights starts with basic human eye mechanics. When you point a firearm at a target, your vision must bridge three separate objects located at three different distances: the rear sight close to your face, the front sight at the end of the barrel, and the target downrange. The human eye relies on a single physical lens that can only focus sharply on one distance at a time. Trying to see the rear notch, the front post, and the bullseye in razor-sharp detail at the exact same second is physically impossible. When beginners try to force their eyes to see all three clearly, their vision dart back and forth, their eyes tire out, and their shots scatter across the paper.
Proper aiming relies on two distinct concepts: sight alignment and sight picture. Sight alignment means lining up the front and rear sights with each other. On a standard handgun, this means placing the front sight post (the front metal peg or blade) directly inside the rear notch. The top flat edge of the front sight post must sit completely level with the top flat edge of the rear sight notch. At the same time, the front post must sit centered horizontally, leaving an equal sliver of daylight visible on both the left and right sides. Shooters often summarize this with the phrase "equal height, equal light." If the front post sits too high, your shot goes high. If the light gap on the left is wider than the right, your shot veers to the right.
Sight picture takes that aligned pair of sights and places them over your target. You can choose between two main ways to hold those aligned sights against your mark. A center hold places the top edge of your aligned front sight right across the center of your target, cutting the bullseye in half. A six-o'clock hold places the top edge of the front sight directly beneath the bullseye, so the circular mark sits right on top of the front post like a pumpkin sitting on a fence post. Whichever hold you choose, sight alignment matters far more than sight picture. A tiny shift in your sight picture downrange moves your hit by an inch or two. A tiny misalignment between your front and rear sights throws your barrel off at an angle, sending your bullet wide into the dirt.
Because your eye can only focus on one object sharply, you must place your visual focus firmly on the front sight post. When you do this correctly, the front sight blade appears crisp and sharp, showing every clean edge and serration. The rear sight notch will appear slightly soft around the edges, and the target downrange will soften into a slightly blurry shape. That blur is completely normal, safe, and correct. As long as the blurry silhouette of your target sits directly behind your razor-sharp front sight post, your shot will land exactly where you want it.
Eye dominance also plays a huge role in how clearly you see your sights. Most people have one dominant eye that sends visual information to the brain more directly than the other. To check your dominant eye, extend both arms forward, bring your hands together, and leave a small opening between your thumbs and index fingers. Look through that small opening at a distant doorknob or light switch with both eyes open. Close your left eye. If the object stays centered in the opening, you are right-eye dominant. If the object jumps out of sight, close your right eye and open your left to confirm that your left eye is the dominant one. Always line up your sights behind your dominant eye. If you are cross-dominant, such as being right-handed but left-eye dominant, turn your head slightly to bring your left eye in line with the sights rather than twisting your wrists into an awkward angle.
The 4-Step Aiming Routine for Clean, Consistent Hits
Before practicing your aiming technique, always practice basic firearm safety. Point the muzzle in a safe direction, drop the magazine, pull the slide or bolt back, and physically look and feel inside the chamber to verify that the firearm is completely unloaded. Once clear, you can safely practice these steps at home or on the firing line.
- Bring the firearm up to your eye line. Stand in a balanced, comfortable stance with your feet shoulder-width apart. Raise the firearm directly up to your dominant eye, keeping your head upright and your neck relaxed. Never drop your head down or crane your neck sideways to hunt for the sights. Bringing the gun up to your natural eye level prevents neck strain, reduces eye fatigue, and ensures your eye sits behind the sights in the exact same spot every time.
- Build your sight alignment. Look through the rear notch and locate the front sight post. Adjust your grip slightly until the top edge of the front sight sits completely flush with the top edge of the rear notch. Check the light coming through the notch on both sides of the front blade. Shift the firearm until the space on the left matches the space on the right, creating equal bars of light.
- Place your sights onto the target. Move the aligned sights onto the target area while keeping the relationship between the front post and rear notch locked in place. Position the top of the front blade where you want the bullet to strike. If your target is twenty-five yards away, keep that aligned block steady over the center of the blurry target zone.
- Lock your focus on the front blade and press the trigger. Shift your conscious visual attention directly to the top edge of the front sight post. Let the target soften. Keep your focus glued to that front post as your index finger smoothly presses the trigger straight backward without jerking. Maintain your gaze on that front sight through the shot and during recoil. Looking up to see where your bullet landed before the shot fully breaks drops the barrel and ruins your aim.
Pistol Notches Versus Rifle Peep Sights
Handguns and rifles use different styles of iron sights, and each asks your eye to do something slightly different. Handguns almost always feature open sights. An open sight pairs a rear notch (shaped like a square notch or a shallow U) with a tall front blade. Because the rear notch sits several inches in front of your face and remains open on top, your brain has to work harder to verify alignment. You must actively check that the front blade is centered side to side and level with the top edges of the rear notch. Any small error in alignment on a short handgun barrel grows quickly as distance increases.
Rifles, on the other hand, frequently use an aperture (a small round peephole on a rear rifle sight) paired with a front sight post. Peep sights work directly with how the human eye naturally processes light. When you position your eye close to a small round peephole, your eye automatically centers the front sight post inside the brightest part of that ring. You do not have to spend mental energy checking if the front post is centered inside the circle. Your optic nerve centers it naturally. All you need to do is look through the circular opening, let the ring blur into a ghostly halo, place the tip of the front post onto your target, and press the trigger.
Rifle peep sights often feature two switchable openings: a wide circle for close, fast-moving targets in dim light, and a small pinhole for precise, long-range shooting in bright daylight. Both handgun and rifle sights feature adjustments for windage (horizontal side-to-side adjustment) and elevation (vertical up-and-down adjustment). If your shots consistently group into a tight cluster that sits two inches to the left of the bullseye, turning your rear sight windage screw to the right will shift your bullet impact back to the center.
When shots fail to hit the center, beginners often assume their sights are crooked. More often, small visual mistakes are the real culprit. Keep this checklist in mind to diagnose common aiming problems:
- Peeking over the sights: Lifting your eye or chin right as the trigger breaks to watch the target sends shots flying high because you lift the front post out of the notch without realizing it.
- Target-focused staring: Staring hard at the bullseye instead of the front sight blade causes the front post to blur and drift out of alignment, creating wide, loose groups.
- Crowding the notch: Letting the front sight blade drift closer to the left edge of the rear notch pushes the barrel to the left, sending impacts off-target on that side.
- Anticipating the recoil: Tensing your hands or pushing the gun forward right before the firearm fires dips the muzzle downward, dropping your shots low and usually to the left for a right-handed shooter.
Backup Sights and Helpful Tools for Verifying Your Aim
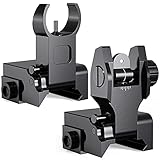
If you shoot a modern rifle or carbine, you might run an optic while keeping iron sights as a reliable failsafe. Quality folding iron sights mount directly onto standard Picatinny or 20mm slotted accessory rails. These sights stay folded down out of your field of view during normal shooting, but they spring up instantly if your primary glass fogs up or runs out of battery power. Many shooters pair these with red dots using co-witness setups, where you can aim through your optic window using your iron sights if the electronics fail. If you want to configure this type of setup, you can learn more about iron sights for co-witnessing with a red dot to ensure your sights match the exact optical height of your window.
When selecting iron sights or aiming aids, pay close attention to material and visibility. Look for front and rear sight sets crafted from sturdy aluminum alloy or steel rather than soft polymer, as metal sights hold their zero far better against bumps and drops. Some sight sets feature bright green or red fiber-optic dots. These light-gathering tubes catch ambient daylight and make your front sight post glow, which helps your eye find and lock onto the front post much faster against dark targets.
Laser bore sighters are another practical tool for checking your iron sight alignment. These small battery-powered devices chamber directly into your barrel like a cartridge or clamp securely into your muzzle, projecting a straight red laser beam onto a wall or target board downrange. While a bore sighter cannot account for bullet drop over long distances, it lets you confirm that your front sight post and rear notch point in the exact same direction as your barrel bore before you spend money on live ammunition at the range.

- ARS Mark9.0
ARS Mark is a ranking system developed by bestairriflescopes.com. ARS Mark has no relationship or impact from any manufacturers or sales agent websites. Learn more
- BrandVisiofire

- ARS Mark8.8
ARS Mark is a ranking system developed by bestairriflescopes.com. ARS Mark has no relationship or impact from any manufacturers or sales agent websites. Learn more
- BrandVisiofire
- ARS Mark8.8
ARS Mark is a ranking system developed by bestairriflescopes.com. ARS Mark has no relationship or impact from any manufacturers or sales agent websites. Learn more
- BrandMarmot

- ARS Mark8.8
ARS Mark is a ranking system developed by bestairriflescopes.com. ARS Mark has no relationship or impact from any manufacturers or sales agent websites. Learn more
- BrandEZshoot

- ARS Mark8.8
ARS Mark is a ranking system developed by bestairriflescopes.com. ARS Mark has no relationship or impact from any manufacturers or sales agent websites. Learn more
- BrandMarmot

- ARS Mark8.6
ARS Mark is a ranking system developed by bestairriflescopes.com. ARS Mark has no relationship or impact from any manufacturers or sales agent websites. Learn more
- BrandOZARK ARMAMENT

- ARS Mark8.2
ARS Mark is a ranking system developed by bestairriflescopes.com. ARS Mark has no relationship or impact from any manufacturers or sales agent websites. Learn more
- BrandGVN

- ARS Mark8.0
ARS Mark is a ranking system developed by bestairriflescopes.com. ARS Mark has no relationship or impact from any manufacturers or sales agent websites. Learn more
- BrandTPRCOL
Last update on 2026-10-01 / Affiliate links / Images, Product Titles, and Product Highlights from Amazon Product Advertising API
FAQs
Should I aim with both eyes open or keep one eye closed?
Closing your non-dominant eye is a fine way to start if you struggle with double vision while learning sight alignment. But as you build comfort, practicing with both eyes open gives you better peripheral vision, reduces eye strain, and helps your balance. If you see two faint images of the gun with both eyes open, squint your non-dominant eye slightly until the extra image fades, leaving your dominant eye focused on the front post.
Why does my target look blurry when I aim through iron sights?
Your target looks blurry because the human eye can only focus on one distance at a time. When you place your visual focus directly on the front sight post, which is located just a couple of feet from your face, any object twenty or fifty yards downrange naturally falls out of focus. A soft, slightly blurred target is completely normal and means your eye is doing its job correctly.
What does "equal height, equal light" mean in shooting?
"Equal height, equal light" is the basic visual rule for aligning open notch iron sights. It means the flat top of the front sight post sits perfectly level with the top flat edges of the rear notch (equal height). At the same time, the sliver of open space visible on the left side of the front post must match the sliver of space on the right (equal light).


12 Best 22 Pcp Air Rifle For Hunting of 2026 With Quiet Power

7 Best 22 Pcp Air Rifle Under 300 of 2026 For Backyard Pest Control

10 Best 22 Break Barrel Air Rifles of 2026 For Backyard Pest Control

10 Best 30 Caliber Pcp Air Rifle of 2026 For Medium Game

Top Best 177 Air Rifle Under 100: Budget-Friendly Picks for 2026

How to Safely Reload Shotgun Shells at Home

11 Best Co2 Air Rifle For Pest Control of 2026 To Ensure Humane Dispatch

12 Best Inexpensive Air Rifles of 2026 For Dependable Backyard Accuracy






