
How to Bore Sight a Crossbow to Save Your Arrows

Most people assume bore sighting only works on firearms with hollow barrels, but crossbows can use the exact same shortcut. In reality, you can align your crossbow optic with an archery laser placed along the flight groove (the track where the arrow rests) or threaded onto an arrow tip. Moving your reticle onto that red dot gets your aim safely on target paper before shooting a single real arrow.
Your setup changes slightly depending on whether your tool rests freely in the arrow track or screws into a bolt insert. Optic styles also matter, since a single red dot aligns faster than a scope with several crosshairs meant for different yardages. Starting at twenty yards gives the most reliable baseline, especially when working inside a garage or back yard. Setting the bow on a stable rest makes the entire alignment process smooth and stress-free.
The Short Version
- Crossbows have no barrel, so you place an archery laser tool directly into the flight groove (the arrow track on top of the rail) or screw a thread-on laser tip into a real arrow shaft.
- Leave the crossbow uncocked throughout the entire process to prevent an accidental dry fire (releasing the bowstring without an arrow loaded), which can destroy limbs and cause serious injury.
- Rest the bow securely on a bench at 20 yards, switch on the laser, and turn your scope dials until the crosshair or aiming dot sits directly on top of the laser beam.
- Laser bore sighting gets your scope on target to save your arrows, but you must follow up with real practice shots because gravity pulls physical arrows down while laser beams travel in a straight line.
How Crossbow Bore Sighting Works Without a Barrel
Firearm owners slip a laser cartridge into a steel barrel chamber, but a crossbow has an open design. That open rail often confuses first-time owners who wonder where a bore sight can possibly go. On a crossbow, the flight groove (the arrow track on top of the rail) serves as your bore (the guide track where the arrow rests). Because the arrow follows this grooved channel all the way off the front of the riser, aligning your optic with this path gives you an accurate reference line.
Archery laser tools solve this problem using two primary designs. The first style is a thread-on laser that screws directly into the threaded insert at the front of a standard arrow shaft, replacing the field point. You seat the arrow into the flight groove just like you would before shooting. The second style is a dedicated laser cartridge shaped to lay flat inside the arrow channel, resting flush against the front of the trigger box. Both styles project a bright beam directly down the centerline of the bow.
Aligning your optic with this beam before shooting saves time, money, and frustration. Modern crossbows fire arrows at high speeds with immense kinetic energy. When a newly mounted scope sits even a fraction of an inch out of alignment, your first shot can miss an entire foam target block. That often means burying a twenty-dollar carbon bolt into rocky dirt, splintering the shaft, or losing an expensive broadhead. Setting the crosshair over the laser dot ensures your very first live arrow strikes safe target foam.
Much like learning how to use a bow sight with steady reference points, setting up a crossbow optic starts with creating a straight visual baseline between your glass and your arrow path.
Safety First: Preventing Dry-Fires and Equipment Damage
Crossbows store massive amounts of mechanical tension in their limbs. Because bore sighting happens indoors, in garages, or on workbenches, safe handling must come before adjusting any optical dials. Follow these basic safety checks before touching your scope:
- Keep the bowstring uncocked: You never need to draw or cock the bowstring to bore sight an optic. The uncocked flight track provides the exact physical centerline needed for alignment. Cocking the bow adds severe tension to the limbs, cables, and trigger mechanism without offering any benefit.
- Never pull the trigger with a sighting tool in place: Pulling the trigger on a laser cartridge or an arrow carrying an unweighted laser causes a dry fire (releasing the bowstring without an arrow loaded). Without the full weight of a real arrow to absorb the stroke, that energy rebounds directly into the limbs and cams. This can snap limbs, break strings, and cause flying debris that leads to severe personal injury.
- Maintain a safe backstop: Treat the crossbow as if it were loaded, even when uncocked. Keep the front of the stock pointed toward a solid archery target or an exterior wall. Ensure that pets and family members remain well behind the bench during setup.
- Clean the arrow channel first: Dust, grit, or dried rail lubricant inside the track can tilt a resting laser cartridge up or to the side. Wipe the arrow track clean with a soft, lint-free cloth so the laser sits completely flat against the rail surface.
- Verify mounting screw tension: Scope rings and red dot bases can vibrate loose on standard Picatinny or 20mm slotted accessory rails. Use an inch-pound torque tool to confirm that all ring screws and base clamps are snug. If the mount moves even slightly, your sighting adjustments will be wasted.
Step-by-Step Laser Alignment on the Rail
Once your work area is safe and your bow rests firmly on a bench, aligning your scope reticle to the laser beam takes only a few minutes. Follow these numbered steps to dial in your optic.
- Lock the crossbow into a steady rest: Place the bow in a dedicated shooting vise, bench bags, or a sturdy shooting rest. The crossbow must remain completely stationary when you take your hands away. If the bow wobbles or tilts while you reach for the scope turrets, you will end up chasing the laser dot across the target. Place a small bubble level across the flat top of your scope base to confirm the bow is not canted to the left or right.
- Set your target at 20 yards: Measure out 20 yards between the front of your crossbow and a target backstop. Twenty yards serves as the standard baseline distance for crossbow archery. At this range, arrow trajectory remains relatively flat, and nearly all multi-reticle scopes use 20 yards for their top aiming point. If working inside a small garage or basement, 10 yards works to get your optic roughly on paper, but 20 yards provides much clearer alignment.
- Seat and activate your laser tool: Turn on the laser. If you have a thread-on arrow laser, screw it into the front insert of a straight, verified arrow shaft until it sits flush against the carbon. Lay the arrow into the flight groove with the nock touching the uncocked bowstring. If you have a drop-in rail cartridge, place it directly into the center of the track and push it back against the trigger housing. Confirm that a sharp red or green dot appears on your target backstop.
- Remove the scope turret caps: Unscrew the protective metal caps covering the scope dials. The top dial controls elevation (up-and-down adjustment). The dial on the right side controls windage (left-to-right adjustment). Crossbow scopes feature directional arrows showing which way to turn the dial to shift your point of impact.
- Align your reticle directly over the laser dot: Look through the optic with your natural cheek weld. Notice where your primary aiming dot or top crosshair sits compared to the laser dot downrange. Without bumping the bow, turn the elevation dial until the horizontal crosshair sits level with the laser dot. Then turn the windage dial until the vertical wire sits centered over the dot. If using an open-window red dot sight, adjust the dials until the illuminated aiming dot covers the laser dot on the paper.
- Confirm alignment and remove the tool: Step back from the bow and let the rest settle. Look through the scope one more time to make sure the reticle remained centered over the laser point. Once confirmed, turn off the laser and lift it out of the track. Store the laser tool safely in its padded box so drops do not knock its internal diode out of alignment.
Transitioning from Laser Alignment to Live Practice Arrows
Laser bore sighting is an alignment aid, not a permanent zero. Zeroing means adjusting your sight so real arrows strike the center of the bullseye at a chosen distance. A laser beam travels in a straight, flat line through the air. In contrast, an arrow is a physical projectile with weight and fletching resistance. The instant an arrow leaves the rail, gravity begins pulling it toward the ground, creating a curved arc.
At 20 yards, a high-speed crossbow shooting an arrow at 380 to 400 feet per second experiences minimal drop, but the arrow will still impact slightly lower than the ruler-straight laser line. As you move back to 30, 40, or 50 yards, that downward curve increases dramatically. Physical arrows are also pushed by crosswinds, whereas light beams cut through wind without shifting.
The goal of your laser tool is simple: it guarantees your first real shot hits the target face instead of flying wide into the grass or brush. Once your laser alignment is complete, transition to live shooting with these steps:
- Take your crossbow to a safe outdoor shooting range with a target rated specifically for high-energy crossbow bolts.
- Select practice arrows that carry field points matching the exact weight of your hunting broadheads, typically 100 or 125 grains.
- Cock the bow using your cocking sled, rope, or crank mechanism, and load an arrow with the odd-colored cock vane seated down into the groove.
- Fire a group of three practice arrows at your 20-yard bullseye using the top crosshair or primary red dot.
- Examine the grouping. If your arrows group tightly two inches low and one inch to the right, make final adjustments to your elevation and windage click dials to center the group.
Once your top reticle is centered at 20 yards with real arrows, multi-reticle scopes take care of the rest. The lower horizontal lines or dots will naturally correspond to 30, 40, and 50 yards based on your bow's speed setting or factory reticle spacing.
Choosing the Right Archery Laser Sighting Tool
Selecting an archery laser tool comes down to how it seats on your bow and how easy it is to operate. Two main styles dominate the market: thread-on arrow inserts and drop-in rail cartridges. Thread-on models use your actual arrow shaft as the guide rod. This ensures the laser sits at the exact height and angle that your arrows travel. Drop-in cartridges require no assembly and drop straight into the track, making them fast to use if you prefer not to keep a dedicated sighting arrow in your gear bag.
Laser beam color also matters depending on where you work. Red laser diodes work well in low light, basements, or indoor ranges, and they draw very little battery power. Green lasers are significantly easier to see against bright outdoor foam targets in direct sunlight, though they consume battery power faster. If you plan to check your alignment outdoors at full daylight, a green laser saves eye strain.
Look for tools that feature a physical on/off switch or push button. Simpler models require you to screw battery caps down to turn them on or remove small button cells entirely to shut them off. Integrated switches make the tool far more convenient to manage on a shooting bench. Finally, prefer solid brass or machined aluminum housings. Metal bodies resist scuffs and maintain internal alignment much better than molded plastic when stored in an archery tackle box.

- ARS Mark8.6
ARS Mark is a ranking system developed by bestairriflescopes.com. ARS Mark has no relationship or impact from any manufacturers or sales agent websites. Learn more
- BrandTipfun

- ARS Mark8.6
ARS Mark is a ranking system developed by bestairriflescopes.com. ARS Mark has no relationship or impact from any manufacturers or sales agent websites. Learn more
- BrandMidTen

- ARS Mark8.2
ARS Mark is a ranking system developed by bestairriflescopes.com. ARS Mark has no relationship or impact from any manufacturers or sales agent websites. Learn more
- BrandMidTen

- ARS Mark8.2
ARS Mark is a ranking system developed by bestairriflescopes.com. ARS Mark has no relationship or impact from any manufacturers or sales agent websites. Learn more
- BrandGotical

- ARS Mark8.2
ARS Mark is a ranking system developed by bestairriflescopes.com. ARS Mark has no relationship or impact from any manufacturers or sales agent websites. Learn more
- BrandTPO

- ARS Mark8.0
ARS Mark is a ranking system developed by bestairriflescopes.com. ARS Mark has no relationship or impact from any manufacturers or sales agent websites. Learn more
- BrandGRG MFG
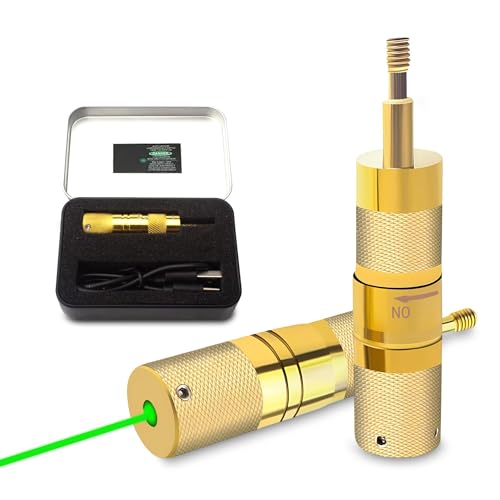
- ARS Mark7.8
ARS Mark is a ranking system developed by bestairriflescopes.com. ARS Mark has no relationship or impact from any manufacturers or sales agent websites. Learn more
- BrandGotical

- ARS Mark7.4
ARS Mark is a ranking system developed by bestairriflescopes.com. ARS Mark has no relationship or impact from any manufacturers or sales agent websites. Learn more
- BrandGotical
Last update on 2026-10-01 / Affiliate links / Images, Product Titles, and Product Highlights from Amazon Product Advertising API
FAQs
Can I sight in a crossbow completely without shooting an arrow?
No, you cannot achieve a true zero without shooting live arrows. A laser bore sight only aligns the scope reticle with the straight line of the rail to ensure your first shot hits the target. Real arrows experience gravity drop, wind drift, and bow vibration, which requires final adjustments using real practice arrows at your intended distance.
What distance is best for laser bore sighting a crossbow?
Twenty yards is the ideal distance for bore sighting a crossbow optic. At 20 yards, arrow drop is minimal, and most crossbow scopes use this distance as their primary baseline aiming mark. If space is limited, sighting at 10 yards gets your optic on paper, but you should confirm your reticle at 20 yards before stepping out farther.
Why does my arrow hit lower than the laser dot?
An arrow drops below the laser line because of gravity. A laser beam travels in a flat, straight line, while a physical arrow arches through the air and loses height as it flies downrange. To fix this, turn your scope's elevation dial in the direction marked "Up" until your live practice arrows center on the bullseye.
Do I need to cock my crossbow to bore sight it?
No, you should never cock your crossbow while bore sighting. The uncocked flight track provides the exact alignment path needed for the laser tool. Cocking the bow creates unnecessary mechanical strain and introduces the severe danger of an accidental dry fire, which can crack the limbs and destroy the bow.


12 Best 22 Pcp Air Rifle For Hunting of 2026 With Quiet Power

7 Best 22 Pcp Air Rifle Under 300 of 2026 For Backyard Pest Control

10 Best 22 Break Barrel Air Rifles of 2026 For Backyard Pest Control

10 Best 30 Caliber Pcp Air Rifle of 2026 For Medium Game

Top Best 177 Air Rifle Under 100: Budget-Friendly Picks for 2026

How to Safely Reload Shotgun Shells at Home

11 Best Co2 Air Rifle For Pest Control of 2026 To Ensure Humane Dispatch

12 Best Inexpensive Air Rifles of 2026 For Dependable Backyard Accuracy






