How to Bore Sight a Red Dot at Home

Bore sighting a red dot comes down to projecting a reference line through the barrel, then dialing the sight dials until the dot meets that mark. That process changes depending on whether the firearm allows a direct view through the barrel or requires a dedicated alignment tool. An indoor target ten to twenty-five yards away gives a dependable visual guide. Adjusting the up-and-down and side-to-side dials brings the dot into position, saving costly ammunition on range day.
Hardware choices and indoor distance dictate the rest of the setup. Bolt-action rifles allow looking directly down the bore, while handguns and semi-automatic rifles need a chamber laser cartridge or a muzzle rod. Sighting across a short hallway also means the dot sits slightly above the laser reference due to the optic height. Taking a few minutes at the workbench ensures the firearm will hit paper on the very first shot.
The Short Version
- Clear the firearm: Take all live ammunition out of the room, remove the magazine, and check the chamber with your eyes and fingers.
- Lock the gun in place: Rest the firearm on a solid bench rest, gun vise, or firm sandbags aimed at a blank wall 10 to 25 yards away.
- Turn on your alignment tool: Slip a laser cartridge into the chamber or mount an expanding arbor rod into the muzzle tip.
- Align the optic reticle: Turn your up-and-down and left-to-right adjustment click dials until your red aiming dot meets the projected laser, then head to the range to confirm with live ammunition.
Clearing the Chamber and Setting Up Your Work Bench
Working on your optic at home requires strict attention to firearm safety before anything else happens. Take every magazine out of the firearm and place all live ammunition in a completely different room. Pull the slide or bolt back, lock it open, and look directly into the chamber. Run a finger inside the empty chamber to make sure no round remains caught inside. Once you confirm the gun is empty, leave any live ammunition stored away until you leave for the shooting range.
A steady work area makes the entire alignment process smooth and reliable. If your firearm moves even an eighth of an inch while you turn an adjustment dial, your visual baseline shifts and your work is ruined. Set up your bench on a sturdy kitchen table, a heavy workbench, or a solid desk that does not wobble when you lean on it.
Support the firearm using a dedicated gun vise, a shooting rest, or heavy sandbags. The gun must sit upright without tipping to either side. Level the firearm so the top of the optic window sits flat. Pick an interior wall, a closed garage door, or a secure basement backstop that gives you between 10 and 25 yards of open space. Tape a simple paper target or a small index card to the wall at the exact height of your barrel.
Choosing Your Method: Chamber Lasers, Muzzle Arbors, or Looking Down the Barrel
You have three ways to align an optic to the bore of your firearm before firing a live shot. Each method works by showing you where the center of the barrel points so you can move your aiming dot to that same spot.
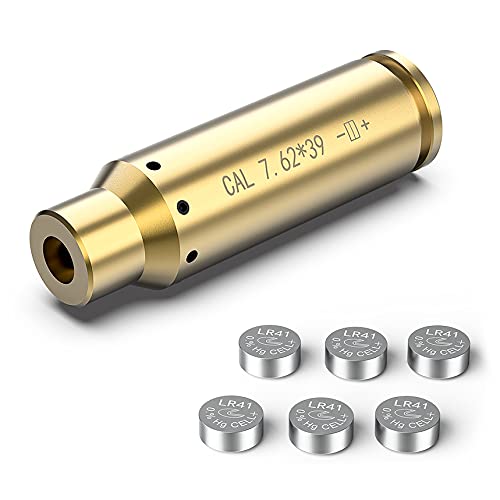
Chamber laser cartridges look just like brass ammunition cases, but they hold a battery and a front-facing laser diode. You slip the cartridge directly into the chamber of your rifle or handgun and close the action gently. Because the cartridge sits directly in the chamber rifling, the red or green light shines straight out through the barrel. This design provides great centering because it rests exactly where a live cartridge sits. The main limitation is that a chamber cartridge only fits one specific caliber, such as a dedicated 9mm or a .223 rifle chamber.
Muzzle arbor kits use a laser housing that mounts to the front tip of the barrel. These kits include an arbor, which is an expanding rod adapter for the barrel tip. You select the plastic or metal arbor adapter that matches your barrel width, slide it into the muzzle, and tighten the screw until it sits snug inside the rifling. The big advantage here is versatility across many calibers, from small rimfire barrels up to 12-gauge shotguns. You must insert these tools carefully so you do not rub or scratch the barrel crown, which is the delicate edge at the barrel exit that guides bullet release.
Looking down the bore, often called mechanical bore sighting, requires no laser tools at all. This approach only works on bolt-action rifles or firearms where you can pull the bolt completely out and see clean daylight through the barrel. You position the rifle on your bench, look through the back of the open receiver directly down the center of the barrel hole, and center a distant target in that circular view. While keeping the barrel centered on the target, you look up through your optic and adjust your aiming dot to the exact same mark. This method costs nothing, but you cannot use it on closed-receiver semi-automatic handguns or lever-action rifles.
Step-by-Step Red Dot Alignment at Home
Once your workspace is ready and your firearm sits secure on the rest, you can bring the optic reticle onto your target mark. Follow these steps in order to complete your initial alignment.
- Check your optic mount: Make sure your red dot sight is secured tightly to your mounting plate or accessory rail. If mounting screws are loose, the sight will wander during adjustments. Tighten the screws using an inch-pound torque tool according to the optic maker instructions, and verify the sight does not rock or slide. If your setup includes backup metal sights, understanding lining up your backup iron sights through the optic glass can give you an extra visual reference across the top of your slide or receiver.
- Activate your laser tool: Turn on your chamber laser cartridge or muzzle arbor laser and place it into the firearm. Aim the barrel at your wall target 10 to 25 yards away. You will see a crisp red or green dot projected onto the paper.
- Lower your red dot brightness: Turn on your red dot sight. Lower the brightness until the aiming dot is dim enough to keep a crisp, sharp edge. A dot that is set too bright will bloom into a large blurry halo, making it difficult to find the exact center of the reticle.
- Remove the protective turret caps: Unscrew the metal or plastic caps covering the elevation dial on top of the optic and the windage dial on the right side. The elevation dial controls up-and-down adjustments. The windage dial controls left-to-right adjustments.
- Adjust your up-and-down dial: Look through the center of the optic glass at the laser beam on the wall. Turn the elevation click dial on top of the sight housing. As you turn the dial, watch how the aiming dot moves relative to the laser on the wall. Continue adjusting until the aiming dot sits on the same horizontal level as the laser.
- Adjust your left-to-right dial: Turn the windage click dial on the side of the sight housing. Move the dial until the aiming dot shifts horizontally to meet the laser point.
- Step back and confirm the alignment: Take your hands off the firearm entirely. Stand back, let the rest settle, and look through the optic once more. Confirm that the firearm did not twist in the sandbags while you turned the dials. The aiming dot and the laser mark should remain aligned.
- Remove the tool immediately: Turn off your laser and remove the cartridge from the chamber or the arbor rod from the muzzle. Pack the tool into its storage case so you never risk leaving an obstruction inside your barrel. Replace your turret caps securely.
Understanding Height Over Bore at Short Distances
When you align an optic inside a house or garage, the physical distance between your barrel and the sight glass plays a large role. This spacing is called height over bore, which is the gap between the barrel center and the optic glass.
A laser beam travels out of the barrel in a perfectly flat line. Your red dot sight sits higher up, mounted on top of the slide or receiver. On a tactical carbine with an upright mount, the optic glass sits roughly 2.5 to 2.8 inches above the center of the barrel. On a handgun slide, such as a rimfire target pistol or a carry pistol, the optic sits much lower, usually between 0.5 and 0.8 inches above the bore center. You can see how low-profile mounting behaves on small platforms when pairing an optic to a rimfire target handgun.
Because the sight sits higher than the barrel, the sightline and the barrel line start out completely parallel with a vertical gap between them. If you adjust your red dot to sit dead center on the laser dot at a short indoor distance of 10 yards, you force the sightline to tilt downward steeply to intersect the laser beam. When you later take that gun to an outdoor range at 50 or 100 yards, your bullets will impact several inches higher than where you aim because the barrel was angled upward relative to the sight.
To avoid this problem when working at 10 to 15 yards indoors on a rifle, do not place the red dot directly on top of the laser beam. Instead, adjust the red dot so it stays perfectly centered left-to-right, but keep the aiming dot roughly 1.5 inches above the laser mark vertically. This offset keeps the sightline and the barrel path running nearly parallel. On handguns where the sight sits tightly against the slide, this vertical gap is very small, so placing the aiming dot directly on the laser point at 15 yards works well for paper alignment.
Moving to the Range for Live-Fire Zeroing
Bore sighting is a preparation step, not the final sighting in of your firearm. Sighting in with live ammunition, commonly called zeroing, is the only way to make sure your shots hit where you aim.
A laser beam is weightless light that cuts through air in an unbroken straight path. A bullet is a heavy physical object made of lead and copper. The moment a bullet leaves the muzzle, gravity pulls it toward the ground. Air resistance slows it down, crosswinds push it sideways, and the pressure of firing creates tiny vibrations along the metal barrel. None of these physical ballistic forces affect a beam of light.
The entire purpose of bore sighting at home is to save you time and money. Without bore sighting, a newly mounted optic might point so far off target that your first shots miss the entire target backer board. You can easily burn through three expensive boxes of cartridges just trying to spot dirt kicks to figure out where your rounds are landing. A proper home bore sight ensures your very first live round hits somewhere on a standard sheet of paper at 25 yards.
When you arrive at the shooting range, follow this simple confirmation plan:
- Set your target at 25 yards first, even if you plan to zero your rifle at 50 or 100 yards later. This close distance confirms your bullet impacts on paper right away.
- Rest the firearm on a bench bag and fire a careful group of three shots at the bullseye.
- Check the center of your three-shot group on the paper. Use the click adjustments on your turrets to walk the group into the center of the bullseye.
- Once centered at 25 yards, move your target out to your chosen final zero distance, fire another group, and make your small final dial adjustments.
Common Bore Sighting Mistakes to Avoid
Avoiding a few simple missteps will save you frustration and protect your equipment from damage.
- Leaving an arbor tool inside the muzzle: Forgetting to pull a muzzle-insert rod out before leaving the house is dangerous. Firing a live round with an arbor stuck in the barrel tip will destroy the barrel and cause severe injury. Make removing the tool an automatic safety habit every single time.
- Turning adjustment turrets the wrong way: Red dot dials are labeled to indicate where bullet impacts move on a target, not how the reticle moves inside the housing. If the dial arrow says "Up," turning that way raises your bullet impact during live fire. However, when aligning to a fixed laser dot on a wall, turning the dial toward "Up" actually shifts your internal reticle downward. Pay close attention to how the dot moves across the wall as you turn the dial.
- Working on an unstable surface: Resting a firearm on your knees, couch cushions, or an unsupported hand while adjusting dials causes wobbling. You will find yourself constantly chasing the laser point because the gun shifts with every click.
- Cranking dials past their mechanical stops: Every optic has a limit to how far the windage and elevation screws can travel. If you feel resistance or the screw stops clicking smoothly, stop turning. Forcing a turret past its limits will strip the internal adjustment threads and break the optic.
- Skipping thread locker on mounting screws: Aligning an optic that is loose on its base wastes your effort. Recoil will shake an unsecured mount loose within five shots. Always confirm that mounting hardware is torqued securely before you spend time aligning the reticle.
What to Look for in a Barrel Alignment Tool
When choosing a barrel alignment tool to help mount and sight in your dot sights, keep a few practical design features in mind.
First, think about the variety of firearms you own. If you only shoot one specific rifle caliber, a dedicated brass chamber cartridge slips directly into the chamber, fits snugly, and avoids any contact with your muzzle crown. If you maintain multiple handguns, shotguns, and rifles across several calibers, a multi-caliber muzzle arbor kit provides much more utility. Look for kits that feature clear size markings on each arbor adapter so you can quickly find the exact match for your barrel bore.
Second, consider the laser color. Green laser beams appear much brighter to human eyes than red beams. A bright green laser stands out clearly against outdoor targets in direct sunlight and across brightly painted indoor rooms. Red lasers cost less, run longer on small batteries, and work completely fine across typical indoor distances of 10 to 25 yards.
Finally, look at how the tool manages power. Some compact models require you to unscrew the battery cap to break the connection whenever you want to pause. Models with an external push-button switch or an internal rechargeable battery are much easier to operate while the tool stays fixed in your barrel.

- ARS Mark9.2
ARS Mark is a ranking system developed by bestairriflescopes.com. ARS Mark has no relationship or impact from any manufacturers or sales agent websites. Learn more
- BrandVisiofire

- ARS Mark9.0
ARS Mark is a ranking system developed by bestairriflescopes.com. ARS Mark has no relationship or impact from any manufacturers or sales agent websites. Learn more
- Brandmoloxo

- ARS Mark9.0
ARS Mark is a ranking system developed by bestairriflescopes.com. ARS Mark has no relationship or impact from any manufacturers or sales agent websites. Learn more
- BrandCVLIFE

- ARS Mark9.0
ARS Mark is a ranking system developed by bestairriflescopes.com. ARS Mark has no relationship or impact from any manufacturers or sales agent websites. Learn more
- BrandCVLIFE

- ARS Mark8.8
ARS Mark is a ranking system developed by bestairriflescopes.com. ARS Mark has no relationship or impact from any manufacturers or sales agent websites. Learn more
- BrandCVLIFE
- ARS Mark8.8
ARS Mark is a ranking system developed by bestairriflescopes.com. ARS Mark has no relationship or impact from any manufacturers or sales agent websites. Learn more
- BrandCVLIFE

- ARS Mark8.8
ARS Mark is a ranking system developed by bestairriflescopes.com. ARS Mark has no relationship or impact from any manufacturers or sales agent websites. Learn more
- BrandCVLIFE
- ARS Mark8.4
ARS Mark is a ranking system developed by bestairriflescopes.com. ARS Mark has no relationship or impact from any manufacturers or sales agent websites. Learn more
- BrandFeyachi
Last update on 2026-10-01 / Affiliate links / Images, Product Titles, and Product Highlights from Amazon Product Advertising API
FAQs
Can I bore sight a red dot without buying a laser tool?
Yes, you can align an optic visually if your firearm allows you to look straight down the barrel bore from the rear, such as a bolt-action rifle. You simply pull the bolt out, center a target down the open barrel channel while the gun sits in a vise, and adjust your red dot until it rests on the same target. On closed-action firearms like handguns or semi-automatic carbines, buying a laser alignment tool is the only practical way to do this at home.
What distance should I set my target at inside my house?
A distance of 10 to 15 yards works well for home alignment because it fits down long hallways, basements, or garage bays. At this range, the laser point remains small and sharp on your paper target. Setting up farther out than 25 yards indoors is unnecessary and can cause the laser beam to widen, making precise reticle adjustments harder.
Should the red dot sit directly on top of the laser dot?
On handguns, placing the red dot directly over the laser dot at 15 yards works fine because the sight sits very close to the barrel. On rifles where the optic sits two inches or more above the barrel, you should keep the red dot about 1 to 1.5 inches higher than the laser point at 10 yards. This offset prevents your sightline from tilting down too steeply, keeping your rifle much closer to target at the range.
Why are my live shots hitting slightly different from where the laser was aimed?
A laser beam travels in a straight line, but live bullets drop from gravity, drift with wind, and react to barrel movement during firing. Live ammunition also travels at varying speeds depending on the powder charge and bullet weight. Bore sighting only gets your shots onto paper, so you must always shoot live groups at the range to set your true zero.


12 Best 22 Pcp Air Rifle For Hunting of 2026 With Quiet Power

7 Best 22 Pcp Air Rifle Under 300 of 2026 For Backyard Pest Control

10 Best 22 Break Barrel Air Rifles of 2026 For Backyard Pest Control
10 Best 30 Caliber Pcp Air Rifle of 2026 For Medium Game
Top Best 177 Air Rifle Under 100: Budget-Friendly Picks for 2026

How to Safely Reload Shotgun Shells at Home

11 Best Co2 Air Rifle For Pest Control of 2026 To Ensure Humane Dispatch

12 Best Inexpensive Air Rifles of 2026 For Dependable Backyard Accuracy