
How to Build an Archery Bow That Will Not Snap

Building a working wooden bow at home is not as risky or complicated as it looks. The whole process comes down to shaping a straight-grained hardwood board and thinning the limbs gradually from the center out to the tips until the wood forms a smooth, balanced curve. Taking light shavings keeps the stress spread out evenly so the piece does not crack.
How well your bow shoots depends on three simple details. First, the board needs straight grain lines that run uninterrupted from end to end. Second, wood must come off slowly from the belly side (the surface facing you when you shoot) to prevent weak spots that bend too sharply. Finally, checking the balance of the flex step by step keeps the wood safe before you ever pull the string back. Here is the straightforward path to build yours safely from start to finish.
Which Wood Board Will Not Snap Under Tension?
Building a wooden bow starts with selecting the right board at a lumber store. A raw piece of bow wood is called a stave. If the wood grain runs off the edge of your board, the limb will crack along that grain line under stress. You need a straight-grained hardwood board that can handle tension and compression without splintering.
When you draw a bow, two forces act on the wood at the same time:
- The back: This is the outer side facing the target. The back stretches under heavy tension.
- The belly: This is the inner side facing the shooter. The belly crushes under heavy compression.
Tension breaks wooden bows much faster than compression. If a single grain fiber peels up on the back, the limb can snap in two. Use this checklist to select a safe board from the lumber rack:
- Wood species: Look for Red Oak, White Ash, Hickory, or Hard Maple. Red Oak is widely available, affordable, and forgiving for a first project.
- Board dimensions: Pick a board measuring one inch thick by two inches wide (labeled as a 1x2 board, with actual dimensions around 0.75 inches by 1.5 inches) and 68 to 72 inches long.
- Grain straightness: Look down the wide face of the board. The growth lines must run parallel from end to end without angling off the sides. This prevents grain runout, which causes sudden breaks.
- Edge grain: Look at the narrow edge of the board. The grain lines should run straight and flat along the full length.
- Clean surface: Reject boards with knots, swirls, cracks, pinholes, or warping. The back of your bow must be completely clean wood.
How Do You Mark the Bow Shape on Wood?
Mark your layout lines clearly with a sharp pencil and a long straightedge. A standard wooden longbow (a traditional, straight-limbed wooden bow forming a simple arc) has a rigid handle and two bending limbs. The limbs are the flexible upper and lower arms that bend to store energy.
Follow these steps to draw the bow profile onto your board:
- Find the exact center: Measure your board from end to end. On a 72-inch board, make a clear pencil mark across the wide face at 36 inches.
- Mark the handle: The riser is the central bow handle or rigid frame that stays stiff while shooting. Mark two inches on either side of the center line to create a four-inch handle section.
- Mark the limb transitions: Measure two inches past each end of the handle. These sections are called the fades. The wood transitions here from the thick, stiff handle into the thinner, bending limbs.
- Draw the limb width taper: Keep the full 1.5-inch width from the handle fades out to the middle of each limb. From mid-limb to each tip, taper the width smoothly down to 0.5 inches at the very ends.
- Mark the belly thickness lines: Turn the board on edge. Keep the handle at full 0.75-inch thickness. Along the limbs, draw a guide line on the belly side that tapers from roughly 0.55 inches thick at the fades down to 0.35 inches thick at the tips. Never cut into the back face of the board.
How Do You Safely Rough Out the Limbs?
Roughing out removes excess wood down to your pencil lines so the board begins to flex. The most important rule in wooden bow making is to protect the back of the bow. The back faces the target and holds the continuous wood fibers that prevent violent breaks. Never cut, plane, or sand across the grain on the back face of the board.
All wood removal happens on the sides of the board and across the belly (the inner side facing the shooter). You can use simple hand tools such as a coarse farrier's rasp, a four-in-hand woodworking rasp, or a sharp hand plane. Clamp the board firmly to a sturdy workbench using soft jaw pads or scrap wood to prevent denting the surface.
Work slowly and remove wood in long, steady strokes along the grain. Take down the sides first until you reach the width taper lines you drew on the face. Once the limb width is correct, turn the board over and begin shaving wood from the belly toward the tips.
Avoid taking deep bites with your rasp. Deep gouges create weak points where stress concentrates when the bow bends. Those stress points can turn into cracks later. Keep your cuts smooth, level, and flat across the full width of the limb belly. Stop as soon as you reach your thickness guide lines.
Where Do You Cut the String Grooves?
String nocks are the grooves at the limb tip holding the bowstring. The bowstring is the main string pulled to fire the arrow. Without clean, properly angled grooves, the bowstring will slip off under tension or cut through the wood grain.
Follow these steps to cut safe nock grooves at each limb tip:
- Mark the nock position: Measure roughly 0.75 inches down from each limb tip. Make a clear pencil mark on both narrow edges of each limb.
- Choose the right tool: Use a small round chainsaw file or a 1/8-inch round rat-tail file. A round profile creates smooth, curved grooves that will not pinch or fray your bowstring.
- File at a 45-degree angle: File grooves into the side edges at a 45-degree angle slanting downward toward the bow handle. This angle matches the natural slope of the bowstring when the bow is strung.
- Keep the back solid: Stop filing as soon as the groove is deep enough to seat the string securely, about half the thickness of your file. Never file across the back of the bow. The wood fibers on the back must stay completely unbroken.
- Smooth all edges: Wrap fine 220-grit sandpaper around your round file. Sand inside each groove and round over the limb tips to remove any sharp corners that could damage the bowstring.
How Do You Tiller the Limbs Evenly?
Tillering is balancing the bend across both limbs. This is the single most critical phase of bow making. If one spot on a limb bends too much while the rest stays stiff, that spot acts like a hinge. Hinges take all the bending stress and snap. Even limbs bend in a gentle, continuous arc, like a satellite dish.
Follow these steps to balance your bow limbs safely:
- Floor tillering: Stand the lower limb tip on your shoe with the belly facing you. Grip the handle with one hand and press your other palm against the upper limb belly to flex it slightly. Repeat this check for the other limb. Both limbs must flex under firm hand pressure before you attach a string.
- Use a loose tillering cord: Loop a strong cord that is several inches longer than the bow into both nocks. Place the bow on a tillering board or tillering stick (a piece of lumber with measured notches mounted to a wall).
- Check limb symmetry: Pull the cord down a few inches and hook it into a notch. Step back six feet and look at the bend. Both limbs should curve equally. Look for stiff flat spots and weak hinges.
- Scrape stiff areas: Mark any stiff section with a soft pencil. Remove the bow and use a cabinet scraper to shave thin, papery wood curls off the belly in that stiff area. Never scrape wood away from a weak spot that is already bending too far.
- Switch to a fitted bowstring: Once both limbs bend evenly with a loose cord, switch to a standard bowstring so the bow sits at brace height (about five to six inches from handle to string). Check the curve again at brace height.
- Measure pull resistance: Draw weight is the pull resistance or effort needed to pull the string back, measured in pounds (lbs). Check the pull resistance on a hanging scale as you pull downward. Never pull the bow past your target draw weight. If you want a 40 lb bow, never pull with more than 40 lbs of force at any point during tillering.
How Do You Safely String and Draw the Bow?
Bringing a newly shaped wooden bow to full draw requires patience and strict safety precautions. Full draw is the position when the string is pulled all the way back to your face anchor point. Draw length is how far back you pull the string to reach your anchor point, measured in inches. Moving too fast can break the wood fibers before they adjust to the bend.
Use this checklist before drawing your bow:
- Wear safety glasses: Always wear impact-resistant eye protection during tillering and your first shooting sessions. If an unbacked wooden bow fractures, wood splinters can fly outward at high speed.
- Use a bow stringer: Always string your bow using a bow stringer tool instead of bending it across your leg. Step-through stringing twists the limbs sideways, which can cause instant wood separation along the grain.
- Exercise the wood gradually: Do not pull the bow straight to full draw. Pull the string back to ten inches twenty times, letting the wood relax between pulls. Increase your pull distance by one inch at a time until you reach your target draw length.
- Inspect the belly for frets: Look closely at the belly wood in bright light. Watch for tiny horizontal crush lines, called frets or chrysals. These lines indicate that the wood was overstressed in that spot.
- Check your arrows: Inspect arrow shafts for hairline cracks by flexing them before shooting. Damaged arrows can break apart on release.
- Never dry fire: Dry fire means releasing a drawn bowstring without an arrow: a dangerous error that can instantly splinter limbs, snap strings, and cause severe personal injury. The energy that normally pushes the arrow has nowhere to go except into destroying the bow limbs.
Once you verify that your limbs bend smoothly and hold tension, practicing how to shoot archery with both eyes open will help you build steady aim and natural target focus with your handmade longbow.
What Tools and Gear Make Bow Making Safer?
Building a wooden bow by hand goes much smoother when you rely on proven reference guides and proper traditional archery accessories. Having the right tools on hand protects your project from snapping and keeps your hands and eyes safe throughout the build.
Before starting your project, consider acquiring these helpful items:
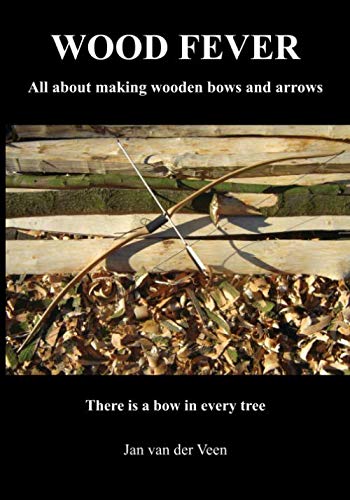
- Bow building guidebooks: A dedicated bowyer manual provides proven limb measurements, wood drying guidelines, and scale profiles. Look for books that cover traditional longbows, self-bows (bows made from a single piece of wood), and board bows. Check that the guide includes clear diagrams showing limb taper dimensions.
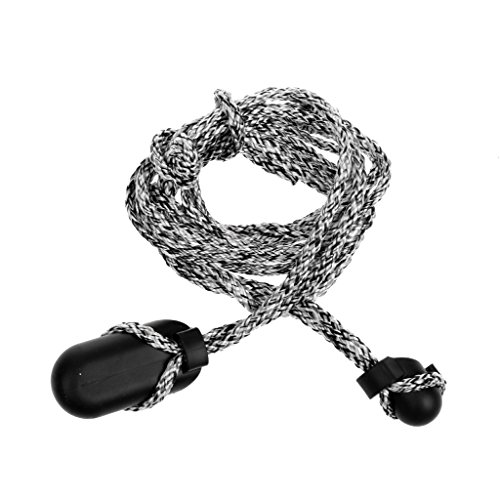
- Bow stringer tools: A durable traditional bow stringer makes bracing your bow safe and simple. Look for stringers made with heavy-duty cord and non-slip limb pockets or rubber friction pads that seat firmly on straight wooden limb tips.
- Archery safety gear: An arm guard (a protective forearm pad or sleeve) shields your arm from string slap (the string hitting the forearm upon release). A shooting glove or finger tab (a protective leather pad shielding fingers from string pressure) prevents blistering and keeps your release clean.

- ARS Mark10.0
ARS Mark is a ranking system developed by bestairriflescopes.com. ARS Mark has no relationship or impact from any manufacturers or sales agent websites. Learn more
- BrandN/A

- ARS Mark9.4
ARS Mark is a ranking system developed by bestairriflescopes.com. ARS Mark has no relationship or impact from any manufacturers or sales agent websites. Learn more
- BrandCREATESPACE
- ARS Mark9.4
ARS Mark is a ranking system developed by bestairriflescopes.com. ARS Mark has no relationship or impact from any manufacturers or sales agent websites. Learn more
- BrandMajosta

- ARS Mark9.2
ARS Mark is a ranking system developed by bestairriflescopes.com. ARS Mark has no relationship or impact from any manufacturers or sales agent websites. Learn more
- BrandN/A

- ARS Mark9.2
ARS Mark is a ranking system developed by bestairriflescopes.com. ARS Mark has no relationship or impact from any manufacturers or sales agent websites. Learn more
- BrandN/A
- ARS Mark9.0
ARS Mark is a ranking system developed by bestairriflescopes.com. ARS Mark has no relationship or impact from any manufacturers or sales agent websites. Learn more
- BrandKESHES

- ARS Mark8.4
ARS Mark is a ranking system developed by bestairriflescopes.com. ARS Mark has no relationship or impact from any manufacturers or sales agent websites. Learn more
- BrandHowExpert

- ARS Mark8.0
ARS Mark is a ranking system developed by bestairriflescopes.com. ARS Mark has no relationship or impact from any manufacturers or sales agent websites. Learn more
- BrandN/A

- ARS Mark6.6
ARS Mark is a ranking system developed by bestairriflescopes.com. ARS Mark has no relationship or impact from any manufacturers or sales agent websites. Learn more
- BrandMajosta

- ARS Mark6.4
ARS Mark is a ranking system developed by bestairriflescopes.com. ARS Mark has no relationship or impact from any manufacturers or sales agent websites. Learn more
- BrandMajosta
Last update on 2026-09-29 / Affiliate links / Images, Product Titles, and Product Highlights from Amazon Product Advertising API
FAQs
What hand tools do you need to build a wooden bow?
You only need a few basic tools to build a board bow. A farrier's rasp or four-in-hand rasp removes bulk wood quickly from the belly. A cabinet scraper shaves paper-thin wood curls during tillering. A small round chainsaw file cuts string nocks, and a tape measure with a pencil keeps your layout lines accurate.
How thick should the bow limbs be when roughing out?
Start with your board at its full 0.75-inch thickness across the handle. Near the fades where the handle meets the limbs, taper the belly down to about 0.55 inches. Continue tapering the thickness smoothly down to roughly 0.35 inches at the limb tips before you begin tillering.
How do you fix a hinge during tillering?
A hinge is a weak spot that bends too sharply compared to the rest of the limb. Stop drawing the bow immediately and never scrape wood from the hinge itself. Instead, carefully scrape the stiff areas on either side of the hinge to spread the bending force evenly along the entire limb.
How long does a handmade wooden board bow last?
A properly shaped and balanced board bow made from straight-grained hardwood can last for thousands of shots over many years. Store the bow unstrung in a dry, climate-controlled space away from moisture and direct sunlight. Wax the bowstring regularly and seal the wood with polyurethane or paste wax to protect it from humidity changes.


12 Best 22 Pcp Air Rifle For Hunting of 2026 With Quiet Power

7 Best 22 Pcp Air Rifle Under 300 of 2026 For Backyard Pest Control

10 Best 22 Break Barrel Air Rifles of 2026 For Backyard Pest Control

10 Best 30 Caliber Pcp Air Rifle of 2026 For Medium Game

Top Best 177 Air Rifle Under 100: Budget-Friendly Picks for 2026

How to Safely Reload Shotgun Shells at Home

11 Best Co2 Air Rifle For Pest Control of 2026 To Ensure Humane Dispatch

12 Best Inexpensive Air Rifles of 2026 For Dependable Backyard Accuracy






