
How to Change an AR-15 Front Sight Safely

Most owners assume changing an AR-15 front sight always demands a heavy hammer, a bench block, and serious gunsmithing skills. In reality, the job is often as simple as loosening one bolt or twisting a small threaded peg. How you handle the job comes down to how the sight attaches to the rifle. Many modern sights clamp onto a rail with an ordinary wrench, while replacing just the aiming post takes less than a minute.
The right steps depend on the specific hardware sitting on your barrel. Swapping just the center post requires depressing a tiny spring-loaded pin and spinning the peg. Replacing a flip-up sight on a handguard only takes loosening a mounting screw. But removing a classic triangular sight base means drifting out wedge-shaped steel pins in the right direction to protect the barrel. Identifying your exact setup makes the whole swap straightforward.
Check Your Sight Type Before Grabbing Any Tools
Always clear your rifle before touching any hardware. Drop the magazine, pull the charging handle back, lock the bolt open, and physically check the empty chamber with your finger. Make sure no live ammunition is in the room. Once your rifle is safe, look closely at the front of your barrel to see which style of front sight you have. AR-15 rifles use three different front sight setups, and each one requires a completely different removal method.
The first type is a screw-in sight post (a threaded center aiming peg). This small metal post sits inside a fixed metal housing or inside a folding sight base. If you only want to switch from a thick square aiming peg to a thinner match post, a night sight, or a fiber-optic bead, you do not need to take off the whole sight base. You only unscrew the small center peg.
The second type is a rail-mounted sight. This is a standalone front sight that clamps directly onto a standard Picatinny rail (a slotted 20mm metal accessory rail running along the top of your handguard). Most rail-mounted units fold flat when you do not need them and flip up with a spring latch. These sights secure with a simple cross-bolt and clamp plate.
The third type is a fixed front sight base, often called an A2 front sight tower. This is the classic triangular metal housing pinned directly around the steel barrel. This unit doubles as a gas block (a barrel collar that routes hot firing gases back through a thin tube to cycle the bolt). Removing this style requires driving heavy pins through the steel collar and detaching the gas tube.
- Screw-in post: Sits down inside protective steel wings. You can see tiny vertical notches cut around its circular base.
- Rail-mounted sight: Bolted directly into the grooves of your top handguard rail. It detaches without touching the barrel or gas system.
- Fixed sight tower: Cast steel block pinned to the barrel itself, featuring a sling swivel on the bottom and a bayonet lug underneath.
Unscrew the Threaded Post Using a Prong Tool
If you only want to replace the aiming peg itself, you do not need to take anything off your barrel or rail. The sight post is held in place by fine screw threads and a detent (a spring-loaded locking pin). This detent pushes up into notches around the base of the post, preventing the post from spinning loose when you fire.
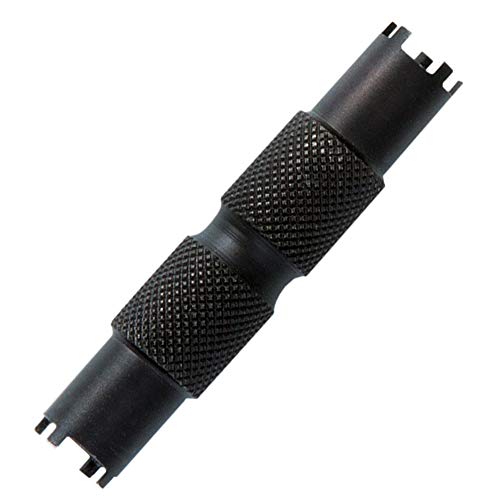
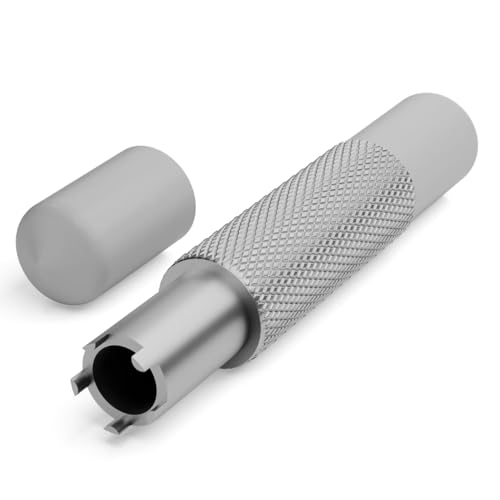
A standard A2 post has four notches around its base, while older A1 military posts have five notches. You will need a simple multi-prong front sight adjustment tool to compress the detent and twist the post at the same time. While you can depress the detent with a punch or the tip of a bullet, a dedicated cylindrical prong tool keeps you from slipping and scratching the finish.
- Anchor the upper receiver: Rest your rifle on a padded bench mat or secure the upper receiver in a vise block so it does not wobble while you work.
- Engage the post with your tool: Slip the prong tool down over the post until the small steel teeth slide into the notches at the post base.
- Push down and turn counter-clockwise: Push down firmly to press the spring-loaded detent flat beneath the base shelf. While holding pressure downward, rotate the tool counter-clockwise to begin unthreading the post.
- Catch the detent and spring: As the post reaches its final threads, lift it out slowly. Keep your thumb over the housing so the tiny detent pin and its inner coil spring do not jump out of their small hole.
- Clean the cavity: Wipe away any dried carbon or grit from the threaded hole using a cotton swab and a drop of cleaning solvent. Leave the small spring and detent resting upright inside their channel.
- Thread the new post in: Set your replacement post over the detent, press the detent down with your tool or a small flat punch, and turn the post clockwise until it catches the threads.
- Set your baseline height: Turn the new post down until the top edge of the square flange sits flush with the surrounding raised shelf. This gives you a standard mechanical starting point for future zeroing.
If the post refuses to budge on the first turn, stop pushing. Carbon buildup can lock the fine threads over time. Apply two drops of penetrating oil around the base of the post, let it soak for fifteen minutes, and try again. Forcing a stubborn post with pliers will burr the metal wings and ruin the detent channel.
Unbolt Rail Sights Directly From the Accessory Rail
Changing a rail-mounted sight is the simplest swap on an AR-15. These sights clamp directly over the raised cross-slots of your handguard. The main goal here is proper placement and correct screw tightness so your sight does not shift under recoil.
- Loosen the cross-bolt: Use the correct hex wrench, Torx bit, or flat-head driver to turn the main clamp bolt counter-clockwise. You only need to loosen the screw enough for the side clamp plate to clear the rail lip; you do not need to remove the screw completely.
- Lift the sight clear: Tilt the sight body sideways and lift it off the handguard. Wipe down the bare Picatinny slots with a clean rag to remove old oil, dust, and metal shavings.
- Position the replacement sight: Set your new sight into the forward-most rail slot on your handguard. Placing the front sight as far forward as possible gives you the longest sight radius (the distance between your front and rear sights), which helps you aim more accurately.
- Push forward while tightening: Before you tighten the mounting screw, push the sight body forward toward the muzzle. This seats the cross-bolt firmly against the front recoil shoulder of the rail slot, preventing the sight from shifting forward under repeated recoil.
- Tighten to spec: Snug the mounting bolt using an inch-pound torque tool. Most polymer and aluminum rail sights require between 20 and 35 inch-pounds of torque, depending on the manufacturer instructions. Apply a small drop of medium-strength blue thread-locking fluid to the screw threads so vibration does not shake the bolt loose.
Never mount your front sight across the joint where the handguard meets the upper receiver. Always keep the sight entirely on the handguard rail. Also, confirm the sight folds down toward the rear of the gun rather than forward toward the muzzle, which keeps the protective wings from snagging on gear.
Drive Taper Pins From Left to Right Carefully
Removing a fixed A2 front sight tower is the most challenging front-end job on an AR-15. The sight base is secured to the barrel by two taper pins (wedge-shaped pins that are slightly wider on one end than the other). Driving these pins the wrong way will jam them permanently into the barrel steel and can bend your barrel.
Standard factory taper pins are installed from left to right. This means the smaller end of each pin is on the left side of the rifle (the side with the bolt release lever), and the wider end is on the right side (the side with the brass ejection port). You must strike the small end on the left to push the pins out the right side.
- Support the barrel properly: Lay your barrel across a dedicated front sight bench block made of dense polymer or non-marring wood. Never strike the pins while supporting the rifle only by the receiver, because the heavy hammer blows can shear the barrel extension pin inside the upper receiver.
- Remove the gas tube roll pin: Locate the tiny roll pin passing horizontally through the upper section of the sight base. Use a small roll pin punch and a lightweight hammer to drive this pin out. Once the pin is free, pull the thin stainless steel gas tube forward out of the receiver and through the front sight block.
- Verify pin sizes: Look closely at both sides of the front sight tower under a bright light. Use a digital caliper if you are unsure. Confirm you are striking the smaller circular head on the left side of the assembly.
- Break the taper fit: Place a stout starter punch (a short, thick steel punch that will not bend) squarely on the center of the small pin head. Strike the punch firmly and squarely with a heavy steel hammer. A timid tap will only mushroom the pin head; a sharp, solid blow breaks the friction fit.
- Drive the pins through: Once the pin shifts below the surface of the sight base, switch to a standard straight drift punch to drive the pin completely out of the right side. Repeat the exact same process for the second pin.
- Slide the sight base off: Spray penetrating oil along the barrel where it meets the sight housing. Use a nylon or brass mallet to tap the rear of the sight tower forward toward the muzzle until it slides completely off the barrel journal (the smooth, machined mounting surface on the barrel).
If you hit a taper pin with three heavy strikes and it does not move a fraction of an inch, stop immediately. Some manufacturers install straight pins with hydraulic presses, and others use thread-locking compound. Hitting a frozen pin harder will mushroom the pin head over the sight collar. If a pin refuses to move, bring the barrel to an experienced gunsmith who can use a hydraulic arbor press to pop the pins free without bending the barrel.
Line Up Your Sights and Rezero at the Range
Once your new sight is mounted, you must verify that its height matches your rear sight and your optic. AR-15 sights are built to specific heights so that your eye naturally aligns through the rear aperture to the front post when you rest your cheek on the stock.
If you shoot with an electronic optic, check your co-witness setup (lining up your backup iron sights through the optic glass). With an absolute co-witness, your iron sights line up directly across the center of your optic window, right on top of the illuminated aiming dot. With a lower 1/3 co-witness, your optic sits slightly higher on a riser mount. This leaves your iron sights visible in the lower third of the glass, giving you a clear view through the optic while keeping backup sights ready if your battery dies.
If you run an electronic red dot, you can review iron sights for cowitness with red dot sights to make sure your front post height lines up cleanly with your optic glass. If you replaced a fixed tower with a rail-mounted folding sight, make sure the front sight is designated as "same plane." A same-plane sight is designed to sit on a handguard rail that matches the exact height of the upper receiver rail. If your handguard rail sits lower than your receiver, a standard front sight will cause your shots to land far too high.
After confirming alignment, take your rifle to the range to zero your new sight at a set distance, such as 25 or 50 yards:
- Firing the group: Fire a steady three-shot group from a supported bench rest, aiming at the exact center of your target.
- Adjusting elevation: Look at where your bullets landed compared to your aiming point. If your shots landed low, you must lower the front sight post by turning it clockwise. If your shots landed high, raise the front sight post by turning it counter-clockwise.
- Confirming your zero: Fire another three-shot group to verify the adjustment. Continue adjusting until your shots strike the center of the target consistently.
Pick Durable Sights and Sturdy Adjustment Tools
Choosing the right replacement hardware makes installation easier and keeps your rifle reliable in the field. When shopping for replacement sight parts, look for tools and sights made from hardened steel or quality aircraft aluminum rather than soft pot metals.
For sight post tools, pick a dual-ended steel design that includes both 4-prong and 5-prong ends. This ensures you can adjust modern A2 posts as well as classic A1 assemblies without hunting for a second tool. A knurled outer handle gives your fingers a firm, non-slip grip, which is helpful when you are working on a dirty rifle at an outdoor range or wearing gloves.
If you are switching to a rail-mounted front sight, verify the clamp style before purchasing. Look for models with a solid steel cross-bolt and a wide clamping bar that grips the rail evenly. Sights with spring-loaded deployment latches should lock firmly into the upright position with zero wobble, ensuring your aiming peg returns to the exact same position every time you flip it up.

- ARS Mark10.0
ARS Mark is a ranking system developed by bestairriflescopes.com. ARS Mark has no relationship or impact from any manufacturers or sales agent websites. Learn more
- BrandZOEKIM
- ARS Mark9.2
ARS Mark is a ranking system developed by bestairriflescopes.com. ARS Mark has no relationship or impact from any manufacturers or sales agent websites. Learn more
- BrandReal Avid

- ARS Mark9.0
ARS Mark is a ranking system developed by bestairriflescopes.com. ARS Mark has no relationship or impact from any manufacturers or sales agent websites. Learn more
- BrandVisiofire

- ARS Mark9.0
ARS Mark is a ranking system developed by bestairriflescopes.com. ARS Mark has no relationship or impact from any manufacturers or sales agent websites. Learn more
- BrandVisiofire

- ARS Mark8.6
ARS Mark is a ranking system developed by bestairriflescopes.com. ARS Mark has no relationship or impact from any manufacturers or sales agent websites. Learn more
- BrandAISUNOUTDOOR
- ARS Mark8.6
ARS Mark is a ranking system developed by bestairriflescopes.com. ARS Mark has no relationship or impact from any manufacturers or sales agent websites. Learn more
- BrandPIHSSFULL

- ARS Mark8.2
ARS Mark is a ranking system developed by bestairriflescopes.com. ARS Mark has no relationship or impact from any manufacturers or sales agent websites. Learn more
- BrandTACFUN

- ARS Mark8.0
ARS Mark is a ranking system developed by bestairriflescopes.com. ARS Mark has no relationship or impact from any manufacturers or sales agent websites. Learn more
- BrandGeneric

- ARS Mark7.6
ARS Mark is a ranking system developed by bestairriflescopes.com. ARS Mark has no relationship or impact from any manufacturers or sales agent websites. Learn more
- BrandNanchroadly

- ARS Mark7.4
ARS Mark is a ranking system developed by bestairriflescopes.com. ARS Mark has no relationship or impact from any manufacturers or sales agent websites. Learn more
- BrandZOEKIM
Last update on 2026-10-02 / Affiliate links / Images, Product Titles, and Product Highlights from Amazon Product Advertising API


12 Best 22 Pcp Air Rifle For Hunting of 2026 With Quiet Power

7 Best 22 Pcp Air Rifle Under 300 of 2026 For Backyard Pest Control

10 Best 22 Break Barrel Air Rifles of 2026 For Backyard Pest Control

10 Best 30 Caliber Pcp Air Rifle of 2026 For Medium Game

Top Best 177 Air Rifle Under 100: Budget-Friendly Picks for 2026

How to Safely Reload Shotgun Shells at Home

11 Best Co2 Air Rifle For Pest Control of 2026 To Ensure Humane Dispatch

12 Best Inexpensive Air Rifles of 2026 For Dependable Backyard Accuracy






