
How to Change a Fiber Optic Sight Rod at Home

A cracked or lost sight insert looks alarming, but fixing it is a quick, low-stress job that requires no gunsmithing tools. All you need to do is snip out the old plastic, thread in a fresh strand, and warm both exposed tips so they swell into rounded caps that lock against the metal frame. The entire repair takes less than ten minutes right at your workbench.
Getting it right depends on matching the thickness of the sight opening and keeping open flame away from the acrylic. Touching the fire directly will scorch the tip black and block light, while gentle radiant warmth expands the ends cleanly so the piece stays put through heavy recoil. Safe handling comes first, so confirm the firearm is completely clear before following the steps below.
Clearing Your Gear and Removing the Damaged Rod
When you pull your handgun out of a holster or unpack your bow, finding an empty front sight frame is frustrating. The bright plastic rod that catches daylight and creates your aiming dot can crack or snap after hard use. Bumping your front sight against a barricade, sliding the gun into a tight holster, or exposing the plastic to harsh bore cleaning solvents can make the material brittle. Replacing this light tube does not require a gunsmith, a sight pusher, or expensive bench tools. You can complete the entire swap at your kitchen table in roughly ten minutes once you follow a few basic steps.
Always start by making your workspace safe. If you are working on a firearm, remove the magazine and set it aside. Pull the slide or charging handle all the way back, lock it open, and visually inspect the chamber. Stick your index finger into the empty chamber to confirm no round is present. Move all live ammunition into another room before laying your tools out. If you are replacing the aiming pin on an archery setup, set the bow in a secure vise or lay it flat on a padded table where it cannot slip while you work.
Once your gear is safe, examine the broken rod inside the metal sight frame (the metal housing that holds the light pipe). If part of the cracked rod is still hanging in the channel, use nail clippers or a razor blade to snip the bridge in half. This releases the tension holding the broken halves against the frame. Take a sewing needle, a straightened paperclip, or a thin piece of brass wire to push the remaining plastic fragments out through the channel. Push gently from back to front. Avoid hardened steel punches or heavy picks, as slipping can gouge the protective finish on your metal sight frame.
If an old piece of plastic seems stuck, check whether dried oil, powder soot, or thread-locking fluid has glued it in place. Soak the tip of a cotton swab in rubbing alcohol and dab it around the channel to loosen the grime. Never use harsh acetone or spray cleaners, because chemical residues can melt your replacement rod the moment you slide it in. Once the broken pieces slide free, run a dry thread or an unflavored dental floss pick through the hole to clear out leftover dust. A clean channel allows the new plastic rod to slide in freely.
Picking the Right Rod Diameter and Dot Color
Before installing a fresh insert, you need to match the channel diameter cut into your metal sight frame. Sight makers do not use a single universal size. If you purchase a bright plastic rod that is even slightly too thick, it will jam halfway through the hole. If the rod is too thin, it will rattle around inside the channel, gather very little ambient light, and fly out under recoil.
Most firearms and archery pins use one of three standard rod thicknesses:
- 0.5 millimeter (approximately 0.019 inch): This thin diameter is the standard choice for multi-pin archery sights and fine target front sights. Archers prefer this fine dot size because it leaves small targets visible at long distances rather than covering up the entire bullseye. If you shoot 3D targets or hunt big game, our guide on how to use a bow sight covers how these fine pins help maintain tight arrow groups.
- 1.0 millimeter (approximately 0.040 inch): This is the most common size found on factory defensive handguns, revolver front sights, and hunting rifles. It creates a bold, visible aiming dot that is fast to locate without covering up your target. If you use tall backup iron sights configured as iron sights for cowitness with red dot sights, a 1.0 millimeter rod offers a distinct reference point through the lower section of your optic glass.
- 1.5 millimeter (approximately 0.060 inch): You will find this heavy diameter on shotgun beads, action-shooting pistols, and turkey guns. The large cross-section catches plenty of ambient light, giving you an immediate flash of color when you mount the gun quickly.
Once you know the channel diameter, pick a color that matches your lighting conditions. Human eyes process green light wavelengths more efficiently than any other color in daylight. A fluorescence green rod appears intensely bright in full sunlight and retains its glow well into dusk, making it a reliable pick for general range use.
Red and amber rods offer distinct advantages in nature. If you shoot outdoors against green trees, tall grass, or brush, a red light pipe provides sharp contrast so your front sight never gets lost in the background. Amber and orange serve as balanced middle choices that perform well under overcast skies and indoor lighting.
Trimming, Heating, and Securing the New Light Rod
Installing the new rod requires sizing the plastic, threading it through the channel, and using gentle heat to create a rounded melted end on both sides. These mushroomed beads act like small rivets, clamping the rod securely against the metal sight frame without using messy glue.
Follow these steps to install the new rod:
- Cut a working length of plastic: Use nail clippers or a razor blade to snip a straight piece roughly two to three inches long. This gives you plenty of plastic to hold without bringing your fingers too close to the heat source.
- Form the first locking bead: Strike a lighter or light a bench candle. Hold the plastic horizontally and bring one tip toward the side of the flame, stopping about one inch away. Never let the plastic touch the fire. Radiant warmth will soften the acrylic, pulling the tip into a smooth, rounded melted end. Let the bead cool for ten seconds until it hardens.
- Thread the rod through the sight frame: Slide the un-melted end of the rod into the metal sight frame until your newly formed rounded melted end rests snug against the metal face. Putting this first bead at the front muzzle end leaves the clean, cut end pointing back toward your eye for maximum clarity.
- Trim the excess plastic overhang: Hold the seated rod firmly against the sight frame with one finger. Take your nail clippers or razor blade and snip the excess plastic, leaving roughly one-sixteenth of an inch sticking out past the metal sight frame. This small overhang provides the material needed to form the second locking rim. Trimming it completely flush will cause the rod to slide out.
- Form the rear locking bead: Shield your firearm slide or sight housing with a piece of cardboard or your finger. Bring the heat source near the trimmed tip, keeping that same one-inch cushion. As radiant heat warms the nub, watch it mushroom flat against the metal frame. Once the bead touches the metal surface, remove the heat and blow gently to cool it.
Run through this quick checklist before taking your gear to the range:
- Dot surface clarity: Look down the sight in normal room light. The melted bead facing your eye must look smooth, round, and clear, with no black soot or cloudy bubbles trapped inside.
- Mechanical retention: Place your thumbnail against the center of the exposed rod and apply light sideways pressure. The plastic light tube must sit firm without sliding forward, backward, or rotating.
- Recess clearance: Inspect both ends. The rounded melted ends must seat flush against the sight frame without hanging over the edges where a holster could catch and snap them.
What to Look for When Buying Replacement Sight Rods
To repair a damaged sight without buying an entire metal sight frame, you only need a pack of replacement optical plastic rods. These rods are made from clear acrylic plastic, also known as PMMA, which acts as a miniature light-gathering channel. The plastic absorbs natural daylight along its exposed length, bounces the light internally, and focuses it directly out the cut ends. This design produces a bright aiming dot that helps you get on target quickly without requiring batteries or electronics.
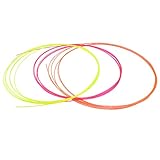
Before ordering a replacement pack, verify a few details to get the right fit. Measure your sight channel opening or check your sight manual so you pick the exact 0.5 millimeter, 1.0 millimeter, or 1.5 millimeter thickness your frame needs. Selecting a variety pack with fluorescent green, red, and orange rods gives you the freedom to try different colors across different seasons. Also, look for multi-rod packs that provide plenty of overall length. A single long rod can be cut into multiple replacement inserts, giving you spare material for future repairs whenever a bead gets scratched or worn down.

- ARS Mark9.0
ARS Mark is a ranking system developed by bestairriflescopes.com. ARS Mark has no relationship or impact from any manufacturers or sales agent websites. Learn more
- BrandMECCANIXITY

- ARS Mark-
ARS Mark is a ranking system developed by bestairriflescopes.com. ARS Mark has no relationship or impact from any manufacturers or sales agent websites. Learn more
- BrandMECCANIXITY

- ARS Mark8.8
ARS Mark is a ranking system developed by bestairriflescopes.com. ARS Mark has no relationship or impact from any manufacturers or sales agent websites. Learn more
- BrandMajosta
- ARS Mark-
ARS Mark is a ranking system developed by bestairriflescopes.com. ARS Mark has no relationship or impact from any manufacturers or sales agent websites. Learn more
- BrandMECCANIXITY
- ARS Mark-
ARS Mark is a ranking system developed by bestairriflescopes.com. ARS Mark has no relationship or impact from any manufacturers or sales agent websites. Learn more
- BrandZEEPA ECO

- ARS Mark-
ARS Mark is a ranking system developed by bestairriflescopes.com. ARS Mark has no relationship or impact from any manufacturers or sales agent websites. Learn more
- BrandWSOLDMA

- ARS Mark-
ARS Mark is a ranking system developed by bestairriflescopes.com. ARS Mark has no relationship or impact from any manufacturers or sales agent websites. Learn more
- BrandWSOLDMA
- ARS Mark-
ARS Mark is a ranking system developed by bestairriflescopes.com. ARS Mark has no relationship or impact from any manufacturers or sales agent websites. Learn more
- BrandHawke

- ARS Mark-
ARS Mark is a ranking system developed by bestairriflescopes.com. ARS Mark has no relationship or impact from any manufacturers or sales agent websites. Learn more
- BrandHawke

- ARS Mark-
ARS Mark is a ranking system developed by bestairriflescopes.com. ARS Mark has no relationship or impact from any manufacturers or sales agent websites. Learn more
- BrandMECCANIXITY

- ARS Mark-
ARS Mark is a ranking system developed by bestairriflescopes.com. ARS Mark has no relationship or impact from any manufacturers or sales agent websites. Learn more
- BrandTRUGLO

- ARS Mark-
ARS Mark is a ranking system developed by bestairriflescopes.com. ARS Mark has no relationship or impact from any manufacturers or sales agent websites. Learn more
- BrandMECCANIXITY
- ARS Mark-
ARS Mark is a ranking system developed by bestairriflescopes.com. ARS Mark has no relationship or impact from any manufacturers or sales agent websites. Learn more
- BrandAKEPO
Last update on 2026-10-02 / Affiliate links / Images, Product Titles, and Product Highlights from Amazon Product Advertising API
FAQs
How close should the lighter flame get to the plastic rod?
Keep the flame about one inch away from the plastic at all times. You only need gentle radiant heat to soften the acrylic, never direct fire. Touching the flame to the rod scorches the material, turns the tip cloudy, and ruins its ability to transmit light to your eye.
Why did the end of my new fiber turn black or cloudy?
A blackened or cloudy end happens when the plastic touches an open flame or gets too hot. The fire deposits carbon soot onto the melting acrylic, which gets trapped inside the cooling bead. If your rod turns dark, snip off the damaged bead with nail clippers and reform it using gentle radiant heat from a safe distance.
How do I stop the new rod from sliding out when firing?
Rods slip out under recoil when the melted beads are too small to lock against the metal sight frame. Make sure you leave roughly one-sixteenth of an inch of extra plastic extending past the sight frame before heating each tip. This extra material gives the bead enough bulk to expand beyond the channel diameter and clamp tight against the frame.


12 Best 22 Pcp Air Rifle For Hunting of 2026 With Quiet Power

7 Best 22 Pcp Air Rifle Under 300 of 2026 For Backyard Pest Control

10 Best 22 Break Barrel Air Rifles of 2026 For Backyard Pest Control

10 Best 30 Caliber Pcp Air Rifle of 2026 For Medium Game

Top Best 177 Air Rifle Under 100: Budget-Friendly Picks for 2026

How to Safely Reload Shotgun Shells at Home

11 Best Co2 Air Rifle For Pest Control of 2026 To Ensure Humane Dispatch

12 Best Inexpensive Air Rifles of 2026 For Dependable Backyard Accuracy






