
How to Change a Red Dot Battery Without Losing Your Zero

Many shooters assume that replacing a dead sight battery automatically ruins their aiming alignment and forces an annoying trip to the range. That fear is mostly unfounded, because most optics let you swap the coin cell without moving the sight. As long as the compartment sits on the top or side of the housing (the metal sight body), your aiming point stays completely locked in place.
The right steps depend almost entirely on where the battery compartment is hidden and which cell it takes. Top-mounted screw caps and sliding side trays allow for a fast swap in seconds. However, bottom-loading models require you to remove the entire optic from the firearm, meaning you must re-align your aim once the new cell is installed. Here is how to find your compartment, place the plus side correctly, and avoid stripping tiny screws.
Your optic design determines how you change the battery
Before touching any tool or battery, safety comes first. Drop the magazine from your firearm, open the action, and inspect the chamber visually and with your finger to verify no round is present. Only work on your optic when the firearm is fully unloaded and pointed in a safe direction.
Dot sights house their power cells in three main places: a top rotary cap, a side-mounted tray, or underneath the metal sight body. Knowing which style sits on your firearm tells you if you can leave the sight mounted or if you must take it off.
Enclosed tube sights often use a top cap or side rotary dial, common on rifles mounted to standard Picatinny or 20mm slotted accessory rails. The battery cap sits directly on top of the housing (the metal sight body) or doubles as the brightness dial. These are simple to swap because the optic stays clamped to the rail throughout the entire process.
Open-window sights on handguns usually use a side-loading tray or a bottom-loading baseplate. A side tray slides out from the housing edge, keeping the sight locked to the slide. In contrast, bottom-loading optics place the battery underneath the frame. If your optic has no visible caps or trays, the battery sits pressed between the base and the slide, requiring you to unbolt the sight.
Top caps and side trays protect your aiming zero
When your battery sits inside a top cap or a side slide-out tray, you can swap it without altering your aiming alignment (your zero). Because the metal sight body stays firmly on the firearm, your point of aim does not move.
Follow these steps to change a top-cap or side-tray battery safely:
- Match your tool to the slot precisely. Top caps usually feature a wide coin slot or textured edge. Use a flat-head bit that fills the entire slot, or a clean coin wrapped in a thin cleaning patch. Never use a narrow screwdriver that slips and gouges the soft aluminum housing. For side trays, use the exact hex or Torx bit supplied with your sight.
- Loosen the cap or tray screw counterclockwise. Turn slowly with steady, downward pressure so the bit does not slip. Once loose, finish turning by hand so you do not drop tiny screws.
- Note the orientation of the old battery. Lift the cap or pull the tray out gently. Note which way the plus sign faces before removing the dead cell. In most top caps and side trays, the flat positive side faces upward or outward. Stamped markings inside the housing show the correct plus and minus battery sides (the polarity).
- Inspect the rubber water-seal ring. Check the thin rubber O-ring along the threads or tray edge. This ring keeps moisture and dust out of the electronics. Straighten it if twisted and ensure it sits cleanly in its groove.
- Insert the fresh cell and hand-tighten the cover. Drop the new coin cell into place without touching both flat faces with bare oily fingers. Turn the cap backward slightly until threads catch to avoid cross-threading, then turn clockwise until snug. Tighten firmly so recoil does not break contact, but avoid over-tightening.
- Power up the optic to verify function. Turn on the brightness dial or move the sight to trigger the motion-sensing auto-on feature. Look through the glass against a plain wall to verify the aiming dot lights up.
Bottom loading sights require careful unmounting and reinstallation
Many compact micro red dots place the battery cavity on the underside of the optic to keep the profile low. You cannot swap the cell while the sight remains bolted to the gun. Removing the optic breaks the mechanical fit between sight and slide, meaning your zero will shift.
Follow these steps to replace a bottom-loading battery and reinstall the sight properly:
- Clear your firearm and secure the slide. Confirm the magazine is out and the chamber is empty. Rest the slide on a flat, padded work surface.
- Use the correct Torx bit for the mounting screws. Handgun slide optics usually fasten with small Torx screws (often T10 or T15). Never use an Allen key, which strips Torx splines easily. Press straight down and loosen both screws counterclockwise before removing either one.
- Lift the sight body straight up off the slide. Do not pry the sight with steel tools. Red dots fit tightly over indexing recoil lugs (small raised posts on the slide cut), so lift the housing straight up with your fingers.
- Remove the dead cell and clean the base. Flip the optic over to release the battery. Wipe away old oil, carbon, or moisture from the base and rubber sealing gasket.
- Seat the new battery with the correct polarity. For nearly all bottom-loading sights, the flat positive side faces up into the housing, while the negative side faces the slide. Confirm with the stamped plus sign inside the pocket.
- Clean screw threads and apply threadlocker. Clean slide screw holes with a dry cotton swab. If recommended by the manufacturer, apply a tiny drop of medium-strength blue threadlocker to each screw. Never use permanent red threadlocker.
- Torque screws evenly to factory specifications. Seat the optic straight onto the recoil lugs. Hand-thread both screws, then use an inch-pound torque tool (a tool measuring screw tightness) to tighten them to factory spec, usually 10 to 15 inch-pounds. Alternate between screws in small turns so the optic clamps down level.
Clean contact points ensure your new battery actually works
If you install a brand-new battery and the aiming dot stays dark, the issue is usually an invisible surface coating, improper polarity, or bent contact pins.
Check these four details before assuming your optic is broken:
- Remove the bitter child-safety coating. Major battery makers apply a bitter, non-toxic coating on both sides of coin cells like CR2032 or CR2025 sizes to stop children from swallowing them. This clear film acts as an electrical insulator. If it covers the contact points, current cannot flow. Rub both sides of the coin cell firmly with a cloth dampened with isopropyl alcohol, or buff the metal faces with a clean pencil eraser.
- Double-check battery polarity. An upside-down cell will not light the dot. Verify that the flat face marked with the plus sign matches the plus symbol stamped on your cap, tray, or housing plate.
- Inspect the metal contact springs inside the housing. Look inside the compartment with a flashlight. Recoil or over-tightened caps can crush the delicate spring contacts flat. If a contact tab looks crushed, use a wooden toothpick to gently lift the tab up a fraction of a millimeter. Do not use metal tools or bend it too far, which can break the spring.
- Verify the exact battery thickness. Ensure you bought the exact code required. A CR2025 has the same 20-millimeter diameter as a CR2032, but it is 0.7 millimeters thinner. A thin cell will rattle inside a CR2032 compartment and lose contact under recoil.
Confirm your aiming alignment at the range before carrying
After installing the battery, you must check your zero. Zeroing means adjusting the aiming dot using the windage and elevation click dials (the left-to-right and up-and-down adjustments) so your shots land exactly where the dot points at a set distance, such as 25 yards for handguns or 50 yards for rifles.
Whether your aiming point moved depends on how you accessed the battery:
If your optic uses a top cap or side tray, the sight never left its mount. Your zero should remain unchanged. Still, firing a quick confirmation group at the range provides peace of mind that nothing shifted during handling.
If your optic uses a bottom-loading battery, your zero has shifted. Even with recoil lugs and an inch-pound torque tool, re-tightening mounting screws creates tiny shifts in how the housing sits on the slide. A shift of just one thousandth of an inch at the base changes bullet impact by an inch or more downrange at 25 yards.
If your firearm has iron sights, you can do a quick bench check. By lining up your backup iron sights through the optic glass (known as co-witnessing), your iron sights act as a visual guide. Your red dot should sit in the same position relative to your front sight post as before. On target handguns such as rimfire pistols like a Ruger Mark series, checking alignment against mechanical sights helps catch obvious shifts before you fire a shot.
Always finish with live shooting. Fire a five-shot group from a supported rest on paper, and adjust your click dials until bullet impacts match the center of the aiming dot.
Keep the correct spare battery size in your range bag
Carrying spare batteries in your range bag or gun case prevents a dead optic from cutting your shooting session short. Dot sights rely on specific lithium coin cells or compact specialty cylindrical cells to function reliably.
Before purchasing replacement batteries, check these essential factors:
- The exact battery code for your optic model. Common open-window pistol sights usually take CR2032, CR1620, CR2025, or CR2450 coin cells, while certain compact tube sights use CR 1/3N lithium cells or CR2 batteries. Never guess based on appearance, as slight differences in cell thickness prevent reliable electrical contact.
- Factory shelf life and packaging. Quality lithium batteries maintain their charge for 3 to 10 years in storage. Storing a sealed multi-pack in your range bag guarantees you have fresh power whenever cold weather or continuous brightness settings drain an active optic.
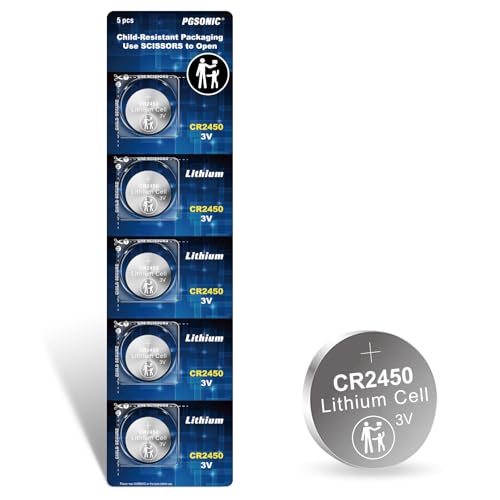
- Child-resistant packaging and coatings. Modern coin cells often come in tough child-resistant packaging and feature bitter outer coatings. Keep a small pair of scissors and an alcohol wipe with your shooting supplies to open packaging easily and clean contact surfaces before insertion.

- ARS Mark9.6
ARS Mark is a ranking system developed by bestairriflescopes.com. ARS Mark has no relationship or impact from any manufacturers or sales agent websites. Learn more
- BrandDURACELL

- ARS Mark9.6
ARS Mark is a ranking system developed by bestairriflescopes.com. ARS Mark has no relationship or impact from any manufacturers or sales agent websites. Learn more
- BrandDURACELL

- ARS Mark9.6
ARS Mark is a ranking system developed by bestairriflescopes.com. ARS Mark has no relationship or impact from any manufacturers or sales agent websites. Learn more
- BrandStreamlight

- ARS Mark9.4
ARS Mark is a ranking system developed by bestairriflescopes.com. ARS Mark has no relationship or impact from any manufacturers or sales agent websites. Learn more
- BrandStreamlight

- ARS Mark9.4
ARS Mark is a ranking system developed by bestairriflescopes.com. ARS Mark has no relationship or impact from any manufacturers or sales agent websites. Learn more
- BrandEnergizer

- ARS Mark9.4
ARS Mark is a ranking system developed by bestairriflescopes.com. ARS Mark has no relationship or impact from any manufacturers or sales agent websites. Learn more
- BrandDURACELL

- ARS Mark9.2
ARS Mark is a ranking system developed by bestairriflescopes.com. ARS Mark has no relationship or impact from any manufacturers or sales agent websites. Learn more
- BrandLiCB
- ARS Mark9.2
ARS Mark is a ranking system developed by bestairriflescopes.com. ARS Mark has no relationship or impact from any manufacturers or sales agent websites. Learn more
- BrandPGSONIC

- ARS Mark8.4
ARS Mark is a ranking system developed by bestairriflescopes.com. ARS Mark has no relationship or impact from any manufacturers or sales agent websites. Learn more
- BrandTEMIBATT
- ARS Mark8.0
ARS Mark is a ranking system developed by bestairriflescopes.com. ARS Mark has no relationship or impact from any manufacturers or sales agent websites. Learn more
- BrandPAOWANG
Last update on 2026-10-02 / Affiliate links / Images, Product Titles, and Product Highlights from Amazon Product Advertising API


12 Best 22 Pcp Air Rifle For Hunting of 2026 With Quiet Power

7 Best 22 Pcp Air Rifle Under 300 of 2026 For Backyard Pest Control

10 Best 22 Break Barrel Air Rifles of 2026 For Backyard Pest Control

10 Best 30 Caliber Pcp Air Rifle of 2026 For Medium Game

Top Best 177 Air Rifle Under 100: Budget-Friendly Picks for 2026

How to Safely Reload Shotgun Shells at Home

11 Best Co2 Air Rifle For Pest Control of 2026 To Ensure Humane Dispatch

12 Best Inexpensive Air Rifles of 2026 For Dependable Backyard Accuracy






