
How to Install a Red Dot Sight So It Never Shakes Loose

A fresh optic box sits open on the workbench next to a scattering of tiny screws, a small wrench, and an unloaded firearm. Securing the sight properly comes down to cleaning the screw holes, pressing the optic forward against its recoil pins, and tightening the screws to the correct inch-pound tightness with removable threadlocker (liquid glue that stops screws from backing out). This sequence keeps the glass locked solid without stripping fragile threads.
The exact routine depends on the firearm platform. Clamping onto the ribbed metal rail of a rifle is direct, but fitting an optic to a pistol slide often requires an adapter plate to match the pattern of screw holes and pins. Screw length also demands care, because a fastener that runs a hair too deep can jam moving parts inside the slide. Here is how to seat the optic cleanly, tighten every screw safely, and keep your aim true.
Clear Your Firearm Completely and Degrease Every Mounting Surface
Safety comes first before you touch any mounting hardware or tools. Drop the magazine, pull the slide or bolt back, and visually inspect the chamber and magazine well to confirm the firearm is completely unloaded. Move all live ammunition into another room so your workbench stays totally safe while you work.
Factory shipping oil, gun grease, and firing residue are the most common reasons an aiming dot shakes loose after a few magazines. Thread-locking fluid only bonds securely to dry, oil-free metal. If oil remains inside the threaded holes or on the screw shanks, the liquid glue cannot set, and firearm recoil will cause the optic to back out quickly.
- Separate the handgun slide or open the rifle action so you can work on a stable, level table surface.
- Dip a cotton swab into rubbing alcohol or a quick-drying degreaser spray, then thoroughly scrub out each screw hole until the swab comes out clean.
- Wipe down the bottom mounting surface of your red dot sight, as well as any adapter plate, to remove oily fingerprints and manufacturing films.
- Roll the threads of your mounting screws across a clean paper towel dampened with alcohol to remove any protective packing oils.
- Let every metal component air dry completely for five minutes before you begin fitting parts together.
Check Your Footprint Pattern and Confirm Screw Length Before Assembly
A footprint is the specific pattern of screw holes and guide pins cut into your firearm slide, receiver, or rail adapter. Common patterns like RMR, RMSc, and Doctor have different pin spacings and screw layouts. If your slide cut does not match your optic footprint, you will need a dedicated adapter plate to bridge the gap. Never force a sight down onto guide pins that do not match the underside of your optic.
Checking your screw length is a critical step that many gun owners overlook. Handguns require special caution because the right-side screw hole often sits directly above the extractor depressor plunger channel. If that mounting screw is even a fraction of a millimeter too long, it will press down onto the steel plunger rod inside the slide. This pins the extractor in place, causing your pistol to suffer immediate extraction failures and stovepipe jams.
Always perform a dry fit without any glue first. Drop your screws through the optic body into the slide and turn them with your fingers. You want at least three full turns of thread engagement so the screw holds under recoil, but you must make sure the screw does not bottom out against the bottom of a blind hole. If the screw stops turning while the sight still wobbles loosely on the slide, the screw is too long.
To verify the extractor clearance on a pistol, remove your slide back plate and slide out the extractor plunger assembly. Shine a small flashlight down the empty tunnel while looking inside as you thread in the right mounting screw. If you see the tip of the screw poking into that channel, stop immediately. You must use shorter screws or carefully file down the screw tip until the channel remains completely open and smooth.
Lock the Optic Forward into Your Picatinny Rail Slots
Mounting an optic to a rifle, carbine, or shotgun usually relies on a standard Picatinny or 20mm slotted accessory rail. This is a ribbed metal bar with horizontal cross-slots that anchor the optic base against forward and backward movement. Where you position the sight along the rail depends on your preferred eye relief and whether you want to line up backup iron sights through the optic glass. If you plan to run iron sights through your window, check out our guide on the best iron sights for cowitness with red dot sights to make sure your sight heights match up properly.
- Loosen the cross-bolts on your optic base or riser mount so the clamping bar opens wide enough to clear the rail teeth.
- Set the optic onto the rail at your chosen position, making sure the cross-bolt drops cleanly into the groove between the rail teeth.
- Push the entire sight firmly forward toward the muzzle of the gun while keeping downward pressure on the base.
- Hold that forward pressure with your support hand while you tighten the cross-bolt nuts with your fingers.
- Check the clamp bar to confirm it grips the beveled rail edge squarely on both sides without tilting upward.
Pushing the optic forward before tightening is essential for holding zero. When you fire a shot, recoil throws the gun backward into your hands or shoulder. The optic wants to remain still due to inertia, which causes the mounting cross-bolt to slam hard against the front wall of the rail slot. If you tighten your mount while it rests against the rear wall, the optic will shift forward on the very first shot, ruining your zeroing adjustments.
Align Your Adapter Plate and Set the Optic Flush on the Slide
Pistol slides undergo intense back-and-forth acceleration every time a round cycles. This violent movement puts heavy shear stress on small mounting screws. Taking your time during alignment prevents snapped hardware and loose sights down the road.
- Fit your adapter plate to the bare slide cut if your handgun uses a modular plate system. Press the plate down flat over the slide pins and check for any rocking or uneven gaps along the edges.
- Apply one small drop of medium-strength blue thread-locking fluid to the plate mounting screws. Thread them into the slide by hand and tighten them down according to the plate manufacturer instructions.
- Place a single drop of blue threadlocker on the lower three threads of your optic mounting screws. Never coat the entire screw length.
- Lower the red dot sight straight down over the guide pins on the slide or adapter plate. Press down firmly with your thumb and nudge the optic forward against the front pins to eliminate any loose play.
- Start both optic screws by hand, turning your driver slowly until the threads catch cleanly without cross-threading, then spin them down until the screw heads touch the optic frame.
Never squeeze liquid threadlocker directly into the screw holes on your firearm slide. Dripping liquid into a closed, blind hole creates hydraulic pressure when you drive the screw down. That trapped fluid can stop the screw from seating all the way, or it can even crack thin metal at the bottom of the slide cut. Putting a tiny drop directly on the screw threads avoids this problem completely.
Use an Inch-Pound Torque Tool and Alternate Your Screws Evenly
Tightening optic screws by feel using a simple L-shaped wrench is an easy way to strip threads or snap screw heads clean off. You need an inch-pound torque tool, which is a specialized turning wrench that slips or clicks once you reach a specific turning tightness. Never use an automotive foot-pound wrench. One foot-pound equals twelve inch-pounds, so an automotive wrench will shear tiny optic screws before you even feel resistance.
Most handgun slide screws require between 10 and 15 inch-pounds of tightness, while rail clamp bolts on rifles usually take 20 to 30 inch-pounds. Always check the paperwork that came with your optic and your firearm to find the exact manufacturer numbers. If your pistol slide manual recommends 12 inch-pounds and your red dot manual suggests 15 inch-pounds, always follow the lower number. It is far better to protect the expensive threads in your firearm slide.
Tighten your mounting screws in balanced stages, just like tightening the lug nuts on a car wheel. Turn the first screw until it makes gentle contact, then turn the second screw to the same light snugness. Set your torque tool to half of your target number, tighten the first screw until the tool clicks, then do the same for the second screw. Finish by setting the tool to your final torque setting and tightening both screws. Alternating back and forth prevents the optic housing from tilting to one side, which keeps the optical glass flat and protects your zero.
Mark Your Screws and Allow the Threadlocker to Cure Fully
- Draw a witness mark across the edge of each screw head and onto the optic body using an oil-based paint pen or bright nail polish.
- Check the manual function of your firearm by pulling the slide or charging handle back to confirm smooth, unhindered movement.
- Leave the firearm resting undisturbed on your workbench for a full 24 hours so the thread-locking fluid can set.
- Inspect the painted witness marks after your first range visit to verify that the screws have not moved at all.
Liquid threadlocker is an anaerobic compound, meaning it only hardens into a tough polymer bond when enclosed between metal threads away from open air. That chemical curing process takes roughly 24 hours to reach full strength. If you take your firearm to the range right after mounting, the shock of live recoil will shatter the wet glue before it hardens, leaving you with loose hardware within a few dozen rounds.
A painted witness mark gives you instant peace of mind. By drawing a thin, bright line from the screw head onto the optic housing, you create a visual indicator. If a screw ever loosens even a tiny fraction of a turn under recoil, the painted line will break and misalign, showing you right away that the screw needs attention before it flies off the gun.
Choose the Right Footprint and Mount Style for Your Firearm
Picking the right optic setup comes down to how your firearm is built and how you plan to use it. Direct mounting to a dedicated slide cut is always the most secure option because it eliminates the extra screws and plates that can work loose over time. If your firearm uses a modular cut, choose high-grade aluminum or steel adapter plates that match your exact optic footprint with tight tolerances.
For target shooting or rimfire training, such as choosing a red dot sight for Ruger Mark pistols, low-profile rail mounts and compact open-window sights keep the firearm balanced while giving you a clear sight picture. Handgun defense setups generally benefit from a larger aiming dot, around 4 to 6 MOA, which is fast to find during rapid presentation. Rifle setups often pair best with a fine 2 MOA dot inside an enclosed tube sight for precise shots at longer distances. Look for optics with motion-sensing auto-on features that wake the dot when moved, durable housings, and clear click dials for windage and elevation adjustments.

- ARS Mark8.8
ARS Mark is a ranking system developed by bestairriflescopes.com. ARS Mark has no relationship or impact from any manufacturers or sales agent websites. Learn more
- BrandCVLIFE
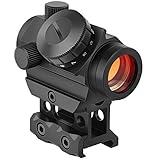
- ARS Mark8.6
ARS Mark is a ranking system developed by bestairriflescopes.com. ARS Mark has no relationship or impact from any manufacturers or sales agent websites. Learn more
- BrandMidTen

- ARS Mark8.4
ARS Mark is a ranking system developed by bestairriflescopes.com. ARS Mark has no relationship or impact from any manufacturers or sales agent websites. Learn more
- BrandCVLIFE

- ARS Mark8.4
ARS Mark is a ranking system developed by bestairriflescopes.com. ARS Mark has no relationship or impact from any manufacturers or sales agent websites. Learn more
- BrandYOIPA

- ARS Mark8.0
ARS Mark is a ranking system developed by bestairriflescopes.com. ARS Mark has no relationship or impact from any manufacturers or sales agent websites. Learn more
- BrandTuFok

- ARS Mark7.8
ARS Mark is a ranking system developed by bestairriflescopes.com. ARS Mark has no relationship or impact from any manufacturers or sales agent websites. Learn more
- BrandUUQ

- ARS Mark7.4
ARS Mark is a ranking system developed by bestairriflescopes.com. ARS Mark has no relationship or impact from any manufacturers or sales agent websites. Learn more
- Brandohhunt

- ARS Mark7.0
ARS Mark is a ranking system developed by bestairriflescopes.com. ARS Mark has no relationship or impact from any manufacturers or sales agent websites. Learn more
- BrandOHHLION
Last update on 2026-10-01 / Affiliate links / Images, Product Titles, and Product Highlights from Amazon Product Advertising API
FAQs
How do I know if my pistol mounting screws are too long?
A screw that is too long will either bottom out before clamping the optic tight, or it will dig into the extractor plunger assembly on the right side of the slide. You can confirm clearance by removing the slide back plate and extractor rod, then shining a light down the channel while the screw is installed. If you see the screw tip protruding into the tunnel or binding the plunger, the screw must be shortened.
Which color threadlocker should I use on optic screws?
Always use medium-strength blue threadlocker for red dot sights and mounting plates. Blue threadlocker keeps screws locked tight against recoil while still letting you break them loose with hand tools when replacing batteries or swapping optics. Never use red threadlocker, because red requires high heat from a blowtorch to remove, which will destroy the delicate electronics and lens seals inside your red dot sight.
Why do I need to push the sight forward while tightening it on a rail?
When you fire a shot, the gun kicks backward, and inertia forces the optic forward inside the rail slot. Pushing the sight firmly forward against the front rail tooth while tightening removes all forward slack beforehand. This prevents the optic from shifting forward during live fire and ensures your zero stays true from the very first shot.
Can I reuse optic screws after removing my red dot sight?
You can reuse optic screws if the threads and tool heads are in clean, undamaged condition, but you must scrub away the dried, crusty threadlocker with alcohol and a wire brush first. If the screw socket shows any rounding or feels loose on your driver bit, discard it and use fresh screws. Optic screws stretch slightly under torque, and worn heads can strip easily during reinstallation.


12 Best 22 Pcp Air Rifle For Hunting of 2026 With Quiet Power

7 Best 22 Pcp Air Rifle Under 300 of 2026 For Backyard Pest Control

10 Best 22 Break Barrel Air Rifles of 2026 For Backyard Pest Control

10 Best 30 Caliber Pcp Air Rifle of 2026 For Medium Game

Top Best 177 Air Rifle Under 100: Budget-Friendly Picks for 2026

How to Safely Reload Shotgun Shells at Home

11 Best Co2 Air Rifle For Pest Control of 2026 To Ensure Humane Dispatch

12 Best Inexpensive Air Rifles of 2026 For Dependable Backyard Accuracy






