
How to Install an A2 Front Sight Straight and Secure

Mounting an A2 front sight on a rifle barrel is nothing to worry about once the basic steps are clear. The job comes down to sliding the triangular sight housing over the barrel, centering it over the small gas vent hole, and locking it down with pins or clamp screws. Keeping the post upright and the gas hole open ensures reliable shooting without any feeding trouble.
The exact approach depends on your hardware. Some sight housings tighten with simple side screws, while traditional versions use taper pins, which are small wedge-shaped metal pins that only fit from one direction. A barrel with pre-cut grooves lets you drive those pins in at your workbench, but a smooth barrel without notches needs a clamp-on model or machine work. Here is how to check your setup and install the sight properly.
Identifying Your A2 Hardware and Prepping Your Bench
Before touching a single tool, verify that your rifle is completely unloaded. Drop the magazine from the lower receiver. Pull the charging handle back, lock the bolt open, and visually inspect the chamber. Sweep a finger inside the chamber to confirm no round remains. Once the rifle is clear, separate the upper receiver from the lower receiver so you can work safely on the barrel alone.
Mounting a traditional front sight base (the triangular metal front sight housing) requires knowing which attachment system you have. Most military-style assemblies use taper pins (wedge pins that are slightly wider on one end). These pins pass through pre-cut grooves on the underside of the barrel, locking the housing under mechanical wedge tension. The other option is a clamp-on housing. A clamp-on model uses split metal bands at the bottom that tighten around the barrel with cross-bolts. Clamp-on models require no barrel cuts, making them ideal for smooth, undrilled barrels.
Working on barrel hardware requires solid support. The wrong punch or an uneven work surface can deform pin heads or gouge barrel finishes. Set up your workspace with the following gear before you begin:
- Front sight bench block: A dense resin block with cutouts that supports the triangular housing flat on your table.
- Hammers: A brass mallet to prevent marring metal and a small steel hammer for firm blows.
- Punches: A stout starter punch to begin seating pins without bending, plus flat-nose drive punches.
- Inch-pound torque tool: A precision hand driver that tightens clamp screws to exact manufacturer limits.
- Thread-locking fluid: Medium-strength blue formula to prevent mounting screws from backing out under recoil.
- Degreaser: Isopropyl alcohol or aerosol parts cleaner to remove oils from mating surfaces.
- Measuring tool: A set of calipers or a small steel ruler.
Step-by-Step Installation for Clamp-On and Pinned Sights
Your installation path depends on whether your housing uses bottom clamp bolts or driven taper pins. Both methods demand exact placement over the gas port (the tiny gas vent hole on top of the barrel).
Installing a Clamp-On A2 Sight
- Clean the barrel journal: Spray the smooth mounting area of the barrel with degreaser to strip off factory oil and dirt. Wipe down the inside of the triangular metal front sight housing. Clean surfaces give the clamp maximum friction against the barrel.
- Position the housing: Loosen the bottom clamp screws so the base spreads open slightly. Slide the housing over the muzzle toward the barrel shoulder. If using a two-piece handguard end cap, place the cap against the shoulder first, then butt the sight housing against it. Without an end cap, leave a small gap of roughly 0.025 inches (about the thickness of a business card) between the shoulder and the base so the gas ports align.
- Apply thread-locking fluid: Remove each clamp screw individually. Add two drops of medium-strength thread-locking fluid to the threads and restart them loosely by hand.
- Set initial alignment: Look down the upper receiver from behind the rear rail. Eyeball the sight post to confirm it stands vertically upright rather than tilting to either side.
- Torque the screws: Use an inch-pound torque tool to tighten each bolt in an alternating pattern, turning each screw a quarter turn at a time. Tightening one screw completely before the other will twist the base off-center. Tighten to manufacturer guidelines, which typically sit between 25 and 35 inch-pounds.
Installing a Taper-Pin A2 Sight
- Clean and check the pin channels: Taper pins only fit barrels with pre-cut grooves that match your specific housing. Wipe the channels clean of any grit or debris.
- Slide the base into position: Slide your handguard cap over the barrel if your rifle uses standard drop-in handguards. Slide the triangular housing over the barrel journal until its cross-holes align with the barrel grooves.
- Confirm pin orientation: Taper pins are directional wedge pins that are slightly wider on one end. On standard military builds, taper pins enter from the left side and exit toward the right side (from the shooter's perspective behind the rifle). Insert the narrow end of each pin into the left side of the sight base.
- Support the barrel: Rest the sight housing inside your bench block with the left side facing upward. The barrel must lie completely flat so hammer energy drives the pin straight into the channel rather than flexing the barrel.
- Start the pins: Press the narrow ends into both holes by hand. Tap the wider head of each pin gently with a brass mallet until the pins hold themselves upright in the barrel grooves.
- Drive the pins home: Place a short starter punch square against the wider pin head. Strike the punch firmly with a steel hammer, alternating between the front and rear pins to draw the housing down evenly. Drive them until the heads sit flush against the outer housing.
Gas Port Alignment and the Virgin Barrel Hurdle
Securing the housing to the barrel is only part of the job. If the gas channel inside the sight base fails to sit square over the gas port on top of the barrel, your rifle will fail to operate reliably. High-pressure gas must travel from the bore, through the tiny gas vent hole, up into the sight base, and down the gas tube to cycle the action.
A misaligned gas block causes short-stroking (failing to cycle or load the next round). The bolt carrier lacks the gas pressure needed to travel fully rearward, resulting in failure to eject fired brass or failure to strip the next cartridge from the magazine. To check alignment before driving pins, draw a light pencil line extending back from the barrel gas vent hole. Draw a corresponding reference mark on the front lip of the sight base. Aligning those two marks ensures your gas passages connect cleanly.
Vertical alignment is equally vital. If the triangular housing is canted (tilted off-center), the front post leans to one side. A canted sight post forces you to dial your rear sight aperture completely to one edge of its windage track just to hit paper. You can verify vertical alignment by clamping the upper receiver in a vise block, placing a small bubble level across the receiver rail, and placing a second level across the ears of the front sight base. Adjust the base until both levels match.
Many builders mount an A2 sight to pair with an optic. If you plan to run backup irons with a glass sight, check out the best iron sights for cowitness with red dot sights in 2026 to see how different sight heights align. In an absolute co-witness setup, your aiming dot aligns directly over the front sight post. In a lower one-third co-witness setup, the iron sights sit in the lower third of the optic window, keeping your main viewing area open.
Undrilled or virgin barrels present a challenge that trips up many home builders. A virgin barrel has a smooth gas journal without pre-cut pin grooves. Never attempt to drill taper pin channels through a sight base using a handheld power drill. The drill bit will skate against the curved surface of the barrel steel, egging out the holes in the sight housing and permanently marring the barrel.
Drilling taper pin grooves requires a rigid milling machine, specialized barrel fixtures, and a number 2/0 taper reamer. The housing must be locked in place under heavy mechanical clamps while the channels are drilled undersized and reamed to a precise matching taper. If your barrel lacks factory-cut grooves, install a clamp-on A2 base instead, or send the barrel to a qualified gunsmith with the proper milling equipment.
Adjusting Sight Elevation and Choosing the Right Tool
Once your A2 front sight base is secure, you must adjust the threaded front post to zero your rifle. The front post controls elevation, shifting your shot impact up or down. Turning this post with pliers or a flat screwdriver will slip, scratching your finish and damaging the adjustment notches.
An A2 front post features four notches spaced around a circular base, held in position by a spring-loaded detent pin. Adjusting the post requires a dedicated front sight tool with prongs that press the detent pin down while gripping the post to rotate it.
When selecting a front sight adjustment tool for your bench or field kit, check for these practical details:
- Dual-ended design: Look for a tool featuring a 4-prong end for standard A2 posts and a 5-prong end for older A1 military posts.
- Tough tool steel: Choose tools machined from solid steel or chromium-vanadium alloy so the small prongs will not twist or snap under pressure.
- Knurled grip body: A textured outer surface gives your fingers the traction needed to push downward against the detent spring and turn the post smoothly.
- Compact size: A small tool roughly two inches in length fits easily inside a range bag or rifle pistol grip compartment.
To adjust elevation, seat the tool prongs over the post and press down firmly to sink the detent pin below the notch track. Rotate the tool clockwise (the direction marked with an arrow on the housing) to screw the post downward. Lowering the post forces you to raise the rifle muzzle, raising your bullet impact on the target. Turning counter-clockwise raises the post, which lowers your point of impact.
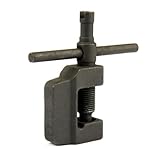
- ARS Mark8.4
ARS Mark is a ranking system developed by bestairriflescopes.com. ARS Mark has no relationship or impact from any manufacturers or sales agent websites. Learn more
- BrandTACFUN

- ARS Mark8.2
ARS Mark is a ranking system developed by bestairriflescopes.com. ARS Mark has no relationship or impact from any manufacturers or sales agent websites. Learn more
- BrandTACFUN

- ARS Mark7.6
ARS Mark is a ranking system developed by bestairriflescopes.com. ARS Mark has no relationship or impact from any manufacturers or sales agent websites. Learn more
- BrandNanchroadly
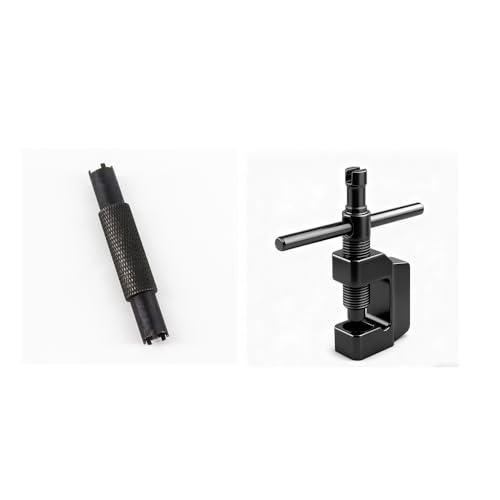
- ARS Mark-
ARS Mark is a ranking system developed by bestairriflescopes.com. ARS Mark has no relationship or impact from any manufacturers or sales agent websites. Learn more
- BrandAISUNOUTDOOR
Last update on 2026-10-01 / Affiliate links / Images, Product Titles, and Product Highlights from Amazon Product Advertising API
Frequently Asked Questions
Which direction do taper pins go when installing an A2 sight?
Taper pins install from the left side of the rifle toward the right side, from the perspective of someone holding the rifle to shoot. The narrower end of each wedge pin enters the left hole first. If you ever need to remove the sight, drive the pins out from right to left so they exit through the wider openings.
Why is my rifle short-stroking after installing an A2 front sight?
Short-stroking usually means the gas channel inside the sight housing is not centered over the gas port on top of the barrel. If the housing is twisted or pushed too tight against the barrel shoulder, gas flow is restricted and the bolt carrier cannot cycle fully. Loosen the housing and confirm that the gas vent hole lines up perfectly with the internal passage.
Can I use set screws instead of taper pins to hold an A2 sight base?
Standard military A2 sight bases are not designed for set screws and should not be modified with them at home. Set screws require shallow dimples drilled into the bottom of the barrel to keep the base from rotating under recoil. If your barrel lacks pin channels, a dedicated clamp-on A2 base provides much better holding power than set screws.


12 Best 22 Pcp Air Rifle For Hunting of 2026 With Quiet Power

7 Best 22 Pcp Air Rifle Under 300 of 2026 For Backyard Pest Control

10 Best 22 Break Barrel Air Rifles of 2026 For Backyard Pest Control

10 Best 30 Caliber Pcp Air Rifle of 2026 For Medium Game

Top Best 177 Air Rifle Under 100: Budget-Friendly Picks for 2026

How to Safely Reload Shotgun Shells at Home

11 Best Co2 Air Rifle For Pest Control of 2026 To Ensure Humane Dispatch

12 Best Inexpensive Air Rifles of 2026 For Dependable Backyard Accuracy






