How to Install Glock Sights Without Scratching Your Slide

Many gun owners assume changing factory sights requires an expensive trip to a gunsmith or heavy hammering. In reality, anyone can swap Glock sights at home with a few simple hand tools. Once the slide is off the frame, a thin nut driver unthreads the tiny front screw from underneath, and a screw-driven clamp tool slides the rear piece out of its notched groove. Adding a single drop of liquid screw glue locks the new front post so it never rattles loose.
A few details change the process. A dedicated clamp tool presses the rear sight smoothly, whereas a soft nylon punch costs less but takes careful tapping. Extra-tall sights made to peek through a red dot window need careful clearance, and some snug aftermarket bases require light hand-fitting with a fine file before sliding into the groove. Here is the safest way to prepare your bench and install both pieces cleanly.
Tools You Need on the Bench
Swapping your sights at home is straightforward when you use the exact tools built for the job. Attempting to install Glock sights with regular garage tools is the most common reason gun owners strip small screws or gouge their slide finish. Gather these items on your workbench before touching the firearm:
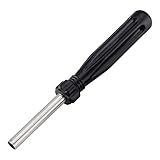
- Glock front sight tool: A 3/16-inch thin-walled hex nut driver. Standard hardware sockets have thick walls that bind against the inside of the slide pocket, which rounds off the tiny screw head. A dedicated thin-walled driver fits cleanly down over the screw.
- Sight pusher tool: A screw-driven clamp tool that slides sights sideways through the dovetail (the notched slot cut across the slide). This tool pushes metal sights smoothly without the impact damage caused by hammers.
- Blue threadlocker: Liquid screw glue that stops parts from vibrating loose under recoil. Use medium-strength threadlocker (typically blue). Never use red threadlocker, which requires intense blowtorch heat to break free.
- Rubbing alcohol and cotton swabs: Essential for wiping away manufacturing oil and grease from the slide pocket and the screw threads so the liquid screw glue bonds properly.
- Painter's tape or electrical tape: Used to pad the slide walls before clamping them into tools, preventing metal-on-metal scratches.
- A fine needle file or 400-grit sandpaper: Handy if you are fitting tight aftermarket metal sights that need a slight touch of hand-fitting to start into the slide slot.
- Digital calipers or a small millimeter ruler: Used to measure the space on either side of the rear sight base to confirm it sits dead center.
Improvising with pliers, claw hammers, or steel screwdrivers will almost certainly chew up the metal or crack delicate parts. Having the correct driver and pusher ready keeps the job simple, clean, and stress-free.
Prepping the Slide Safely
Before doing any mechanical work on a firearm, you must verify that the gun is completely unloaded and inert. Remove the magazine, pull the slide back, and lock it open. Look inside the chamber and feel inside with your finger to verify no live round is present. Remove all ammunition from your workspace completely.
Once you verify the gun is clear, point the muzzle in a safe direction, press the trigger, pull down the two slide lock tabs, and push the slide forward off the frame. This simple field strip (taking the slide off the frame) leaves you with just the slide assembly.
Lift out the recoil spring assembly, then remove the barrel. Set the polymer frame, barrel, and spring off to the side. Lay a soft rubber mat or a folded clean shop towel across your table. This padded surface stops the steel slide from sliding around and prevents small screws from bouncing onto the floor if you drop them. Wipe away any loose oil or carbon buildup around the factory sights using a clean cloth.
Step-by-Step Instructions to Install Glock Sights
Follow these numbered steps in sequence to swap both the front and rear sights safely without damaging your slide finish or stripping any hardware.
-
Remove the factory front sight screw from under the slide. Turn the slide upside down so the muzzle end faces you. Insert your thin-walled 3/16-inch hex driver into the small oval pocket under the front sight, press downward to seat the socket squarely over the tiny screw head, and turn counterclockwise.
Why this step matters: Glock front sight screws have very thin, shallow heads. If the tool is tilted or too thick to seat flat against the screw base, it will slip off and strip the hex edges, leaving the screw stuck inside your slide.
-
Clean and degrease the mounting hole and screw threads. Lift off the old front sight post. Dip a cotton swab in rubbing alcohol and thoroughly scrub the oval hole on the slide and the threads of your new mounting screw. Let the metal air-dry for two minutes.
Why this step matters: Factory packaging oil and preservative grease prevent liquid screw glue from bonding to bare metal. If you skip degreasing, the glue will not cure, and your front sight will shake loose during shooting.
-
Apply a tiny drop of blue threadlocker to the front screw. Place one small droplet of blue liquid screw glue directly onto the threads of the new screw. You only need a fraction of a drop to coat the threads.
Why this step matters: The sharp recoil of a cycling slide produces intense vibration that will loosen an unglued screw within a few dozen rounds. Blue threadlocker keeps the screw tight while still allowing removal later with hand tools.
-
Seat the new front sight straight and tighten the screw gently. Drop the new front sight post into the oval hole on top of the slide. Hold the sight post straight and parallel with the slide edges using your fingers. From underneath, start the screw by hand using the hex driver, then snug it down until it stops.
Why this step matters: Overtightening will snap the tiny screw shank in half, ruining the screw and possibly damaging the sight. Snug hand pressure with a small driver provides plenty of holding force without breaking the metal.
-
Wrap the slide in tape and mount it into the sight pusher. Apply two layers of blue painter's tape to both sides of the slide where the clamping jaws will touch. Place the slide into the sight pusher tool and tighten the side clamps so the slide sits upright and completely level.
Why this step matters: Bare metal tool clamps can scuff the slide coating under heavy pressure. Padded tape protects the finish, while a rigid, level clamp stops the slide from twisting as the pusher screw turns.
-
Push the factory rear sight out from left to right. Lower the pusher block so it aligns with the thick lower base of the rear sight, not the top notch. Turn the drive handle slowly clockwise to push the sight out toward the right side of the slide (as viewed from the shooter's position looking toward the muzzle).
Why this step matters: Glock slide slots are standard cut so sights drift out toward the right side smoothly. Pushing against the tall top blade instead of the solid base can snap plastic factory sights or bend thin metal blades.
-
Check the fit of the new rear sight base by hand. Take your new metal rear sight and slide it into the dovetail slot from the right side using only light finger pressure. It should enter the slot roughly one-third to halfway across before stopping.
Why this step matters: Aftermarket sight bases are made slightly oversized so they fit snugly in different slide tolerances. If a sight will not start by hand, forcing it with a pusher tool will gouge your slide slot or crush the sight base.
-
Press the new rear sight into the center from right to left. Place the slide back in the pusher tool, align the pusher block against the new sight base, and slowly turn the drive bolt to slide the sight in from the right toward the center of the slide.
Why this step matters: Turning the drive screw slowly lets you feel if the metal binds or tilts. A controlled, steady push seats the sight cleanly without marring the finish or cracking glass tritium vials.
Using a Brass or Nylon Punch as a Budget Method
If you do not own a screw-driven sight pusher tool, you can install metal sights using a brass or nylon punch and a small hammer. But this method requires patience, steady hands, and extra caution to avoid dinging your slide.
Never place an unsupported slide on a flat table and hit it with a hammer. Instead, wrap your slide in thick leather or heavy cardboard and clamp it firmly into a bench vise. The slide must be supported securely right under the dovetail slot so all the hammer energy moves the sight rather than flexing your gun.
Place the flat face of the nylon or brass punch against the lower base of the sight, right where it enters the slide slot. Hold the punch steady at a slight downward angle. Tap the punch with light, controlled strokes using a small four-ounce or eight-ounce hammer. Use multiple light taps rather than heavy swings. Brass is softer than the steel slide, so it will mark the sight with a gold-colored smudge rather than scratching the steel. You can wipe away brass marks later using gun solvent.
Never use this punch method on night sights. Night sights contain miniature glass vials filled with radioactive tritium gas to make the aiming dots glow in the dark. The sharp shock wave of a hammer strike can shatter those fragile glass vials, causing the gas to leak out and permanently darkening your glowing dots. Also, never use steel punches, flathead screwdrivers, or carpenter's chisels. Hardened steel will gouge your slide finish and ruin the dovetail notch instantly.
Centering and Checking Sight Alignment
Once both sights sit on your slide, verify that the rear sight is centered correctly before you reassemble the gun. A sight that is off-center by even a fraction of a millimeter will throw your shots several inches off target at twenty yards. Run through these checks to confirm proper alignment:
- Caliper verification: Measure the distance from the left outer edge of the slide to the left edge of the rear sight base with digital calipers. Then measure the distance from the right outer edge of the slide to the right edge of the rear sight base. The two numbers should match within a few thousandths of an inch.
- Visual symmetry check: Hold the slide up to eye level against a brightly lit white wall. Look down the top flat of the slide to verify that the front blade sits completely parallel with the slide sides and the rear sight has equal metal showing on both sides of the slot.
- Optic window check: If you installed tall sights on a slide equipped with a red dot optic, confirm your sights co-witness (line up your backup iron sights through the optic glass window). The iron sights should sit neatly in the lower third of the glass without blocking your view of the main aiming dot. For detailed combinations and sight setups, check the best iron sights for cowitness with red dot sights in 2026.
- Range confirmation: Reassemble the firearm, reinstall the barrel and recoil spring, and perform a full function check. Head to an outdoor or indoor shooting range, place the handgun on a sturdy sandbag rest, and fire five slow, deliberate shots at a target set at fifteen yards.
If your group lands to the left of the bullseye, use your sight pusher to move the rear sight slightly to the right. If your shots hit to the right, move the rear sight slightly to the left. Remember the basic rule of iron sights: always move your rear sight in the direction you want the bullet impact to move on paper.
What to Look for in Glock Sight Installation Tools
Investing in dedicated sight tools makes future maintenance and sight upgrades fast and worry-free. When shopping for front sight drivers and rear sight pusher tools, pay attention to a few structural details before buying.
For front sight drivers, look for a tool made from hardened steel with an ultra-thin socket wall. Standard hardware sockets simply do not fit into the recessed Glock slide pocket. A driver with an internal magnet makes a big difference because it holds the microscopic screw securely in place while you guide it into the slide.
For rear sight pushers, choose a heavy-duty model built with CNC machined aluminum alloy or solid steel hardware. Inexpensive pushers made of thin sheet metal or plastic flex under pressure, which causes the pusher block to slip off the sight base and scratch the slide. Look for a pusher that grips the slide securely from the sides and bottom. This prevents the slide from tilting or lifting as you turn the drive screw.
Finally, check the pusher block clearance. If you plan to install extra-tall metal sights for use with a suppressor or a slide-mounted red dot optic, ensure the tool allows you to raise or lower the pusher block so it clears the taller sight blade while still pushing directly on the lower dovetail base.

- ARS Mark9.6
ARS Mark is a ranking system developed by bestairriflescopes.com. ARS Mark has no relationship or impact from any manufacturers or sales agent websites. Learn more
- BrandTRUGLO

- ARS Mark9.4
ARS Mark is a ranking system developed by bestairriflescopes.com. ARS Mark has no relationship or impact from any manufacturers or sales agent websites. Learn more
- BrandLUSOFAE

- ARS Mark9.2
ARS Mark is a ranking system developed by bestairriflescopes.com. ARS Mark has no relationship or impact from any manufacturers or sales agent websites. Learn more
- BrandPridefend
- ARS Mark9.2
ARS Mark is a ranking system developed by bestairriflescopes.com. ARS Mark has no relationship or impact from any manufacturers or sales agent websites. Learn more
- BrandRaiseek

- ARS Mark9.2
ARS Mark is a ranking system developed by bestairriflescopes.com. ARS Mark has no relationship or impact from any manufacturers or sales agent websites. Learn more
- BrandLtnsimy

- ARS Mark9.0
ARS Mark is a ranking system developed by bestairriflescopes.com. ARS Mark has no relationship or impact from any manufacturers or sales agent websites. Learn more
- BrandATG

- ARS Mark8.6
ARS Mark is a ranking system developed by bestairriflescopes.com. ARS Mark has no relationship or impact from any manufacturers or sales agent websites. Learn more
- BrandGeneric

TRUGLO Sight-Setter Durable Compact Lightweight Easy-to-Use Rear Sight Adjustment Tool
View on Amazon- ARS Mark8.6
ARS Mark is a ranking system developed by bestairriflescopes.com. ARS Mark has no relationship or impact from any manufacturers or sales agent websites. Learn more
- BrandTRUGLO

- ARS Mark8.4
ARS Mark is a ranking system developed by bestairriflescopes.com. ARS Mark has no relationship or impact from any manufacturers or sales agent websites. Learn more
- BrandSporGain
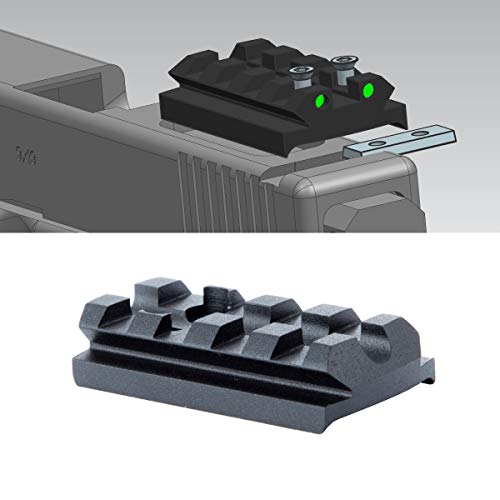
- ARS Mark8.0
ARS Mark is a ranking system developed by bestairriflescopes.com. ARS Mark has no relationship or impact from any manufacturers or sales agent websites. Learn more
- BrandTuFok
Last update on 2026-10-01 / Affiliate links / Images, Product Titles, and Product Highlights from Amazon Product Advertising API
Frequently Asked Questions
Which direction should a Glock rear sight be pushed out and in?
Looking down the slide from back to front (from the rear plate toward the muzzle), push the old factory rear sight out from left to right. When installing the new rear sight, push it into the dovetail slot from right to left toward the center. This matches standard slide cut tolerances and keeps the slot clean.
What should I do if the new rear sight is too tight to push into the dovetail?
If the new sight base does not slide in about one-third of the way by hand, never force it with the pusher tool. Remove the sight, place a sheet of 400-grit sandpaper on a flat table, and rub the flat bottom of the sight base across the paper for a few light strokes. Wipe away metal dust, check the fit in the slide, and repeat until it starts smoothly by hand.
Can I use red threadlocker on the front sight screw?
No, you should only use medium-strength blue threadlocker on Glock front sight screws. Red threadlocker requires high heat from a small torch to break the bond, which can damage night sight vials, melt plastic inserts, and discolor your slide finish. Blue threadlocker easily resists recoil vibration but still unscrews with hand tools when you need to change sights.
How do I know if I need tall suppressor-height sights instead of standard sights?
You only need extra-tall sights if you are using a sound suppressor attached to your barrel or a slide-mounted red dot optic. Tall sights allow you to aim over the top of a suppressor tube or view your backup iron sights through the optic glass window. For standard handguns without optics or suppressors, stick with factory-height sights to keep your original point of impact.


12 Best 22 Pcp Air Rifle For Hunting of 2026 With Quiet Power

7 Best 22 Pcp Air Rifle Under 300 of 2026 For Backyard Pest Control

10 Best 22 Break Barrel Air Rifles of 2026 For Backyard Pest Control
10 Best 30 Caliber Pcp Air Rifle of 2026 For Medium Game
Top Best 177 Air Rifle Under 100: Budget-Friendly Picks for 2026

How to Safely Reload Shotgun Shells at Home

11 Best Co2 Air Rifle For Pest Control of 2026 To Ensure Humane Dispatch

12 Best Inexpensive Air Rifles of 2026 For Dependable Backyard Accuracy