How to Put a Sight on a Bow Without Stripping the Threads

Many archers assume bolting on a sight is just about cranking screws into whatever holes match, but that rush easily strips the soft aluminum threads in the riser (the central handle of the bow). Installing a sight properly means you must line up the bracket with the threaded riser holes and start every bolt by hand before snugging it down with a hex key (an L-shaped Allen wrench).
The exact mounting steps change slightly with your equipment. Compound bows rely on two standard threaded holes on the riser, while recurve bows often use a lighter single-screw bracket. Your shooting hand determines the side, as a right-handed bow holds the bracket on the right side of the handle facing downrange. The sight style, whether a basic fixed multi-pin box or an adjustable slider bar, also affects the starting height. Following a steady process keeps your gear safe and gets your bow ready to shoot.
The Short Version
- Line up the bracket holes with the threaded holes on the outside of your riser (the central bow handle).
- Start each mounting bolt with your fingers for two full turns to prevent cross-threading (forcing a screw in crooked).
- Snug both bolts down evenly using an Allen wrench (an L-shaped hex key tool) without overtightening.
- Check that your sight pins sit square to the arrow rest and confirm the bubble level rests centered before shooting.
Tools and Parts to Gather Before You Start
Mounting an archery sight takes only a few minutes when you have the right gear ready. Using the wrong size wrench can round out screw heads and turn a simple task into a frustrating repair.
- Standard hex keys: Most compound bows use standard American hex sizes. An Allen wrench (an L-shaped hex key tool) in 7/64, 1/8, or 9/64 inch is common for mounting bolts. Make sure the key fits deep into the bolt head without slipping.
- Two mounting bolts: Sights include two matching steel bolts, usually 10-24 thread pitch. Check the threads for metal burrs or paint before installing.
- The sight bracket assembly: This includes the mounting plate, any extension arms, and the front housing holding your pins.
- Blue thread-locking fluid: Bow vibration loosens hardware over time. A single drop of removable blue threadlocker keeps screws secure. Avoid permanent red threadlocker.
- A padded surface or bow stand: Rest your bow on a soft mat or secure it in a portable vise to protect the finish while working.
The mounting bolts are steel, while the riser (the central bow handle) is machined aluminum. Aluminum is much softer than steel. Forcing a steel screw into aluminum at an angle will tear the softer threads out instantly. Working carefully by hand protects the bow handle from permanent damage.
Finding the Sight Mounting Holes on Your Bow Riser
Look at the sight window on your bow, which is the cutout section directly above the arrow shelf. Along the flat side of that window, you will find threaded holes drilled into the riser. Modern bows follow standard AMO spacing, placing two threaded holes 1.312 inches apart. This standard ensures almost every modern sight bracket fits your bow handle directly.
The mounting side depends on which hand you use to shoot. If you shoot right-handed, you hold the bow grip in your left hand and pull the string with your right. In that setup, the sight bracket bolts onto the right side of the riser, facing away from you toward the target. For a left-handed bow, the bracket mounts on the left side. The sight pins always point back toward your eye while the housing extends toward the target.
Many risers, including options among the best bow sight for Mathews bows, feature four or six threaded holes stacked vertically. These extra holes let you set the bracket higher or lower to match your anchor point. They also leave open holes to mount a bow quiver alongside your sight.
How to Bolt the Sight to the Riser Step by Step
Follow these steps to mount the sight securely without damaging the aluminum riser threads.
- Inspect the threads: Look into the riser holes with a flashlight. Clear away any factory paint, dust, or metal shavings with a clean cotton swab so the bolts turn freely.
- Position the bracket: Place the sight bracket against the riser and align its mounting slots with the threaded holes that match your eye level. Hold the bracket flat against the handle with one hand.
- Start the top bolt by hand: Insert one bolt through the bracket into the top hole. Turn it backward slightly until you feel a faint click into the thread groove, then spin it clockwise two full turns using your fingertips. If you feel resistance, back it out and realign it to prevent cross-threading (forcing a screw in crooked).
- Start the bottom bolt by hand: Thread the second bolt into the lower hole using your fingers. Keep both bolts slightly loose so the bracket can still shift on the riser.
- Snug the bolts evenly: Insert the short end of your Allen wrench into each bolt and turn until the heads touch the bracket. Alternate between the screws, tightening each a half turn at a time so the plate seats flat.
- Apply firm final tension: Give each bolt a final quarter-turn using the wrench. Stop as soon as you feel firm resistance. Do not lean your body weight into the tool.
Setting Your Starting Bracket Distance and Elevation
After bolting the bracket down, establish a solid baseline position before shooting. Your sight includes windage (left-to-right adjustment) and elevation (up-and-down adjustment) controls. Some models also feature an extension bar that slides forward and backward.
If your sight has an extension bar, start by locking it in the middle of its track. Mounting the sight further forward extends your sight radius, which helps reveal small aiming errors. Pulling the sight closer makes the pins appear brighter and makes it easier to center the circular housing inside your peep sight. Starting in the middle lets you test both benefits later.
Next, center the elevation bracket in the middle of its vertical track. Loosen the vertical locking screw, slide the housing until it rests halfway between the top and bottom travel limits, and lock it down. This gives you plenty of travel room to move the pins higher or lower when sighting in. Once your bracket is secure, learning how to use a bow sight will help you group your arrows accurately.
Leveling the Sight Bubble for Straight Shots
Most bow sights feature a small bubble level mounted at the bottom of the pin housing. This level ensures your bow stands straight at full draw. If the bow leans left or right, your arrows will drift in that direction downrange.
- Hold the bow upright: Rest the bow in a vise or against a plumb door frame so the riser stands vertically.
- Check the sight bubble: Look at the level at the bottom of the pin ring. The bubble should sit centered between the lines while the bow handle stays plumb.
- Loosen the adjustment screws: Loosen the screws holding the pin housing to the mounting arm just enough so the ring can rotate under gentle pressure.
- Align the bubble: Rotate the housing until the bubble rests centered between the indicator lines.
- Tighten the screws: Hold the housing steady and tighten the screws firmly so the housing cannot slip during shooting.
Aligning the level before shooting prevents left and right misses. When your bubble reads level at full draw, your pins point true.
Costly Mounting Mistakes and How to Spot Them
Installing a bow sight is straightforward, but small mistakes can damage your bow or ruin your accuracy. Knowing what to watch for helps you avoid trouble.
The most expensive mistake is cross-threading a steel bolt into the soft aluminum riser. A properly aligned screw turns easily by hand for the first few turns. If a bolt binds after half a turn, stop right away. Forcing a tight screw with an Allen wrench strips the aluminum threads, leaving a loose hole that cannot hold a bolt.
Another common error is mounting the bracket backward or upside down. If the pins point toward your face or the sight housing blocks the string path, remove the bracket and flip it. The pins should always face toward you while the housing extends toward the target.
Watch out for mounting bolts that are too long. Some risers have shallow blind holes, or the holes pass near the arrow rest bracket. Long screws can bottom out inside the hole or strike nearby accessories. When a bolt bottoms out, it stops turning before it clamps the sight down, leaving the bracket loose.
Never skip vibration checks. Every shot creates vibration that can loosen hardware. A small drop of blue threadlocker prevents mounting bolts from backing out after dozens of shots. If you hear a faint rattle during a shot, inspect your mounting bolts immediately.
Choosing the Right Bow Sight for Your Setup
When selecting a sight for your bow, matching the sight design to your shooting style makes mounting and tuning much simpler. Most models fall into two main categories: fixed multi-pin sights and single-pin slider sights.
Fixed multi-pin sights offer several aiming points set at specific distances, such as twenty, thirty, and forty yards. They mount close to the bow handle with a compact bracket, making them durable and easy to handle in brush. If you hunt from elevated tree stands, choosing the best bow sight for treestand hunting provides the wide field of view and bright pins needed for steep shooting angles.
Single-pin slider sights use a movable dial to adjust one pin for exact distances. They provide a clear sight picture, but require clearance on the side of the riser for the adjustment wheel. Before buying, verify that the sight uses standard AMO mounting spacing, includes a built-in bubble level, and provides micro-adjust knobs for easy windage and elevation tuning.

- ARS Mark7.4
ARS Mark is a ranking system developed by bestairriflescopes.com. ARS Mark has no relationship or impact from any manufacturers or sales agent websites. Learn more
- BrandAolamegs

- ARS Mark-
ARS Mark is a ranking system developed by bestairriflescopes.com. ARS Mark has no relationship or impact from any manufacturers or sales agent websites. Learn more
- BrandKTGCOZS

- ARS Mark-
ARS Mark is a ranking system developed by bestairriflescopes.com. ARS Mark has no relationship or impact from any manufacturers or sales agent websites. Learn more
- BrandSOPOGER

- ARS Mark-
ARS Mark is a ranking system developed by bestairriflescopes.com. ARS Mark has no relationship or impact from any manufacturers or sales agent websites. Learn more
- BrandSOOHUPET

- ARS Mark-
ARS Mark is a ranking system developed by bestairriflescopes.com. ARS Mark has no relationship or impact from any manufacturers or sales agent websites. Learn more
- BrandLWANO
- ARS Mark-
ARS Mark is a ranking system developed by bestairriflescopes.com. ARS Mark has no relationship or impact from any manufacturers or sales agent websites. Learn more
- BrandTrophy Ridge

- ARS Mark-
ARS Mark is a ranking system developed by bestairriflescopes.com. ARS Mark has no relationship or impact from any manufacturers or sales agent websites. Learn more
- BrandSPG
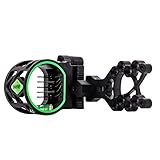
- ARS Mark-
ARS Mark is a ranking system developed by bestairriflescopes.com. ARS Mark has no relationship or impact from any manufacturers or sales agent websites. Learn more
- BrandLWANO
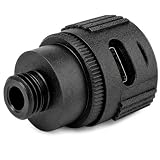
- ARS Mark-
ARS Mark is a ranking system developed by bestairriflescopes.com. ARS Mark has no relationship or impact from any manufacturers or sales agent websites. Learn more
- BrandVIPER
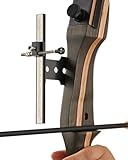
- ARS Mark-
ARS Mark is a ranking system developed by bestairriflescopes.com. ARS Mark has no relationship or impact from any manufacturers or sales agent websites. Learn more
- BrandTOPARCHERY
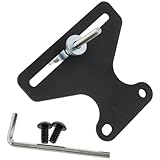
- ARS Mark-
ARS Mark is a ranking system developed by bestairriflescopes.com. ARS Mark has no relationship or impact from any manufacturers or sales agent websites. Learn more
- BrandAYLIFU

- ARS Mark-
ARS Mark is a ranking system developed by bestairriflescopes.com. ARS Mark has no relationship or impact from any manufacturers or sales agent websites. Learn more
- BrandTRUGLO

- ARS Mark-
ARS Mark is a ranking system developed by bestairriflescopes.com. ARS Mark has no relationship or impact from any manufacturers or sales agent websites. Learn more
- BrandLWANO
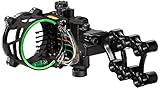
- ARS Mark-
ARS Mark is a ranking system developed by bestairriflescopes.com. ARS Mark has no relationship or impact from any manufacturers or sales agent websites. Learn more
- BrandTrophy Ridge
Last update on 2026-10-02 / Affiliate links / Images, Product Titles, and Product Highlights from Amazon Product Advertising API
FAQs
Which side of the bow handle does the sight bolt onto?
The sight bolts onto the side of the riser matching your shooting hand. Right-handed archers hold the bow in their left hand and bolt the sight onto the right side of the riser. Left-handed archers mount the sight onto the left side.
How tight do bow sight mounting screws need to be?
Tighten the screws until they sit flat against the bracket, then give them an extra quarter-turn with your Allen wrench. The fit should be firm and snug, but never forced. Overtightening can strip the soft aluminum threads inside the riser.
What should I do if a screw feels stiff right away?
Stop immediately and back the screw out. A stiff screw usually means it is entering crooked or caught on paint residue. Turn the screw backward until you feel it seat into the thread, then turn it clockwise using only your fingers.
Should I use thread-locking fluid on bow sight bolts?
A single drop of removable blue threadlocker helps keep bolts from loosening under bow vibration. Blue threadlocker holds the hardware firmly while still allowing removal with hand tools. Never use permanent red threadlocker on bow accessories.


12 Best 22 Pcp Air Rifle For Hunting of 2026 With Quiet Power

7 Best 22 Pcp Air Rifle Under 300 of 2026 For Backyard Pest Control

10 Best 22 Break Barrel Air Rifles of 2026 For Backyard Pest Control
10 Best 30 Caliber Pcp Air Rifle of 2026 For Medium Game
Top Best 177 Air Rifle Under 100: Budget-Friendly Picks for 2026

How to Safely Reload Shotgun Shells at Home

11 Best Co2 Air Rifle For Pest Control of 2026 To Ensure Humane Dispatch

12 Best Inexpensive Air Rifles of 2026 For Dependable Backyard Accuracy