How to Remove a Shotgun Bead Sight Without Breaking the Stem

Most shotgun beads simply unscrew counterclockwise with a pair of padded pliers or a small wrench. That straightforward twist only works if the bead has tiny threads rather than a smooth pin pressed into the steel. Taking things slow here protects the barrel finish and prevents the delicate screw stem from snapping off inside the hole.
How you free the bead depends on a few factory details. Some barrels use a smooth press-fit post, which requires pulling straight up or careful drilling rather than twisting. Other barrels feature threads locked in place with tough factory glue, meaning you need penetrating oil or mild heat to break the bond safely. The shape of the bead base also matters, since flat sides take a wrench while round posts demand extra grip protection. Learning what sits on your barrel makes it easy to back the bead out cleanly.
Check if your bead screws in or presses into place
Before you bring any tool near your shotgun, unload the firearm completely. Open the action, look directly into the chamber, and check the tubular magazine to verify that no shells are present. Move all ammunition to another room so your work area stays safe. You cannot safely remove a sight if you are distracted by firearm handling.
Most modern shotguns use a bead that screws directly into the barrel or rib. The bead is simply a tiny screw with a round ball or flat top. Brands like Remington, Mossberg, Winchester, Browning, and Beretta rely on threaded posts for most of their hunting and field models. If your barrel features a vent rib (the raised metal strip on the barrel), the bead is almost always threaded into a small pre-drilled hole along that top strip.
Other shotguns use a bead that is pressed into an unthreaded hole. You find these friction-fit pins on older utility shotguns, military surplus models, and many plain-barrel guns that lack a raised rib. These beads have a smooth metal pin underneath that was hammered or pressed into a tight hole at the factory. They have no screw threads at all.
Inspect the bead under a strong desk lamp with a magnifying glass. Look at the base where the bead meets the steel surface. If you see tiny flat edges on either side of the bead base, it is threaded. Those flats are designed specifically for a wrench. If you can see through the open space under the raised rib, look underneath to see if the shank (the threaded screw stem) pokes through the bottom of the metal. If you see threaded rings or a flat screw tip sticking through, your bead definitely screws out.
If the bead is a perfectly round ball sitting flat against a plain, curved barrel with no wrench flats, it may be pressed into place. Never try to unscrew a friction-fit bead. Twisting a bead that is pressed into an unthreaded hole will snap the pin flush against the barrel steel, leaving you with a difficult repair.
Tape the barrel and grab padded pliers first
Shotgun barrels have delicate surface finishes. Bluing and Parkerizing are thin chemical treatments that protect steel from rust, and a metal tool slipping across the muzzle will leave a bright, permanent scratch. Setting up proper protection takes only two minutes and keeps your barrel looking factory fresh.
Gather your supplies before you begin turning any metal:
- Protective tape: Wrap two or three layers of blue painter's tape or electrical tape tightly around the barrel and rib, right up against the base of the bead. If your tool slips, the tape absorbs the scrape instead of your bluing.
- A dedicated bead wrench: Many aftermarket sight kits include a tiny stamped hex wrench or miniature socket. If you have one that matches your bead size, use it instead of pliers because it grips all sides evenly.
- Small locking pliers or needle-nose pliers: If your bead has no flat edges and is completely round, you need pliers. Choose a small pair that gives you fine control rather than a large household tool.
- Jaw padding: Never let bare steel pliers touch a brass or steel bead. Bare pliers will crush the soft metal bead into an egg shape and strip away your grip. Cut a small scrap of thick leather, heavy rubber band, or multiple layers of duct tape and wrap it over the plier jaws.
- Penetrating oil: A bottle of thin, creeping lubricant helps break down dried rust, powder soot, and light grime inside the threads.
- A pinpoint heat tool: A household hair dryer or a clean electric soldering iron provides gentle, localized warmth if factory thread glue is holding the bead tight.
Turn counterclockwise with steady pressure to avoid slipping
Once your barrel is taped and your tools are ready, place the shotgun barrel on a flat, padded work surface. If you use a bench vise, clamp the barrel between soft rubber vise pads or wooden blocks. Clamping a thin shotgun barrel directly in bare metal vise jaws will crush the barrel tube out of round.
Follow these steps to back the threaded bead out cleanly:
- Seat your tool low on the bead: If you are using a bead wrench, slide it fully down until it rests flush against the protective tape on the barrel. If you are using padded pliers, grip the bead at its absolute base, right where it meets the barrel. Gripping the top of the ball gives the tool too much leverage, which can bend the shank (the threaded screw stem) sideways and snap it off.
- Squeeze firmly: Clamp your padded pliers with enough force that the padding bites into the metal shape without crushing it. If the pliers slip around the bead when you turn, stop immediately and tighten your grip. Slipping rounds off the metal edges and destroys your purchase.
- Apply downward pressure: Press straight down into the barrel while slowly rotating the tool counterclockwise. Downward force keeps the wrench or plier jaws from riding up over the top of the bead. Remember standard right-hand thread direction: turn left to loosen.
- Feel for the initial release: A healthy bead will give a tiny, soft click or sudden slip in resistance as the threads break free. As soon as you feel that initial movement, ease off your twisting force.
- Unscrew the rest by hand: Take the pliers away once the bead moves half a turn. Finish backing the bead out using your bare fingertips or a loose wrench. This prevents you from cross-threading or bending the delicate screw post as it reaches the final threads. Drop the loose bead into a small tray so it does not roll off your bench.
Warm stubborn factory thread glue before turning hard
If you turn your tool with moderate finger pressure and the bead does not budge, stop immediately. Do not bear down or force the tool. Gun makers frequently assemble shotguns using thread glue (factory threadlocker) to ensure heavy shotgun recoil does not shake the tiny front bead loose during field shooting. Over several years, dried oil, carbon grime, and hardened glue can freeze those tiny threads in place.
Applying brute force to a glued bead will twist the head clean off the tiny post. Brass beads are especially soft, and steel beads often have shanks no thicker than a sewing needle. When glue holds the threads, heat is the safest solution because it softens the adhesive without harming the barrel.
Loosen stubborn thread glue with this controlled sequence:
- Soak the base in penetrating oil: Place a single drop of penetrating oil directly at the seam where the bead touches the barrel rib. Let the barrel sit flat for two to four hours, or overnight if possible. The thin oil creeps downward along the screw channels.
- Wipe away excess oil: Clean the area with a rag so you do not burn oil during the heating step.
- Apply pinpoint heat: Plug in an electric soldering iron and allow it to come up to operating temperature. Press the clean, heated metal tip directly against the top of the shotgun bead. Hold it there for twenty to thirty seconds. The brass or steel bead absorbs the heat and transfers it straight down into the shank (the threaded screw stem), breaking down the thread glue.
- Keep heat away from the rib solder: Never use a propane torch or broad open flame on your barrel. The vent rib (the raised metal strip on the barrel) is joined to the barrel using silver solder. An open torch flame can overheat the barrel, melting that solder and causing the rib to separate from the gun. A soldering iron tip delivers heat only to the bead itself.
- Turn while warm: While the bead is still hot to the touch, grip it with your padded tool and turn counterclockwise. The softened glue should release smoothly with light hand pressure.
Call a gunsmith if the tiny stem breaks flush
Even when you take your time, an old, rusted bead post can snap. When this happens, the ball shears off, leaving the headless threaded shank (the threaded screw stem) stuck flush inside the rib hole. There is nothing left for pliers or wrenches to grab.
Do not try to drill the broken post out with a handheld cordless drill. Handheld drill bits wander off center within a fraction of a second. The hardened drill bit will skate across the tiny screw fragment and gouge deep trenches into the softer steel of your barrel rib. In most cases, home drilling ruins the factory hole and turns a simple fix into an expensive barrel repair.
Avoid hardware-store screw extractors as well. Shotgun bead posts are tiny, often measuring less than one-sixteenth of an inch in diameter. Micro-sized extractors are brittle. If you force an extractor into a hole that small, the tip of the tool usually snaps off flush inside the broken screw. Because extractors are made of hardened tool steel, a broken extractor makes the hole nearly impossible to drill out later.
A qualified gunsmith can resolve a broken post quickly and safely. They mount the barrel in a rigid milling machine, locate the exact center of the hole under magnification, and cleanly mill out the broken shank without touching the original barrel threads. If the original threads are damaged, the gunsmith can run a tap (a tool that cuts threads) through the hole to clear the path, or step the hole up to the next standard screw size.
If your shotgun has a bead pressed into an unthreaded hole that needs removal, a gunsmith is also your best resource. Removing a press-fit pin cleanly requires specialized pulling jigs or careful micro-machining. Once the smooth pin is removed, a gunsmith can thread the bare hole so you can easily install modern aftermarket sights at home in the future.
Clean the threads and check the pitch carefully
Once the old bead is out, inspect the empty hole under good lighting. You will almost certainly find dried crust from old thread glue, hardened oil, and carbon buildup sitting down inside the threads. Leaving that debris in place can cause your new sight to bind early, tricking you into thinking it is fully seated when it is actually sitting crooked.
Dip a wooden toothpick or a stiff nylon brush into rubbing alcohol or bore cleaner and scrub the hole. Work the tip in and out of the threads to lift dried thread glue out of the grooves. Blow the hole clean with a can of compressed air or wipe it dry with a clean patch. Look closely into the hole to verify that the internal thread rings look clean and intact.
Shotgun bead threads are not universal. Different manufacturers use different thread sizes, and even guns from the same brand can differ across model years. Common thread sizes include:
- 6-48: The standard thread size for many Remington models, as well as several Ithaca and modern utility shotguns.
- 5-40: Very common on Mossberg shotguns and certain older American field guns.
- 3-56: The traditional thread pitch for many Winchester and Browning sporting shotguns.
- 2.6mm and 3mm: Common metric thread pitches found on modern Beretta, Benelli, and European target shotguns.
Never force a new sight into the barrel hole with a tool. Always start the threads using only your fingers. The replacement sight should spin smoothly into the hole for several turns without binding. If you feel hard resistance after only half a turn, stop immediately. You have the wrong thread pitch. Forcing a mismatched screw into the rib will strip the soft internal threads, requiring a tap (a tool that cuts threads) to repair the metal.
Much like lining up your backup iron sights through the optic glass on a tactical rifle, front sights on a shotgun rib must sit straight, level, and true to give you a reliable aiming point. If your new bead sits crooked, the threads are cross-threaded or debris is trapped underneath the shoulder.
Pick a replacement sight that fits your rib style
Choosing the right replacement sight comes down to how your barrel is built and what kind of shooting you do. Once your factory bead is removed, you have many options that install easily on your bench.
If you shoot clays or hunt waterfowl in low light, fiber-optic bead sights are a popular upgrade. These units use a bright synthetic rod that collects ambient light, making the front aiming point pop against dark backgrounds without requiring batteries. Many fiber-optic sights come with interchangeable color pipes so you can swap between red, green, or amber depending on lighting conditions.
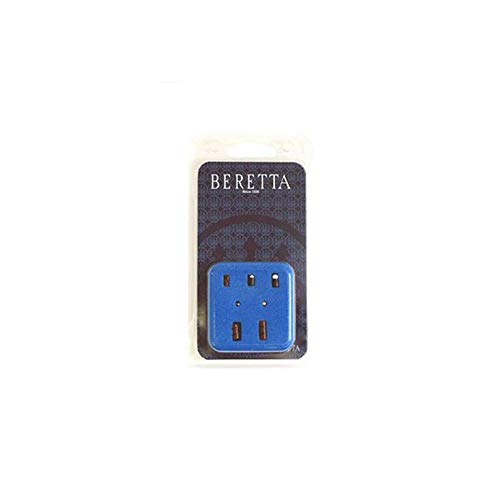
When shopping for a replacement sight, look for universal kits that include multiple threaded adapter posts. Quality aftermarket kits often bundle four or five threaded studs covering standard American and metric sizes. Having multiple posts in the package eliminates the stress of guessing your barrel's exact thread pitch before you buy. You simply test-fit each post by hand until you find the one that spins in effortlessly.
Check the width of your vent rib (the raised metal strip on the barrel) before buying a sight that clips or clamps along the sides. Ribs range from narrow field widths around one-quarter inch to wide competition ribs exceeding three-eighths of an inch. A clamp-on sight must match that width perfectly so it cannot twist under recoil.
Finally, consider the height of your new sight. Your replacement bead should match the height of your original factory bead as closely as possible. If your new sight sits noticeably taller than the factory post, your shotgun will shoot lower than your point of aim. If the new sight sits too low, your shot pattern will land high. Once you confirm that the height is correct and the threads fit cleanly, place a tiny drop of blue thread glue on the post, snug the sight down finger-tight with your padded tool, and let it cure overnight before heading to the range.

- ARS Mark9.0
ARS Mark is a ranking system developed by bestairriflescopes.com. ARS Mark has no relationship or impact from any manufacturers or sales agent websites. Learn more
- BrandDead Ringer
- ARS Mark8.8
ARS Mark is a ranking system developed by bestairriflescopes.com. ARS Mark has no relationship or impact from any manufacturers or sales agent websites. Learn more
- BrandBeretta

- ARS Mark8.4
ARS Mark is a ranking system developed by bestairriflescopes.com. ARS Mark has no relationship or impact from any manufacturers or sales agent websites. Learn more
- BrandTRUGLO
Last update on 2026-10-01 / Affiliate links / Images, Product Titles, and Product Highlights from Amazon Product Advertising API


12 Best 22 Pcp Air Rifle For Hunting of 2026 With Quiet Power

7 Best 22 Pcp Air Rifle Under 300 of 2026 For Backyard Pest Control

10 Best 22 Break Barrel Air Rifles of 2026 For Backyard Pest Control
10 Best 30 Caliber Pcp Air Rifle of 2026 For Medium Game
Top Best 177 Air Rifle Under 100: Budget-Friendly Picks for 2026

How to Safely Reload Shotgun Shells at Home

11 Best Co2 Air Rifle For Pest Control of 2026 To Ensure Humane Dispatch

12 Best Inexpensive Air Rifles of 2026 For Dependable Backyard Accuracy