How to Remove a Glock Front Sight Without Stripping the Screw

A workbench lamp catches the inside of the stripped slide, revealing a tiny bolt head tucked into a cramped metal notch. Taking off the front sight requires turning that small screw counterclockwise using a thin-wall socket wrench that reaches deep into the narrow pocket.
A few details change the job slightly. Some factory setups use a pinned plastic peg instead of a screw, requiring a quick clip from the underside rather than twisting. Many metal sights also have hardened thread glue on the threads, which softens quickly under mild heat from a hair dryer. Because standard home toolboxes carry sockets that are too thick to seat flat, matching the right approach keeps the metal slide and the soft fastener completely safe. Here is how to handle each step cleanly.
Clearing the Pistol and Setting Up a Safe Workspace
Before you pick up any wrench or driver, you must ensure the firearm is completely unloaded and separated from its firing components. Accidental discharges happen when people rush past basic safety habits to get straight to mechanical adjustments. Work in a quiet, well-lit room with no ammunition anywhere on the table. Point the muzzle in a safe direction, press the magazine release, and pull the magazine completely out of the grip. Pull the slide back firmly multiple times to eject any live cartridge that might rest inside the chamber. Lock the slide to the rear, look directly into the chamber, and physically feel the empty space with your finger to verify no round remains.
Once you confirm the gun is empty, you need to field strip it. Field strip means taking the gun apart into basic pieces for routine cleaning and maintenance. Point the firearm in a safe direction and pull the trigger to drop the firing pin. Grasp the slide, which is the top metal half of the gun, with one hand while wrapping your fingers over the top. Pull the slide back about an eighth of an inch, pull down the two small slide lock levers on both sides of the frame, and push the slide forward off the polymer frame. Set the frame aside because you will not need it for this task.
Turn the slide upside down so the internal channel faces up toward the ceiling. Compress the recoil spring assembly slightly toward the front of the slide, lift it up from its seated notch on the barrel lug, and set it down on your table. Next, lift the barrel up and pull it out toward the rear of the slide. You are now left with just the stripped bare slide. Place a clean rubber work mat, a silicone gun pad, or a folded shop towel on your table. This soft surface prevents the metal finish on top of your slide from scratching or marring while you apply downward hand pressure during the removal process.
- Remove the ammunition: Take the magazine out of the grip and clear all loose rounds off your workbench.
- Inspect the chamber: Pull the slide back, look inside, and feel the open chamber with your index finger.
- Separate the slide: Pull the trigger safely, pull the slide lock levers down, and slide the top half off the frame.
- Remove internal parts: Take out the recoil spring assembly and the barrel so the front sight pocket is exposed.
- Pad your work surface: Lay down a soft towel or rubber mat to protect the outer metal finish from scratches.
- Prepare a small container: Keep a magnetic dish or small bowl nearby so the tiny front sight screw does not roll away.
Why Standard Sockets Strip the Front Sight Screw
Most people who run into trouble trying to remove a front sight do so because they grab a standard socket set from their garage. On modern factory slides, the front sight stays in place with a tiny steel screw that features a 3/16-inch hex head. This screw sits deep inside a very tight, narrow pocket machined directly under the muzzle end of the slide. While the head of that screw measures 3/16 of an inch across, the surrounding metal well leaves almost zero clearance around the outer edges of the screw head.
A standard household socket has thick steel walls designed to take high turning force on heavy automotive bolts or home plumbing fixtures. When you push a regular socket into the slide cavity, the thick outer metal of the socket hits the inner wall of the slide before the socket opening can slide down over the screw head. It might feel like the tool is sitting on the screw, but it is actually wedged sideways or resting only on the top millimeter of the corners. If you twist the tool while it sits in this shallow position, the socket slips off. This immediately rounds off the soft corners of the tiny screw head, leaving you with a stripped fastener that standard tools can no longer turn.
To pull this screw out cleanly, you must use a thin-wall socket. A thin-wall socket is a skinny wrench tip made for tight gaps, featuring outer metal walls that are slim enough to slide straight down to the base of the screw without binding against the slide walls. When the socket reaches the base, the hexagonal flats make full contact across the entire height of the screw head. That complete contact spreads your turning force evenly, preventing the metal from twisting out of shape or shearing off.
Trying to grip the screw with needle-nose pliers or twisting the front sight post from the top of the slide will only cause costly damage. Grabbing the sight blade with pliers and twisting it will snap the tiny screw shank in half or distort the oval mounting hole cut into the top of your slide. If that mounting hole stretches or deforms, your new sight will never sit straight or hold its zero. Taking the time to seat the correct slim driver saves you from having to take your ruined slide to a professional gunsmith.
Step-by-Step Screw Removal and Breaking Stubborn Threadlocker
Removing the screw is straightforward once the slide rests on your padded work surface and your thin-wall driver sits directly over the fastener. Follow these specific steps to take the screw out cleanly:
- Position the slide securely: Lay the slide upside down on your padded mat with the front muzzle end pointed toward your non-dominant hand. Hold the slide firmly against the table so it cannot rock back and forth.
- Align the driver vertically: Insert your 3/16-inch thin-wall tool straight down into the front sight recess. Keep the shaft of the tool perfectly upright at a 90-degree angle to the slide. Wiggle the driver handle slightly between your fingers until you feel the socket drop completely over the flats of the screw head.
- Apply downward force: Press down firmly on the end of the driver with the palm of your hand before you attempt to turn it. This continuous downward pressure keeps the tool firmly seated and stops it from lifting up off the screw.
- Turn counterclockwise: While maintaining that firm downward push, twist the driver handle counterclockwise. A clean screw should break loose with a crisp, audible click or a sudden release of resistance.
- Unthread and lift: Continue turning the driver counterclockwise with light finger pressure until the screw disengages from the sight body. Lift the tool straight up, retrieve the small screw, and pull the front sight blade off the top of the slide.
If the screw refuses to budge under firm hand pressure, do not try to muscle it loose by cranking harder on the driver. Forcing a stuck fastener almost always strips the screw head or bends the tool. The resistance you feel is almost certainly caused by threadlocker. Threadlocker is liquid glue that keeps screws from backing out under the sharp recoil of firing. Factory sights and previous custom installations often use strong bonding compound on these tiny threads, which hardens into a tough polymer barrier that locks the metal surfaces together.
To break this bond safely, apply mild, controlled heat directly to the screw without scorching the surrounding metal. The safest tool for this job is an electric soldering iron with a clean tip. Plug the soldering iron in and let it come up to temperature. Place the hot metal tip directly onto the head of the front sight screw inside the slide cavity for roughly 15 to 20 seconds. The heat will travel straight down the steel screw and soften the threadlocker glue, turning it soft and gummy. If you do not own a soldering iron, you can direct the narrow nozzle of a household hair dryer on high heat against the front of the slide for about a minute. Never use an open-flame propane torch or lighter, because direct flame can easily burn, discolor, or ruin the protective finish on your slide.
Once you have applied heat for 15 to 20 seconds, immediately insert your thin-wall driver, push down with steady palm pressure, and turn counterclockwise. The softened glue will release its hold, allowing the screw to back out smoothly. If it still binds after a partial turn, pause and apply the heated soldering iron tip for another 10 seconds to warm the deeper threads before finishing the removal.
Some older pistols or basic factory setups do not have a screw at all. Instead, they feature a staked sight. A staked sight is a sight held by flared plastic rather than a screw. If you look inside the slide recess and see a flat plastic post or a round plastic pin with a small spread wedge instead of a metallic hex head, you have a staked sight. You cannot unscrew this style.
To remove a staked plastic sight, take a pair of small wire cutters or needle-nose pliers and reach inside the slide cavity. Squeeze the flared plastic wings or expanded wedge together to crush the flare, or snip off the small expanded tip entirely. Once the internal plastic wedge is removed, take a small wooden dowel or a flat plastic punch, place it against the bottom of the plastic post inside the slide, and push firmly upward. The plastic sight blade will pop out through the top of the slide without scratching the metal finish. You can discard this sight, because staked plastic sights cannot be reinstalled once the internal retaining flare is clipped.
Choosing the Right Front Sight Tool for Clean Removal
Having the right dedicated front sight wrench makes this job quick and prevents costly mistakes. If you plan to install taller iron sights to establish a clean co-witness, which means lining up your backup iron sights through the optic glass of an open-window reflex sight, you will need this tool for both the removal of your factory blade and the installation of your new sights. Review the best iron sights for cowitness with red dot sights in 2026 to confirm the proper sight height for your setup before you begin mounting your replacement hardware.
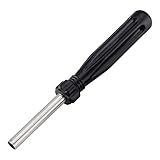
When selecting a front sight tool, look for a model that explicitly features a thin-wall barrel construction. The outer diameter of the socket must be narrow enough to slip past the inner walls of the slide without rubbing or catching on the edges. Tools constructed from solid steel resist rounding out internally, ensuring the socket holds its hexagonal shape even when encountering stubborn, threadlocked fasteners.
Another helpful feature to confirm before purchasing is a magnetized socket tip. The front sight screw is exceptionally small and easily dropped. A magnetized socket holds the screw securely inside the tip as it backs out of the threads, keeping it from falling out onto your workbench or disappearing into the carpet. Check the handle design as well. A tool with a knurled, textured grip or a small screwdriver-style handle allows you to exert steady, controlled downward pressure with your palm while twisting smoothly with your fingers, preventing accidental slips that could scratch the slide.

- ARS Mark9.6
ARS Mark is a ranking system developed by bestairriflescopes.com. ARS Mark has no relationship or impact from any manufacturers or sales agent websites. Learn more
- BrandTRUGLO

- ARS Mark9.4
ARS Mark is a ranking system developed by bestairriflescopes.com. ARS Mark has no relationship or impact from any manufacturers or sales agent websites. Learn more
- BrandLUSOFAE

- ARS Mark9.4
ARS Mark is a ranking system developed by bestairriflescopes.com. ARS Mark has no relationship or impact from any manufacturers or sales agent websites. Learn more
- BrandReal Avid

- ARS Mark9.4
ARS Mark is a ranking system developed by bestairriflescopes.com. ARS Mark has no relationship or impact from any manufacturers or sales agent websites. Learn more
- BrandHEKAGURA
- ARS Mark9.2
ARS Mark is a ranking system developed by bestairriflescopes.com. ARS Mark has no relationship or impact from any manufacturers or sales agent websites. Learn more
- BrandRaiseek

- ARS Mark9.2
ARS Mark is a ranking system developed by bestairriflescopes.com. ARS Mark has no relationship or impact from any manufacturers or sales agent websites. Learn more
- BrandLtnsimy

- ARS Mark9.2
ARS Mark is a ranking system developed by bestairriflescopes.com. ARS Mark has no relationship or impact from any manufacturers or sales agent websites. Learn more
- BrandLUSOFAE

- ARS Mark9.2
ARS Mark is a ranking system developed by bestairriflescopes.com. ARS Mark has no relationship or impact from any manufacturers or sales agent websites. Learn more
- BrandUrgeeo

- ARS Mark8.4
ARS Mark is a ranking system developed by bestairriflescopes.com. ARS Mark has no relationship or impact from any manufacturers or sales agent websites. Learn more
- BrandSporGain
Last update on 2026-10-01 / Affiliate links / Images, Product Titles, and Product Highlights from Amazon Product Advertising API
FAQs
Can I remove the front sight with regular needle-nose pliers?
No, you should never attempt to remove the sight with pliers. The screw sits deeply recessed inside the inner channel of the slide, where pliers cannot reach or grip the hex flats. Trying to twist the sight blade from the top of the slide will simply bend the blade, shear the screw, or warp the oval slide opening.
What should I do if the front sight screw is already stripped?
If the tiny screw head has rounded off, stop turning it immediately to avoid making the damage worse. Apply heat to the screw using a soldering iron tip to break down any hardened threadlocker inside the threads. You can place a wide rubber band over the tip of your driver to fill the gap and create extra friction, or use a specialized micro screw extractor to back the screw out cleanly.
Do I need to put threadlocker on the new front sight screw during installation?
Yes, you should always place a tiny drop of medium-strength blue threadlocker on the screw threads when installing a replacement sight. The sharp recoil and rapid cycling of the slide will quickly loosen an untreated screw during shooting. Avoid high-strength red threadlocker, because it requires extreme heat to loosen and can make future sight changes very difficult.


12 Best 22 Pcp Air Rifle For Hunting of 2026 With Quiet Power

7 Best 22 Pcp Air Rifle Under 300 of 2026 For Backyard Pest Control

10 Best 22 Break Barrel Air Rifles of 2026 For Backyard Pest Control
10 Best 30 Caliber Pcp Air Rifle of 2026 For Medium Game
Top Best 177 Air Rifle Under 100: Budget-Friendly Picks for 2026

How to Safely Reload Shotgun Shells at Home

11 Best Co2 Air Rifle For Pest Control of 2026 To Ensure Humane Dispatch

12 Best Inexpensive Air Rifles of 2026 For Dependable Backyard Accuracy