
How to Remove Orange Tip From Airsoft Gun Safely

How to Remove Orange Tip From Airsoft Gun becomes a frustrating headache fast once glue, pins, or stubborn factory paint enter the picture. Plenty of airsoft owners expect a quick twist and done deal, then suddenly end up with scratched outer barrels, damaged threads, or cracked flash hiders. That sinking feeling hits hard after spending good money on a replica that no longer looks clean or functions properly. Careful prep changes everything, though, because the right removal method depends heavily on how the orange tip was installed in the first place.
Heat usually plays a bigger role than most people expect. Manufacturers often secure orange tips with adhesive that softens once exposed to controlled warmth, making removal far less aggressive and reducing the chance of chewing up the barrel threads. A bowl of hot water, a hair dryer, or steady low heat can loosen stubborn parts without turning the process into a disaster. Rushing with pliers right away tends to backfire, and yeah, that’s where many replicas end up scarred beyond repair.
Thread protection matters just as much as the removal itself. Some barrels use clockwise threading while others rely on counterclockwise designs, and forcing the wrong direction can strip everything before you even realize what happened. Tiny retaining pins hidden beneath paint layers also catch people off guard. A quick inspection under bright light often reveals details that save hours of frustration and prevent expensive replacement parts later.
Cheap tools create another common mess. Oversized wrenches, metal pliers, or rough grips can leave ugly bite marks across the flash hider and barrel surface. Soft rubber grips, padded tools, and patience usually work better than brute force. Oddly enough, slower handling often removes the orange tip faster because nothing gets jammed or warped halfway through the process.
Legal concerns also sneak into the conversation more than many expect. Some regions require visible markings on replica firearms during transport or public display, even after purchase. Removing the orange tip without understanding local rules can create unnecessary trouble later. Keeping the original part stored safely nearby avoids headaches if regulations or field requirements suddenly change.
Customization drives a lot of interest here too. Swapping the orange tip for a mock suppressor, tracer unit, or metal flash hider gives replicas a cleaner and more realistic appearance. Still, compatibility issues pop up constantly between thread sizes and barrel lengths. Checking measurements first prevents wasted money and the classic “well, that doesn’t fit” moment sitting at the workbench.
How to Remove Orange Tip From Airsoft Gun isn’t just about appearance. Proper handling protects the barrel alignment, preserves threading, and keeps future upgrades smooth instead of stressful. One careful afternoon usually beats dealing with permanent cosmetic damage that sticks out every single time the replica comes out of the case.

- ARS Mark8.4
ARS Mark is a ranking system developed by bestairriflescopes.com. ARS Mark has no relationship or impact from any manufacturers or sales agent websites. Learn more
- BrandGoldenBall

- ARS Mark7.5
ARS Mark is a ranking system developed by bestairriflescopes.com. ARS Mark has no relationship or impact from any manufacturers or sales agent websites. Learn more
- BrandGamo

- ARS Mark7.8
ARS Mark is a ranking system developed by bestairriflescopes.com. ARS Mark has no relationship or impact from any manufacturers or sales agent websites. Learn more
- BrandGoldenBall
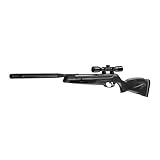
- ARS Mark8.3
ARS Mark is a ranking system developed by bestairriflescopes.com. ARS Mark has no relationship or impact from any manufacturers or sales agent websites. Learn more
- BrandGamo
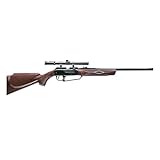
- ARS Mark8.3
ARS Mark is a ranking system developed by bestairriflescopes.com. ARS Mark has no relationship or impact from any manufacturers or sales agent websites. Learn more
- BrandDaisy
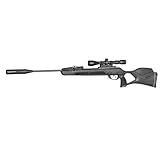
- ARS Mark8.4
ARS Mark is a ranking system developed by bestairriflescopes.com. ARS Mark has no relationship or impact from any manufacturers or sales agent websites. Learn more
- BrandGamo
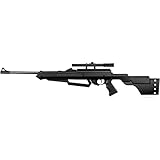
- ARS Mark9.5
ARS Mark is a ranking system developed by bestairriflescopes.com. ARS Mark has no relationship or impact from any manufacturers or sales agent websites. Learn more
- BrandBarra

- ARS Mark7.3
ARS Mark is a ranking system developed by bestairriflescopes.com. ARS Mark has no relationship or impact from any manufacturers or sales agent websites. Learn more
- BrandUmarex

- ARS Mark8.7
ARS Mark is a ranking system developed by bestairriflescopes.com. ARS Mark has no relationship or impact from any manufacturers or sales agent websites. Learn more
- BrandGamo
- ARS Mark9.0
ARS Mark is a ranking system developed by bestairriflescopes.com. ARS Mark has no relationship or impact from any manufacturers or sales agent websites. Learn more
- BrandDaisy

- ARS Mark8.8
ARS Mark is a ranking system developed by bestairriflescopes.com. ARS Mark has no relationship or impact from any manufacturers or sales agent websites. Learn more
- BrandCrosman

- ARS Mark8.5
ARS Mark is a ranking system developed by bestairriflescopes.com. ARS Mark has no relationship or impact from any manufacturers or sales agent websites. Learn more
- BrandDPMS
Last update on 2026-07-27 / Affiliate links / Images, Product Titles, and Product Highlights from Amazon Product Advertising API
How To Remove Orange Tip From Airsoft Gun
Nothing ruins the look of a realistic replica faster than a bright orange plastic tip stuck to the front of the barrel like a traffic cone. Plenty of airsoft owners buy a rifle or pistol expecting quick cosmetic upgrades, then hit a wall the second they try removing the factory tip. Some twist too hard and strip the threads. Others attack it with pliers and end up scratching the outer barrel beyond repair. How to remove orange tip from airsoft gun becomes much easier once you know what actually holds the piece in place and how manufacturers typically secure it.
Why Orange Tips Feel Impossible To Remove
Factory-installed orange tips rarely come off with a simple twist. Many brands use thick adhesive, hidden retaining pins, or painted-over screws to keep the tip attached during shipping and retail display. That extra security protects stores legally, but it also creates a nightmare later for anyone trying to install a tracer unit or metal flash hider. Glue buildup, stubborn threading, and soft plastic parts combine into one irritating little project.
Heat changes the whole situation. Most adhesives soften once exposed to controlled warmth, which means less force gets transferred into the barrel threads. A lot of damaged airsoft replicas started because someone skipped the heating step and went straight for brute force. That usually ends with ugly scratches, bent flash hiders, or stripped threading that won't hold future attachments properly.
Cheap tools create another layer of frustration. Metal pliers can chew through painted surfaces within seconds, especially on aluminum outer barrels with softer finishes. Rubber grips or padded adjustable wrenches reduce that risk dramatically. Thread protection matters more than speed because fixing damaged barrel threads often costs more than the upgrade itself.
Some manufacturers also install reverse threading. That tiny detail catches people constantly because clockwise and counterclockwise threading vary across airsoft brands. Turning the wrong direction too aggressively can permanently damage the muzzle. A quick check beforehand saves hours of regret and keeps the removal process controlled instead of chaotic.
Spotting Pins, Glue, And Hidden Locks
Careful inspection solves half the problem before tools even touch the replica. Tiny retaining pins often sit underneath layers of orange paint or glue near the base of the tip. Under bright lighting, those hidden spots become easier to notice because the surface usually looks slightly uneven or recessed. Small factory pins hold more aggressively than many people expect.
Some airsoft pistols use microscopic screws hidden along the bottom side of the flash hider. Miss that detail and suddenly the entire barrel assembly starts twisting instead of the orange tip itself. That’s usually the moment panic kicks in. A flashlight and slow rotation check help expose hidden mounting points before damage happens.
Glue patterns reveal clues too. Thick glossy adhesive around the threading area often means heat will loosen the connection fairly easily. Dry or chalky adhesive tends to require longer heating sessions because older compounds harden over time. Patience matters here because rushing usually leads to cracked plastic and slipped tools.
Even paint can create confusion. Some manufacturers layer orange paint over black polymer flash hiders rather than using fully orange parts. Scraping aggressively without checking first can damage the original surface underneath. Surface inspection helps avoid unnecessary cosmetic mistakes that become impossible to hide later.
Using Heat Without Damaging The Barrel
Controlled heat remains one of the safest removal methods available. Hot water works surprisingly well because it softens glue without exposing sensitive components to direct flame or excessive temperatures. Most people fill a bowl with hot water, dip only the orange tip area for a few minutes, then attempt removal gradually. That simple approach often breaks the adhesive bond enough to free the threads.
Hair dryers also help, especially on rifles with electronics nearby. Heat guns can work too, but they carry more risk because concentrated heat may warp polymer parts or damage nearby finishes if left too long. Slow warming beats aggressive heating every single time. Moderate temperature control protects the outer barrel while loosening stubborn adhesive safely.
Steam exposure sometimes surprises people with how effective it feels. Warm moisture penetrates tiny gaps around the threading and softens dried glue hidden inside the muzzle assembly. Still, excessive moisture around electronic rifles should stay limited. Nobody wants a cosmetic upgrade turning into gearbox maintenance.
Gloves help more than expected during heated removal attempts. Warm barrels become slippery fast, especially once softened adhesive starts moving around the threads. A secure grip reduces accidental slipping and keeps twisting pressure consistent. That steady control usually removes the tip cleaner and faster than forcing things aggressively.
Protecting Threads During Removal
Thread damage creates long-term headaches that affect every future attachment upgrade. Tracer units, suppressors, and replacement flash hiders all rely on clean threading to mount correctly. Once threads strip or flatten, alignment problems start appearing immediately. Clean barrel threads save money and frustration later.
Soft cloth wrapping works wonders before using any gripping tools. Even a microfiber towel creates enough cushioning to prevent direct metal-on-metal contact. That tiny step helps preserve barrel finishes while adding extra traction. Plenty of scratched replicas could've avoided damage with thirty seconds of preparation.
Short twisting motions usually work better than one giant forceful turn. Gradual pressure allows softened glue to separate naturally without shocking the threading system. If resistance suddenly increases, stop immediately and apply more heat rather than pushing harder. Barrel threading can fail faster than many people expect.
Cleaning leftover adhesive afterward matters too. Sticky residue trapped inside the threads interferes with future attachments and causes crooked mounting positions. Cotton swabs, soft brushes, and gentle cleaning alcohol remove buildup without grinding down the threading itself. Thread maintenance keeps future upgrades fitting smoothly instead of wobbling loosely.
Common Mistakes That Ruin Airsoft Barrels
Pliers directly against the barrel surface cause some of the ugliest damage seen on airsoft replicas. Teeth marks, chipped paint, and crushed flash hiders happen fast once metal tools start slipping around polished finishes. The replica may still function afterward, but visually, the front end often looks permanently rough. Cosmetic damage becomes impossible to ignore every time the rifle comes out of storage.
Another huge mistake involves overheating polymer outer barrels. Plastic components soften much faster than aluminum or steel, which means prolonged heat exposure can warp alignment completely. Suddenly the muzzle attachment sits crooked, and tracer units no longer line up properly. Gentle heating avoids turning a simple upgrade into a replacement project.
People also underestimate hidden retaining pins constantly. Twisting aggressively against a pinned flash hider creates internal stress that cracks the surrounding material. Once the crack spreads, the entire tip assembly may wobble or break apart unevenly. Inspecting first prevents that expensive surprise.
Impatience wrecks more replicas than poor tools honestly. A rushed removal attempt usually escalates into stronger force, more slipping, and damaged threading. Slowing down gives adhesives time to soften properly and allows better control throughout the process. Patience protects both the appearance and function of the replica.
Choosing Replacement Muzzle Attachments
Removing the orange tip usually leads directly into customization plans. Some players install mock suppressors for a cleaner profile, while others prefer tracer units for low-light games. That excitement sometimes causes compatibility mistakes though. Thread size matters heavily because not every attachment fits every airsoft barrel.
Negative 14mm threading appears commonly on rifles, but pistols and specialty replicas often use different configurations entirely. Buying attachments without checking thread direction or barrel size creates frustrating fitment issues later. Correct thread compatibility prevents wasted money and awkward returns.
Weight changes also affect handling more than expected. Heavy suppressors shift the rifle balance forward, especially on shorter carbines. Some people love that realistic feel, while others find prolonged aiming more tiring during long matches. Smaller tracer units often maintain a better balance between function and comfort.
Material quality matters too. Cheap alloy attachments scratch easily and sometimes loosen under repeated use. Better-built muzzle devices tend to secure more consistently and resist cosmetic wear from field use. Explore practical upgrade setups through best hunting bow ever made discussions that also highlight durability tradeoffs and gear balance strategies.
Safe Handling After The Orange Tip Is Gone
Replica firearms without orange tips require more caution during transport and storage. Realistic appearances increase the chance of misunderstandings in public spaces, especially around vehicles, parking lots, or apartment complexes. Carrying replicas openly creates unnecessary attention that nobody really wants. Responsible transportation becomes more important after cosmetic modifications.
Gun bags and hard cases help prevent problems immediately. They also protect upgraded muzzle attachments from scratches or impact damage while traveling to fields or events. Tossing an exposed replica loosely into a trunk usually ends badly for both the finish and optics. Simple storage habits keep the replica looking cleaner much longer.
Field regulations vary too. Some indoor arenas require orange tips regardless of local law, while others allow realistic setups during active gameplay only. Checking site policies beforehand avoids awkward arguments at check-in. Nothing kills pre-game excitement faster than being turned away over a preventable equipment issue.
Keeping the original orange tip stored safely nearby helps in surprising situations. Certain events, shipping requirements, or resale situations may still require visible markings later. That tiny plastic piece might seem useless after removal, but tossing it immediately can create hassle later on. Original factory parts occasionally save time and money down the road.
Cleaning Residue And Restoring Barrel Finish
Leftover adhesive tends to cling stubbornly around the muzzle after the tip finally comes off. Sticky residue attracts dirt quickly and can interfere with attachment threading if ignored. Gentle rubbing alcohol usually breaks down most glue without harming metal surfaces. Strong industrial solvents feel tempting, but some finishes react badly and discolor almost instantly.
Microfiber cloths help preserve painted outer barrels better than paper towels or abrasive pads. Rough cleaning materials create faint scratches that become more visible under sunlight later. Slow circular wiping motions clean the area more evenly while reducing streaks. Surface care keeps the muzzle area looking factory-clean after modification.
Thread brushes also help clean stubborn buildup trapped deep inside the threading grooves. Tiny adhesive fragments left behind can jam suppressors or tracer units halfway onto the barrel. A few minutes of cleanup prevents future attachment headaches. Most people skip this step initially, then regret it once new accessories refuse to seat properly.
Paint touch-up pens sometimes help cover minor cosmetic marks around the muzzle area too. Matte black finishes blend scratches fairly well if the damage stays shallow. Deep gouges from pliers usually remain visible though, which circles right back to why careful removal matters so much. Compare realistic maintenance habits and equipment care through best bow sight under 50 recommendations that focus heavily on protecting surfaces and threaded components.
Safest Way To Remove Orange Tip Airsoft Gun
One bad twist can wreck the entire front end of an airsoft replica, especially after the orange tip finally starts moving unevenly. Plenty of people assume the hard part ends once the flash hider loosens, but honestly, that’s where fresh problems often begin. Crooked threads, loose barrel wobble, and damaged tracers usually trace back to rushed handling during the last few turns. Safe removal habits matter just as much after the orange tip breaks loose as they do during the heating process.
How Barrel Materials Affect Removal
Polymer barrels react completely differently than aluminum or steel outer barrels. Plastic components soften quickly under heat, which means even a few extra minutes with a heat gun can warp alignment slightly. That tiny bend might not seem obvious immediately, but suppressors and tracer units often expose the issue later once attachments sit unevenly. Material sensitivity changes how aggressive the removal process should feel.
Metal barrels tolerate controlled heat better, though painted finishes still scratch surprisingly fast. Glossy coatings especially tend to show plier marks instantly under direct light. Soft cloth wrapping helps protect surfaces while improving grip at the same time. A microfiber towel honestly saves more cosmetic damage than expensive tools sometimes do.
Cheaper airsoft replicas occasionally use weaker threading compounds too. That sounds helpful at first, but softer threads also strip more easily under pressure. Gentle rotations protect those thinner thread lines from flattening or tearing. Slow pressure control prevents expensive replacement problems later.
Some rifles combine multiple materials around the muzzle area. Metal barrels paired with polymer front sights or handguards create uneven heat distribution that catches people off guard. Warm one section too aggressively and nearby plastic may soften before the adhesive even loosens. Balanced heating keeps the removal process predictable instead of messy.
Fixing A Stuck Or Half-Removed Tip
Half-loosened orange tips frustrate people more than completely stuck ones. The adhesive starts stretching internally, but the flash hider still refuses to rotate cleanly. That awkward in-between stage tempts people into forcing things harder, which usually damages the threads immediately. Controlled repositioning becomes critical once movement starts unevenly.
Reheating the muzzle area helps reset stubborn adhesive that partially hardened again during cooling. Warm the area gradually, then rotate backward slightly before continuing forward. That small back-and-forth movement breaks glue tension more evenly across the threads. Plenty of damaged barrels could've survived with slower movement patterns.
Needle-nose pliers wrapped in rubber tape sometimes help with tiny pistol flash hiders that standard tools can’t grip properly. Bare metal jaws remain risky though, especially on softer polymer tips. Slipping once can gouge the barrel finish badly enough to stay visible forever. Grip protection matters more than squeezing strength.
Thread jams occasionally happen because tiny adhesive chunks wedge deep into the grooves during removal. Stop immediately if resistance suddenly spikes halfway off the barrel. Continuing forcefully can cross-thread the muzzle permanently. Cleaning exposed threads before continuing usually solves the issue without damaging the replica.
Thread Direction Mistakes That Cause Damage
Reverse threading confuses even experienced airsoft owners sometimes. Negative threading loosens clockwise instead of counterclockwise, which feels completely backward at first. Panic usually sets in once resistance increases and the barrel assembly starts shifting unexpectedly. Thread direction awareness saves a ridiculous amount of frustration.
Manufacturers rarely label threading clearly either. Some replicas include tiny markings near the muzzle, while others provide almost no guidance at all. Quick online searches for the exact model help confirm thread direction before tools touch the barrel. Guessing blindly creates unnecessary risk that takes seconds to avoid.
Cross-threading starts subtly. The flash hider begins turning unevenly, then suddenly tightens at strange angles instead of moving smoothly. Many people keep twisting anyway, assuming more adhesive remains inside. Unfortunately, that rough resistance usually signals damaged thread alignment already beginning.
Damaged threads don’t just affect appearance. Suppressors, tracer units, and replacement flash hiders may wobble loose constantly afterward. Some attachments even tilt slightly, affecting BB trajectory near the muzzle. Proper thread alignment keeps future upgrades stable and visually clean.
Why Tracer Units Change Removal Priorities
Tracer units motivate plenty of orange tip removals because indoor fields look dramatically better once glowing BBs enter the mix. Suddenly, the factory muzzle setup feels limiting instead of temporary. Still, tracer units require clean thread alignment far more than standard flash hiders do. Precise muzzle threading becomes extremely important once electronics and illumination systems enter the setup.
Cheap tracer units often loosen during gameplay if threads contain leftover glue or tiny burrs from rushed removal attempts. That wobble gets annoying fast, especially during rapid movement or repeated firing. Clean threading allows the tracer to mount flush against the barrel without rattling loose constantly.
Weight distribution changes too. Compact pistols with large tracer units suddenly feel front-heavy during extended games. Smaller lightweight tracers usually pair better with short sidearms, while rifles handle larger suppressor-style tracers more comfortably. Balance matters more during long indoor matches than many people realize.
Battery compartments and charging ports also create extra maintenance concerns. Dirt and adhesive residue near the muzzle can migrate onto the tracer mounting area over time. Regular cleaning helps maintain secure alignment and consistent illumination performance. Explore realistic equipment setups through best target for compound bow recommendations that also emphasize stability, alignment, and impact resistance.
Cleaning And Inspecting Internal Threads
Internal barrel threads collect debris quickly after orange tip removal. Glue flakes, paint fragments, and tiny plastic particles often stay trapped inside the grooves even when the muzzle looks clean externally. Ignoring that buildup usually creates rough attachment fitment later. Thread cleaning protects both cosmetic appearance and attachment stability.
Soft nylon brushes remove residue safely without grinding down the threading itself. Metal brushes feel tempting for stubborn glue, but aggressive scrubbing can flatten softer aluminum grooves surprisingly fast. Slow circular brushing works better than heavy pressure. Small maintenance habits make future upgrades much smoother.
Alcohol-based cleaners help dissolve remaining adhesive too, especially around hidden thread corners where debris tends to collect. Oversaturating the barrel isn't necessary though. A lightly dampened cotton swab usually handles the job without creating unnecessary mess around nearby components.
Inspection matters after cleaning finishes. Shine a flashlight directly into the threading and rotate the replica slowly. Damaged sections usually appear shinier or uneven compared to surrounding grooves. Early thread inspection helps catch small problems before suppressors or tracer units lock into damaged positions permanently.
Transport Concerns After Removing The Tip
Airsoft replicas without orange tips attract more attention during transport, especially around public parking lots or apartment areas. Tossing an exposed rifle casually into the back seat creates unnecessary risk and awkward misunderstandings. Soft rifle bags reduce visibility while protecting optics and muzzle attachments from scratches. Discreet transportation matters far more after cosmetic modifications.
Hard cases offer better protection for replicas with expensive tracer units or suppressors attached permanently. Loose gear sliding around inside a trunk tends to batter the muzzle area first during sudden stops or rough roads. Foam inserts help stabilize attachments while preventing barrel wobble during travel.
Some local regulations still require orange markings during certain transport situations too. Keeping the original tip stored safely inside the gun bag avoids future stress if field rules or transportation concerns change unexpectedly. Tiny factory parts feel useless until suddenly they solve a major headache later.
Storage conditions matter too. Heat buildup inside vehicles weakens adhesives around installed muzzle devices and may affect tracer batteries over time. Cool dry storage keeps both attachments and barrel threading in better condition long term. Compare realistic range setup habits and protective gear ideas through best backstop for pellet gun discussions focused heavily on safe handling and equipment protection.
Signs The Barrel Needs Replacement
Sometimes the damage already happened before the removal process even started. Cheap factory threading occasionally arrives uneven straight from production, especially on entry-level replicas. Orange tip removal simply exposes the issue more clearly once replacement attachments refuse to seat correctly. Persistent alignment problems often signal deeper barrel issues.
Visible wobble around the muzzle usually means the threads stripped or the outer barrel shifted internally. Tightening attachments harder rarely fixes the problem permanently. In fact, excessive force often worsens the instability and damages additional components nearby. Stable alignment should feel smooth and consistent without aggressive tightening.
Cracks near the front sight or muzzle area also deserve attention immediately. Tiny fractures spread quickly during gameplay because repeated firing vibrations stress weakened plastic constantly. Small cosmetic cracks sometimes stay manageable, but deeper structural splits usually grow over time. Replacing damaged parts early prevents more expensive repairs later.
Replacement barrels vary heavily in finish quality, thread precision, and compatibility. Reading compatibility details carefully prevents frustrating fitment surprises once the new barrel arrives. Accurate replacement sizing keeps upgrades smooth while preserving the clean appearance most airsoft owners wanted from the beginning.


12 Best 22 Pcp Air Rifle For Hunting of 2026 With Quiet Power

7 Best 22 Pcp Air Rifle Under 300 of 2026 For Backyard Pest Control

10 Best 22 Break Barrel Air Rifles of 2026 For Backyard Pest Control

10 Best 30 Caliber Pcp Air Rifle of 2026 For Medium Game

Top Best 177 Air Rifle Under 100: Budget-Friendly Picks for 2026

How to Safely Reload Shotgun Shells at Home

11 Best Co2 Air Rifle For Pest Control of 2026 To Ensure Humane Dispatch

12 Best Inexpensive Air Rifles of 2026 For Dependable Backyard Accuracy






