How to Replace the Front Sight on a Ruger 10/22?

Replacing the front sight on a Ruger 10/22 comes down to tapping the old sight out from left to right and sliding the new piece in from the opposite side. How easily that metal piece moves depends on having solid barrel support and striking in the correct direction from behind the rifle. Tapping the sight the wrong way will only wedge it tighter into its metal mounting slot.
Factory sights sit notoriously tight in their notched barrel slots, and some need a drop of penetrating oil before they will budge. The job also calls for a brass punch rather than hard steel, which keeps the barrel finish free from scratches and dents. A few careful workbench steps make it easy to remove the factory sight cleanly and center your new sight without damaging the rifle.
The Short Version
- Unload and clear first: Remove the magazine, pull the bolt back, and physically check that the chamber is empty before clamping the barrel in a padded vise.
- Drift left to right: From the shooter perspective behind the stock looking toward the muzzle (the open front end of the gun barrel), tap the factory front sight out toward the right side.
- Use brass tools: Place a flat-tipped brass rod against the base of the sight and strike it with a firm hammer blow to avoid scratching the steel barrel.
- Install right to left: Slide the new sight in from the right side, lightly file the bottom of the sight base if it binds too early, and tap it to the center.
Preparing Your Rifle and Supporting the Barrel
Working on a rifle barrel requires a rock-solid work area. If the barrel moves even a fraction of an inch when your hammer strikes, that impact energy bounces away instead of moving the sight. Before touching any tools, prepare your workspace and make sure the firearm is completely safe.
- Drop the magazine: Press the magazine release latch and remove the rotary magazine from the rifle stock.
- Lock the bolt open: Pull the charging handle fully to the rear, push up on the bolt lock button near the trigger guard, and let the bolt catch.
- Check the chamber: Look directly into the open chamber and feel inside with your finger to verify there is no live round in the rifle.
- Remove the stock (recommended): Loosen the front barrel band screw if your model has one, slide the band off, loosen the single takedown screw on the underside of the stock, and lift the barreled action out of the wood or synthetic stock. This prevents you from cracking the stock under pressure.
- Clamp the barrel securely: Place the barrel into a bench vise lined with soft rubber jaw covers, thick leather scraps, or dense wood blocks. Clamp the barrel as close to the front sight as possible without blocking your hammer swing. A barrel held loosely in your lap or on a towel will flex like a diving board, absorbing every blow and leading to slipped tools.
Essential Tools for the Job
Factory sights on this rimfire rifle are famous for being extremely tight. Using the wrong tools will quickly lead to marring (scratching or denting the barrel surface). Gather these items before you start tapping on your firearm:
- Brass drift punch: A drift punch (a flat-tipped brass rod used to tap parts sideways) protects your barrel because brass is softer than barrel steel. If the punch slips, brass leaves a gold smudge that wipes away with oil, whereas a steel punch will gouge the metal finish.
- Medium-weight hammer: An 8-ounce to 12-ounce brass, plastic, or small steel ball-peen hammer works best. A lightweight household tack hammer bounces off without delivering enough force, while a heavy framing hammer is too unwieldy.
- Penetrating lubricant: A quality spray lubricant creeps between tightly pressed metal parts to break loose surface oxidation and factory bluing salt buildup.
- Small triangular needle file: Aftermarket sights are often made slightly large so they can fit various barrel tolerances. A fine file lets you shave tiny amounts of metal from the replacement sight base.
- Padded bench vise: A sturdy vise bolted to a heavy workbench provides the rigid backing you need to break the factory bond.
- Clean microfiber cloth: Having a soft shop cloth on hand helps wipe away excess oil and brass markings after the job is finished.
Removing the Old Sight: Left to Right
Ruger cuts the barrel slot with a slight mechanical taper, and factory machines press the sight in from right to left. Because of this taper, you must drive the factory sight out from left to right. Always orient yourself from the shooter perspective, meaning you are holding or sitting behind the buttstock and looking forward toward the muzzle.
- Apply penetrating fluid: Spray a drop of penetrating oil directly along the seam where the sight meets the dovetail (the notched slot cut across the barrel to hold the sight base). Let it soak for ten to fifteen minutes so the fluid can wick under the metal base.
- Set your brass drift punch: Place the flat tip of the brass drift punch against the bottom flat edge of the front sight base on the left side of the barrel. Never place the punch against the thin blade or the front bead, because thin metal will bend or shear right off, leaving the base trapped in the slot.
- Angle the punch properly: Hold the punch nearly level with the top curve of the barrel, resting it flush against the sight base. Keep your fingers firmly braced against the barrel so the punch cannot slip upward when struck.
- Deliver short, sharp strikes: Strike the end of the punch squarely with your hammer. Do not tap timidly. A few crisp, sharp, confident taps will break the factory friction seal much better than twenty soft taps that only mushroom the brass punch.
- Drive the base out: Once the sight moves its first millimeter, the hardest part is over. Continue tapping gently toward the right side until the old sight slides free from the barrel slot. Clean the empty dovetail with a cloth and a drop of solvent to clear away old debris.
What to Do When the Factory Sight Refuses to Budge
Many factory front sights seem completely welded in place. Ruger often installs these parts with heavy hydraulic presses, and excess bluing salt from manufacturing can bond the two steel surfaces together. If your sight will not budge after several solid strikes, stop swinging before your punch slips.
Start by applying more penetrating fluid and giving it time. Spray the slot thoroughly and let the barrel sit horizontally for an hour, or even overnight. This gives the fluid time to travel across the full width of the dovetail cut.
Next, examine your barrel support. If your workbench moves or your vise flexes when you strike, the impact energy is being wasted. If you do not have a heavy bench vise, rest the muzzle area of the barrel directly on a solid wooden block laid over a concrete garage floor. Supporting the steel directly against an unyielding surface forces all the hammer energy into the dovetail joint.
You can also use mild heat to expand the outer metal slightly. Warm the barrel dovetail area with a standard household hair dryer for three to five minutes. Do not use an open-flame propane torch, which can ruin the barrel temper or discolor the blue finish. While the metal is warm, set your brass punch against the sight base and give it a firm, authoritative strike. If the sight still refuses to move after these attempts, take the barrel to a local gunsmith who has a dedicated mechanical sight-pushing tool rather than risking damage to your barrel.
Installing the Replacement Sight: Right to Left
Because the dovetail cut was pressed from right to left, your new sight must enter from the right side of the barrel and slide toward the left. Never force a new sight into the slot if it binds immediately, as wedging an oversized sight will gouge the precision edges of your barrel.
- Test the fit by hand: Take your new front sight and try sliding it into the dovetail from the right side using only finger pressure. A correctly sized sight should slide roughly one-third to halfway into the slot before stopping under friction.
- Fit the base if it binds early: If the replacement sight will not even enter the slot or stops after a tiny fraction of an inch, the sight base is too thick. Lay a sheet of fine emery cloth on a flat table, or use a small needle file to stroke the bottom flat surface of the new sight. Remove a tiny amount of metal, wipe off the filings, and test the fit again. Never file the barrel slot itself; always modify the cheaper replacement part.
- Secure the barrel in your vise: Clamp the barrel back in your padded vise with the right side facing your working hand. Apply a light film of gun oil to the slot to help the new sight glide smoothly.
- Tap the sight into place: Start the sight into the right side of the slot by hand. Place your brass punch against the right-hand edge of the new sight base, holding it low and flat. Tap the punch steadily to drive the sight toward the center of the barrel.
- Stop at center: Tap the sight until it sits evenly spaced between both outer edges of the barrel band or dovetail flat. Wipe away any brass marks or excess oil with your microfiber cloth.
Centering Your New Sight Before Range Zeroing
A front sight that sits slightly off-center will throw your shots wide to the left or right. Before heading out to shoot, verify that the blade sits directly over the centerline of the barrel bore.
You can check centering visually by looking down the barrel from the muzzle end with the rifle unloaded. Look at the small shoulders of the barrel dovetail on either side of the sight base. The exposed flat metal on the left side should match the exposed flat metal on the right side. For an exact measurement, use a set of calipers or a small machinist ruler to measure the distance from the edge of the sight base to the edge of the barrel flat on both sides.
Once the sight is centered, plan a trip to the shooting range for final zeroing (adjusting your sights so shots land exactly where you aim at a set distance). Fire a small three-shot group at a target set 25 yards away. If your shots hit to the right of your target, tap your front sight slightly to the right to correct it. If your shots hit to the left, tap the front sight slightly to the left. Remember the rule for iron sights: move your front sight in the opposite direction that you want your bullet impact to move.
Choosing Replacement Sights and Optic Mounts
Replacing your front sight is also the natural time to rethink your sighting setup. Many shooters replace their damaged factory bead with a bright fiber-optic front sight to make target acquisition faster in dim lighting or woods. Others choose to remove iron sights entirely when converting their rimfire rifle to run an electronic aiming dot.
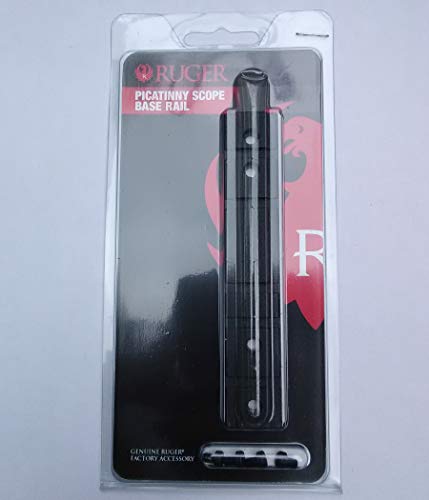
If you prefer an optic, you will need a low-profile rail that screws directly into the top of the rifle receiver. Look for rails that match standard Picatinny or 20mm slotted accessory rails so you have the freedom to mount either compact open-window sights or sealed enclosed tube sights. When choosing an optic, pay attention to dot size: a fine 2 MOA aiming dot covers roughly half an inch at 25 yards for pinpoint paper punching, while a larger 4 to 6 MOA dot is faster to pick up for quick steel plinking.
Some shooters prefer keeping their iron sights usable even with an optic mounted. This setup allows you to use backup iron sights that co-witness through an optic, meaning you can look straight through the optic window and still align your front and rear iron posts if the red dot battery dies. If you plan to co-witness, verify the height of your replacement front sight carefully before buying, as standard factory-height front sights are often too low to clear the base of a rail-mounted red dot.
When installing any optic base or rail on your receiver, clean the factory screw holes with rubbing alcohol and apply a single drop of blue removable thread-locking fluid to each screw. Tighten them evenly using an inch-pound torque tool set to the manufacturer recommended rating (typically 12 to 15 inch-pounds for rimfire receivers) to prevent stripped threads in the aluminum housing.

- ARS Mark-
ARS Mark is a ranking system developed by bestairriflescopes.com. ARS Mark has no relationship or impact from any manufacturers or sales agent websites. Learn more
- BrandTACBRO

- ARS Mark-
ARS Mark is a ranking system developed by bestairriflescopes.com. ARS Mark has no relationship or impact from any manufacturers or sales agent websites. Learn more
- BrandTrinity

- ARS Mark-
ARS Mark is a ranking system developed by bestairriflescopes.com. ARS Mark has no relationship or impact from any manufacturers or sales agent websites. Learn more
- BrandNimrod's Wares
- ARS Mark-
ARS Mark is a ranking system developed by bestairriflescopes.com. ARS Mark has no relationship or impact from any manufacturers or sales agent websites. Learn more
- BrandRuger

- ARS Mark-
ARS Mark is a ranking system developed by bestairriflescopes.com. ARS Mark has no relationship or impact from any manufacturers or sales agent websites. Learn more
- BrandGame Reaper
Last update on 2026-10-02 / Affiliate links / Images, Product Titles, and Product Highlights from Amazon Product Advertising API
FAQs
Why does the front sight have to come out from left to right?
Ruger cuts the barrel dovetail with a slight mechanical taper and presses the original sight in from the right side at the factory. Driving the sight out toward the right follows that natural taper, allowing the base to loosen as it moves. Trying to force the sight out toward the left wedges the metal tighter into the slot, which can ruin the dovetail or bend your punch.
Can I use a standard steel punch if I do not have a brass punch?
You should never use a steel punch directly on a gun barrel or sight base. Steel is harder than the barrel metal and will slip under heavy hammer strikes, gouging deep scratches into your barrel finish. Brass is softer than gun steel, meaning the punch absorbs the friction and leaves only soft marks that clean off with oil.
What should I do if the new front sight is loose in the dovetail?
If a replacement sight slides completely through the barrel slot by hand without friction, it cannot hold zero. You can tighten the fit by using a center punch to make three small dimple marks along the bottom flat underside of the sight base, which raises tiny ridges of steel to create tension. Alternatively, applying a drop of green retaining compound to the dovetail will lock a slightly loose sight firmly in place.
Do I need to remove my front sight if I mount a red dot sight?
You do not need to remove the front sight to use an electronic red dot sight on your rifle. Most red dot sights sit high enough on an accessory rail that the red aiming dot projects well above the factory front sight post. You only need to remove the front sight if it blocks your field of view or if you install a thick bull barrel that lacks iron sight cuts.


12 Best 22 Pcp Air Rifle For Hunting of 2026 With Quiet Power

7 Best 22 Pcp Air Rifle Under 300 of 2026 For Backyard Pest Control

10 Best 22 Break Barrel Air Rifles of 2026 For Backyard Pest Control
10 Best 30 Caliber Pcp Air Rifle of 2026 For Medium Game
Top Best 177 Air Rifle Under 100: Budget-Friendly Picks for 2026

How to Safely Reload Shotgun Shells at Home

11 Best Co2 Air Rifle For Pest Control of 2026 To Ensure Humane Dispatch

12 Best Inexpensive Air Rifles of 2026 For Dependable Backyard Accuracy