
How to Sight In a Laser Sight Step by Step

Start by resting the unloaded firearm on a flat surface and lining the beam up with your mechanical sights across the room. Doing this simple baseline check gets the beam close to center so zeroing does not waste boxes of ammunition. Once on the firing range, shoot a steady cluster from a rest and adjust the alignment screws until the dot matches your bullet holes.
The exact dial settings depend on your target distance and where the unit mounts to your frame. Because a rail-mounted laser sits an inch or two below the barrel, the straight beam and curved bullet path only meet at one set yardage, usually between seven and fifteen yards for a defensive handgun. Setting that distance first keeps every shot predictable. Here are the clear steps to get your sight locked on target without the headache.
What Distance Should You Choose for Your Laser?
Zeroing means adjusting the laser dot so your shots land exactly where the dot points at a set distance. Before turning any adjustment dials, you must pick the exact yardage where you want that alignment to happen. Without a fixed distance, you will chase bullet impacts across the target without ever locking in a reliable point of aim.
A laser beam travels in a straight line of light that never drops. A bullet, however, falls toward the ground due to gravity, traveling in a gentle curve. Because of this curved path, the straight laser beam and the arcing bullet only cross at specific points. Choosing your zero distance sets where those paths meet.
For a defensive handgun, setting your laser between 7 and 15 yards works best. Most defensive pistol encounters occur within 10 yards, making 7 to 10 yards practical for home defense or concealed carry. At this close range, the dot provides rapid confirmation without requiring you to calculate bullet drop.
If you mount a laser on a home defense carbine, rifle, or shotgun, a zero distance of 25 yards is standard. This distance provides practical accuracy across hallways, rooms, and open yards. Once you pick your distance, commit to it. Do not move your target closer or farther during the alignment process.
How Do You Align the Laser at Home?
You can complete a rough alignment at home before shooting live rounds. This initial setup gets the laser dot close to your point of impact, saving you from missing the paper target completely and wasting ammunition at the range.
Always clear the firearm first. Drop the magazine, open the slide or action, and visually inspect the chamber. Feel inside the chamber with your finger to confirm no cartridge is present. Remove all live ammunition from the room before continuing.
Mount the sight firmly to your standard Picatinny or 20mm slotted accessory rails. If you need a solid unit for a handgun, a sturdy rail mount pistol laser sight keeps the housing from shifting on the frame. Once mounted, follow these steps:
- Support the firearm: Secure the cleared firearm in a bench vise with padded jaws or rest it firmly on heavy sandbags. The firearm must sit completely still without hand support.
- Pick an aiming mark: Choose a distinct spot on an interior wall across the room at your planned distance. A small square of dark tape on a light wall works well.
- Center your mechanical sights: Align your iron sights squarely on the wall mark. Keep the front sight post level and centered in the rear notch. If you use backup optics, understanding how to pair iron sights for cowitness gives you an extra reference to confirm your line of sight is centered.
- Use a bore tool if available: A bore sighter is a barrel-mounted laser tool used for setup that slips into the muzzle or chamber. It projects a reference beam straight out of the barrel centerline, showing where the bore actually points.
- Adjust the laser screws: Locate the two adjustment screws on the laser housing. Windage is the left and right adjustment screw on the side. Elevation is the up and down adjustment screw on the top or bottom. Turn the screws with the supplied wrench until the laser dot sits directly over your front sight post or overlaps the bore sighter dot.
- Confirm alignment: Step back and make sure the firearm did not shift in the rest. Verify that both the sights and the laser beam point to the exact same spot.
How Do You Adjust the Laser at the Range?
Home alignment gets your laser close, but live shooting confirms where bullets actually strike. Recoil and bullet velocity both influence flight, so range verification is essential.
Never zero a laser while standing offhand. Body sway and trigger jerk scatter your shots, making it impossible to tell whether an error comes from the laser or your grip. Sit at a bench and rest the firearm frame or your wrists on steady sandbags.
- Set up your target: Place a paper target with clear bullseyes downrange at your chosen zero distance, such as 10 yards.
- Aim with the laser dot: Switch on the laser. Hold the aiming dot steady on the center bullseye using the sandbag support. Focus on the dot rather than your iron sights.
- Fire a three-shot group: Squeeze the trigger smoothly three times. Keep the dot centered on the bullseye through each shot without rushing.
- Check bullet impact: Unload the firearm, lock the action open, and leave it resting on the bench pointing downrange. Inspect your target to find the center of your three-shot group. Note how far the cluster sits from the bullseye.
- Adjust the screws toward the holes: Use your wrench to turn the adjustment screws. Turning the screws moves the laser dot itself. To bring the dot onto your shots, move it toward where the bullets landed. If shots hit left, adjust windage to move the dot left. If shots hit low, adjust elevation to move the dot down.
- Fire a confirmation group: Aim the adjusted dot back at the center bullseye and fire three more shots. If the holes cluster around the dot, your laser is zeroed. If not, make small adjustments until they match.
Why Does the Laser Beam Drift at Different Ranges?
Shooters often notice that a laser zeroed at 10 yards hits slightly high or low at other distances. This drift is not a mechanical defect. It occurs because of laser offset, which is the physical space between the laser lens and the center of the barrel.
When a laser mounts to an under-barrel rail, the lens sits one to two inches below the bore centerline. Because the laser shines in a straight line while the bullet arcs downward, the two lines can only cross at your zero distance.
Think of the laser path and bullet path as two lines forming an elongated X. Because the laser sits below the barrel, the beam must angle slightly upward to intersect the bullet path at your zero point. At distances closer than your zero, the bullet exits higher than the laser beam, causing shots to strike slightly above the dot.
Past your zero distance, the straight laser beam continues rising while gravity pulls the bullet downward, causing shots to land below the dot. On a defensive handgun zeroed at 10 yards, this difference is usually under two inches between point-blank range and 20 yards, keeping your shots well within target center.
How Do You Keep Recoil from Loosening the Sight?
Recoil creates sudden vibrations that loosen mounting screws and shift internal parts. If your laser holds zero for ten rounds and then wanders, loose hardware is usually the culprit. Use this checklist to keep your sight securely locked:
- Degrease mounting threads: Clean the rail, clamp bars, and screw threads with rubbing alcohol before mounting. Removing oils ensures thread compounds bond securely.
- Apply medium-strength thread locker: Place a drop of blue thread-locking fluid on the mounting screw threads. Blue formula holds against heavy recoil vibrations but still releases with hand tools. Never use permanent red thread locker on small firearm screws.
- Torque to manufacturer specifications: Tighten clamp screws with an inch-pound torque tool instead of guessing with a basic Allen key. Most rail clamps require 15 to 20 inch-pounds of torque. Over-tightening can strip threads, while under-tightening lets the sight slide under recoil.
- Never force internal screws: Windage and elevation dials move against small internal springs. Once a screw resists turning, stop immediately. Forcing it past its limit will strip internal threads or crack the laser diode mount.
- Mark witness lines: Draw a fine line across each screw head onto the sight body with a paint pen once zeroed. A quick visual check will show if a screw backs out during range sessions.
What Kind of Alignment Tool Makes Setup Easier?
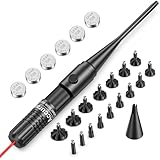
Zeroing a laser sight purely with live ammunition burns through expensive cartridges, especially if your initial alignment misses the paper entirely. A dedicated laser bore sight kit provides a fast shortcut by creating an instant bore reference right from your workbench.
When choosing an alignment kit, check caliber compatibility and mounting design. Multi-caliber kits use expanding adapters that slide into the muzzle, seating securely in rifling from .17 caliber up to 12-gauge shotgun barrels. Cartridge-style units match specific casing dimensions and chamber directly into the breech. Chamber units offer dedicated alignment for a single caliber, while multi-caliber kits let you zero multiple firearms with one set.
Consider the switch style and beam color as well. A push-button switch lets you turn the beam on and off without unthreading battery caps or disturbing the tool inside the barrel. If you plan to zero outdoors in daylight, a bright green laser provides better visibility against sunny targets than a red beam, though red lasers work reliably indoors and in dim light.

- ARS Mark9.2
ARS Mark is a ranking system developed by bestairriflescopes.com. ARS Mark has no relationship or impact from any manufacturers or sales agent websites. Learn more
- BrandUUQ

- ARS Mark9.2
ARS Mark is a ranking system developed by bestairriflescopes.com. ARS Mark has no relationship or impact from any manufacturers or sales agent websites. Learn more
- BrandVisiofire

- ARS Mark9.0
ARS Mark is a ranking system developed by bestairriflescopes.com. ARS Mark has no relationship or impact from any manufacturers or sales agent websites. Learn more
- BrandAEROSHOT

- ARS Mark8.8
ARS Mark is a ranking system developed by bestairriflescopes.com. ARS Mark has no relationship or impact from any manufacturers or sales agent websites. Learn more
- BrandCVLIFE

- ARS Mark8.8
ARS Mark is a ranking system developed by bestairriflescopes.com. ARS Mark has no relationship or impact from any manufacturers or sales agent websites. Learn more
- BrandEZshoot
- ARS Mark8.8
ARS Mark is a ranking system developed by bestairriflescopes.com. ARS Mark has no relationship or impact from any manufacturers or sales agent websites. Learn more
- BrandCVLIFE

- ARS Mark8.8
ARS Mark is a ranking system developed by bestairriflescopes.com. ARS Mark has no relationship or impact from any manufacturers or sales agent websites. Learn more
- BrandCVLIFE

- ARS Mark8.6
ARS Mark is a ranking system developed by bestairriflescopes.com. ARS Mark has no relationship or impact from any manufacturers or sales agent websites. Learn more
- BrandEZshoot
- ARS Mark8.4
ARS Mark is a ranking system developed by bestairriflescopes.com. ARS Mark has no relationship or impact from any manufacturers or sales agent websites. Learn more
- BrandEZshoot
Last update on 2026-10-02 / Affiliate links / Images, Product Titles, and Product Highlights from Amazon Product Advertising API
FAQs
Does a laser sight replace iron sights or optics?
A laser sight serves as an aiming aid rather than a replacement for iron sights or optics. Batteries can drain, electronic switches can fail, and direct sunlight can wash out the dot on light targets. Keeping functional iron sights ensures you always have a dependable backup aiming system.
Can you see a red laser dot in direct sunlight?
A red laser dot is difficult to see in full outdoor sunlight beyond 5 to 7 yards. The human eye struggles to pick up red light against bright, sunlit backgrounds like dirt or paper. For daylight shooting, an overcast day or a green laser makes tracking the dot much easier.
Will removing the laser sight ruin your zero?
Removing the laser from your accessory rail will almost always shift your zero. Even a tiny variation in how the clamp seats against the rail slots changes where the beam points downrange. If you take the sight off to clean the firearm, always verify your zero before relying on it.
What should you do if the adjustment screws stop turning?
Stop turning the wrench immediately once you feel firm resistance. Reaching the end of the screw travel means the internal diode cannot tilt any farther. If your dot still does not match bullet impact, remove the sight, clean the rail, and remount it squarely on the firearm frame.


12 Best 22 Pcp Air Rifle For Hunting of 2026 With Quiet Power

7 Best 22 Pcp Air Rifle Under 300 of 2026 For Backyard Pest Control

10 Best 22 Break Barrel Air Rifles of 2026 For Backyard Pest Control

10 Best 30 Caliber Pcp Air Rifle of 2026 For Medium Game

Top Best 177 Air Rifle Under 100: Budget-Friendly Picks for 2026

How to Safely Reload Shotgun Shells at Home

11 Best Co2 Air Rifle For Pest Control of 2026 To Ensure Humane Dispatch

12 Best Inexpensive Air Rifles of 2026 For Dependable Backyard Accuracy






