
How to Sight In a Red Dot Sight Without Wasting Ammo

Set up a firm bench rest and place a target just 10 to 15 yards away. Starting close keeps your first shots on the paper so nothing gets lost off the backboard. Fire a careful three-shot cluster while holding your aim steady, then turn the adjustment dials to walk your bullet holes right behind the glowing dot.
The exact routine changes depending on your firearm and how your optic is built. Handguns are usually finished at 15 to 25 yards, while rifles typically need a second tune-up out at 50 or 100 yards. Optic dials also move your hits by different amounts at different ranges, so resting on solid sandbags prevents you from chasing scattered holes. Here is how to read the markings correctly and line up your point of impact without burning extra ammo.
Mounting Prep, Bench Stability, and Starting Distances
Before you load a single magazine, your optic needs to be attached correctly to your firearm. Most sighting headaches come from loose hardware rather than bad shooting or broken optics. When a sight shifts even a fraction of a millimeter under recoil, your shots will scatter across the paper target, and no amount of dial turning will fix it. Always clear the firearm first by dropping the magazine, racking the slide or bolt, and visually checking the empty chamber before touching any tools.
Red dot sights attach either to standard Picatinny or 20mm slotted accessory rails on rifles or directly into a specific slide cut on a handgun. Handgun slides use specific screw-hole patterns called footprints, such as RMR or RMSc cuts. When setting the optic into its footprint or onto a rail, make sure it sits flat without any rocking or gap underneath. Clean the screw threads with rubbing alcohol to remove factory oil. Apply a tiny drop of medium-strength blue thread-locking liquid to the screw threads, then tighten each screw using an inch-pound torque tool. Hand-tightening with a basic Allen key often leads to stripped threads or loose screws that back out under heavy recoil. Follow the torque numbers listed in your optic manual, which usually fall between 12 and 15 inch-pounds for handguns.
Once the sight is locked down, your bench setup determines whether your zeroing session goes smoothly or turns into a box of wasted ammunition. Sighting in requires removing human movement from the firearm. You cannot sight in an optic accurately while standing on your feet and holding the gun freehand, because your body naturally sways, your arms tire, and your trigger pull can yank the barrel off target.
- Clear your firearm completely and confirm the chamber is empty before starting any mounting work.
- Clean all mounting screws, apply blue thread-locking liquid, and tighten with an inch-pound torque tool.
- Place your firearm on a front shooting rest, sandbag, or bench block so it stays still without muscle strain.
- Start your target close at 10 to 15 yards to guarantee your initial shots hit paper.
The biggest beginner mistake is setting the target out at 50 or 100 yards right away. If your sight is misaligned by even a small angle from the factory, your bullets will fly completely off the target backer at longer distances. You will have no idea whether your shot went high, low, left, or right. Starting at 10 to 15 yards guarantees your bullets hit somewhere on a standard paper sheet. Handguns are usually zeroed permanently between 15 and 25 yards, while rifles end up sighted in at 50 or 100 yards. Starting both platforms at 10 to 15 yards saves your ammunition and gives you an immediate visual baseline.
Rough Alignment with a Bore Sighter or Iron Sights
You can get your aiming dot close to your actual bullet impact before firing a single live round. This preliminary step is called bore sighting, and it aligns the optical path through the glass with the physical path of the barrel bore. Doing this at home or at the bench saves you from firing random shots just to find the edges of your paper target.
A laser bore sighter is the quickest tool for rough alignment. These tools come as either a cartridge-shaped laser that sits inside the firearm chamber or an arbor kit that slides snugly into the muzzle of the barrel. Once inserted, the tool projects a straight laser beam down the center of the barrel onto a wall or target backer about 10 to 15 yards away. With the firearm resting securely on your bench bags, look through the optic window. You will see your optic aiming dot and the laser dot on the wall. Simply turn your adjustment dials until the red optic dot rests directly over the laser dot. Always remove the bore sighter and clear the muzzle before handling any live ammunition.
If you do not have a laser bore sighter, you can use your firearm iron sights for initial alignment. Handgun slides and modern rifles often feature backup sights designed for co-witness, which means lining up your backup iron sights through the optic glass. If you use tall iron sights for cowitness with red dot sights, look through the rear sight notch and focus on the front sight post. Adjust your red dot dials until the illuminated dot sits directly on top of the front sight blade. This visual check gets your optic straight enough to hit paper on your first live shot.
Remember that rough alignment with a laser or iron sights is never a substitute for live-fire zeroing. Bullets travel in an arc due to gravity, and firearm recoil begins while the bullet is still traveling down the barrel. A laser travels in a perfectly straight line and has no weight or recoil. Rough alignment only guarantees that your initial shots will land safely on your target backer so you can begin fine-tuning with live ammunition.
Live-Fire Sighting Steps and Dial Adjustments
With your rough alignment complete and your target set at 10 to 15 yards, settle into your shooting bench. Sighting in is a deliberate, step-by-step process. Rushing your shots or making hasty dial turns after every single pull of the trigger will leave you chasing holes all over the paper.
- Fire a steady three-shot group: Center your red dot on the target bullseye and press the trigger smoothly three times. Do not touch your optic adjustment dials after the first shot. One stray shot can happen because of poor trigger press or bench wobble. Three shots together form a group that shows your true point of impact.
- Locate the center of your group: Walk downrange or look through a spotting scope to find the center of the triangle formed by your three bullet holes. Compare that group center to your point of aim, which is the bullseye where your red dot was resting.
- Measure the distance to your aiming point: Use a small ruler or the grid lines on a sighting target to measure how many inches your bullet group is hitting away from the bullseye. Note whether the group is low or high, and whether it is left or right.
- Turn the adjustment dials: Remove the protective turret caps from your optic. Your optic has two adjustment dials: the elevation dial on top, which controls up-and-down movement, and the windage dial on the side, which controls left-to-right movement.
- Fire a second three-shot confirmation group: Aim at the bullseye again and fire three more careful shots. Your new group should land much closer to the center. If it is still slightly off, make minor dial adjustments.
- Push the target back to your final zero distance: Once you are hitting center at your starting distance, move your target out to your final distance, such as 25 yards for a handgun like a target Ruger Mark or 50 to 100 yards for a rifle. Fire one final three-shot group to verify your zero at full distance.
The most common frustration during zeroing is turning the adjustment dials the wrong direction. Optic adjustment dials are clearly marked with directional arrows, usually labeled "UP" and "R" for right. These arrows indicate the direction your bullet impact will move on the target, not the direction the glass or internal emitter moves. If your three-shot group hits 3 inches below the bullseye, turn the top elevation dial in the direction of the "UP" arrow to walk the bullets upward. If your shots hit 2 inches to the left of the bullseye, turn the side windage dial in the direction of the "R" arrow to move the bullet impact to the right.
Understanding how much each click moves your shot prevents guesswork. Optic adjustment clicks are measured in Minute of Angle, commonly called MOA. One MOA represents roughly 1 inch at 100 yards. If an optic features 1 MOA per click, each click moves the bullet impact 1 inch at 100 yards, half an inch at 50 yards, and one-quarter of an inch at 25 yards. If your target is placed at 12.5 yards, that same click moves the bullet impact only one-eighth of an inch. When you are sighting in close at 10 to 15 yards, you will need to turn the dial several clicks to move your bullet impact a single inch on paper. Count your clicks carefully as you turn, write down your adjustments, and never adjust both dials at the exact same moment if you are trying to stay organized.
If your shots scatter unpredictably across the target without forming a tight cluster, stop shooting live rounds and check your hardware. Grab the optic with your hand and try to gently wiggle it. Any play or clicking sound means the mounting plate or base screws have loosened. If the mount is completely solid, check your shooting fundamentals. Resting your hands or barrel directly on hard wood or metal can cause the firearm to bounce during recoil, throwing shots off target. Always rest the gun on soft sandbags or rubber pads. Check your optic brightness as well. If the dot appears starburst-shaped or fuzzy, lower the illumination until you see a crisp, round dot that does not bloom across your target.
What to Look for in Red Dot Sights and Alignment Tools
Having the right gear makes zeroing straightforward and repeatable. When shopping for an optic or sighting accessory, look for features that keep your zero locked down under heavy shooting schedules. Dependable optics feature clear, tactile adjustment clicks that you can distinctly feel and hear with your fingers. Spongy or silent adjustment screws make it difficult to count adjustments accurately, forcing you to guess how far you turned the dial.
Consider the build construction and housing design. Handgun optics experience intense back-and-forth shock forces every time the slide cycles, so optics forged from durable aerospace aluminum hold their internal zero much better than budget plastic units. You should also check the battery compartment layout. Optics with side-loading or top-loading battery trays let you replace dead batteries without taking the sight off your firearm, preserving your zero completely. Sights with bottom-mounted batteries require removing the entire sight from the slide, which ruins your zero and forces you to repeat the sighting process every time the battery dies.
Motion-sensing auto-on features, often called shake-awake technology, are also valuable. These sensors turn the reticle on instantly when movement is detected and shut it down after several minutes of stillness, saving battery life without leaving you with a blank window at the range. Finally, keeping a dedicated laser bore sight kit in your range bag turns any future optic installation or iron sight swap into a quick five-minute alignment job that wastes almost no live ammunition.

- ARS Mark9.0
ARS Mark is a ranking system developed by bestairriflescopes.com. ARS Mark has no relationship or impact from any manufacturers or sales agent websites. Learn more
- BrandARORY

- ARS Mark9.0
ARS Mark is a ranking system developed by bestairriflescopes.com. ARS Mark has no relationship or impact from any manufacturers or sales agent websites. Learn more
- BrandCVLIFE

- ARS Mark8.8
ARS Mark is a ranking system developed by bestairriflescopes.com. ARS Mark has no relationship or impact from any manufacturers or sales agent websites. Learn more
- BrandCVLIFE

- ARS Mark8.8
ARS Mark is a ranking system developed by bestairriflescopes.com. ARS Mark has no relationship or impact from any manufacturers or sales agent websites. Learn more
- BrandCVLIFE

- ARS Mark8.8
ARS Mark is a ranking system developed by bestairriflescopes.com. ARS Mark has no relationship or impact from any manufacturers or sales agent websites. Learn more
- BrandEZshoot

- ARS Mark8.8
ARS Mark is a ranking system developed by bestairriflescopes.com. ARS Mark has no relationship or impact from any manufacturers or sales agent websites. Learn more
- BrandCVLIFE
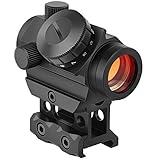
- ARS Mark8.6
ARS Mark is a ranking system developed by bestairriflescopes.com. ARS Mark has no relationship or impact from any manufacturers or sales agent websites. Learn more
- BrandMidTen

- ARS Mark8.6
ARS Mark is a ranking system developed by bestairriflescopes.com. ARS Mark has no relationship or impact from any manufacturers or sales agent websites. Learn more
- BrandFeyachi

- ARS Mark7.8
ARS Mark is a ranking system developed by bestairriflescopes.com. ARS Mark has no relationship or impact from any manufacturers or sales agent websites. Learn more
- Brandohhunt

- ARS Mark7.0
ARS Mark is a ranking system developed by bestairriflescopes.com. ARS Mark has no relationship or impact from any manufacturers or sales agent websites. Learn more
- BrandOHHLION
Last update on 2026-10-02 / Affiliate links / Images, Product Titles, and Product Highlights from Amazon Product Advertising API
FAQs
Why does my red dot appear to move around the window when I shift my head?
This visual effect is normal and is how red dot sights are designed to work. Red dots are largely parallax-free, meaning the illuminated reticle stays locked onto the target even if your eye is not centered behind the lens. As long as your optic is zeroed and the dot is resting on your target bullseye, your bullet will land where the dot points regardless of your head position.
Should I sight in my handgun red dot at 15 or 25 yards?
Most shooters prefer zeroing a defensive or carry handgun at 15 yards, while competitive and precision target shooters lean toward 25 yards. A 15-yard zero keeps your bullet path within an inch of your aiming point from 5 yards out to 25 yards, which covers standard self-defense distances. Sighting in at 25 yards provides slightly better precision at longer distances, but it demands very steady bench technique to shoot tight groups.
Do I adjust the optic dials toward where the bullet hit or toward the bullseye?
You turn the dials to move your bullet impact toward the bullseye. Optic dials are marked to show the direction the bullet holes will travel on paper. If your shots hit low and to the left, turn the elevation dial toward "UP" to raise your hits and the windage dial toward "R" to push your hits to the right until they match your aiming point.


12 Best 22 Pcp Air Rifle For Hunting of 2026 With Quiet Power

7 Best 22 Pcp Air Rifle Under 300 of 2026 For Backyard Pest Control

10 Best 22 Break Barrel Air Rifles of 2026 For Backyard Pest Control

10 Best 30 Caliber Pcp Air Rifle of 2026 For Medium Game

Top Best 177 Air Rifle Under 100: Budget-Friendly Picks for 2026

How to Safely Reload Shotgun Shells at Home

11 Best Co2 Air Rifle For Pest Control of 2026 To Ensure Humane Dispatch

12 Best Inexpensive Air Rifles of 2026 For Dependable Backyard Accuracy






