
How to Sight In at 50 Yards Without Wasting Ammo

Sighting in a dot sight at 50 yards works fastest by starting at 15 yards first so your bullets hit the paper target immediately. The main catch is that each adjustment click moves the bullet impact half as far at 50 yards as it does at standard rifle distances. Setting that quick short-range baseline stops you from chasing scattered holes or wasting costly ammunition into the dirt berm.
Your exact dial adjustments will depend on the measurement marks stamped on your optic, along with resting the gun on firm sandbags to stop natural body sway. Ammunition caliber and how high the sight sits above the barrel also shape where the bullet travels farther out. Following a simple bench routine gets your dot locked dead center without any confusing math.
The Short Version
- Start close first: Place your first paper target at 15 or 25 yards. This guarantees your shots hit paper so you do not waste rounds trying to find where your bullets are landing downrange.
- Rest the rifle completely: Support both the front handguard and the buttstock on sandbags or a bench block. Removing your body wobble is the only way to confirm where the optic is truly pointing.
- Double your dial clicks: Red dot adjustment dials are usually calibrated for 100 yards. At 50 yards, each click moves your bullet strike half as far, meaning you need twice as many clicks to move your bullet impact one inch.
- Fire in clusters of three: Never turn the dials after a single shot. Fire three shots with the dot resting on the center ring, find the center of that group, and adjust from that middle point.
Pre-Range Checklist: Getting Your Sight Ready at Home
Before heading to the shooting line, take care of setup tasks at home. Trying to fix loose hardware or dead batteries on a cold shooting bench causes frustration and wasted ammunition. Start by clearing your firearm completely: remove the magazine, open the action, and physically check the chamber with your finger to confirm it is empty.
A loose optic mount is the most common reason a dot sight refuses to hold its zero. When a red dot wobbles by even the thickness of a piece of paper on your rail, that tiny shift moves your bullet impact several inches downrange. Set your sight onto the standard Picatinny or 20mm slotted accessory rail and push the optic forward toward the muzzle before clamping it down. This forward pressure keeps the cross-bolt snug against the rail slot during recoil.
Always tighten your mounting screws with an inch-pound torque tool (a specialized wrench that limits turning force so you do not crush delicate threads). Check your optic manual for the exact torque rating, which is typically between 15 and 25 inch-pounds. Adding a drop of medium-strength, removable thread-locking fluid to each screw thread stops mounting screws from vibrating loose under fire. Let the fluid dry overnight before shooting.
If your carbine has backup sights, this is also the moment to inspect your visual setup. Checking your iron sights for cowitness with red dot sights lets you look through the optic glass and align your iron posts directly with the dot. If your iron sights are already zeroed, placing the red dot right on top of the front post gives you a quick preliminary alignment before you burn a single cartridge.
Finally, inspect the aiming dot itself. Turn on the optic and lower the brightness until the red dot is just bright enough to see cleanly against a light wall. Running the brightness dial at maximum setting causes starburst glare, turning a small, precise dot into an oversized fuzzy blotch that hides the target bullseye.
The Short-Range Start: Saving Ammo at 15 to 25 Yards
The single biggest mistake shooters make is walking out to the 50-yard bench, pinning a target up, and pulling the trigger. Fresh out of the box, an optic can easily be pointed twelve inches higher or wider than your bore axis. At 50 yards, that gap sends your bullets straight into the dirt backer or the wooden target frame. You are left guessing whether you missed high, low, or wide, and you can burn two boxes of shells without learning a thing.
You can eliminate this problem by starting close. Here is the step-by-step process:
- Set your target at 15 or 25 yards: At this short distance, the paper target covers an enormous visual area compared to where the rifle barrel points. Even if the sight alignment is wildly off, your bullet holes will still punch somewhere on the paper sheet.
- Build a stable shooting rest: Sit down at the bench. Rest the front handguard on a solid front bag and tuck a small squeeze bag under the toe of the rifle stock. Squeeze the rear bag with your off-hand until the aiming dot hovers effortlessly over the bullseye without your arm muscles holding it up.
- Fire a three-shot cluster: Keep your focus on the target paper, hold the aiming dot steady on the center bullseye, and press the trigger smoothly straight back. Fire three shots at a calm, steady rhythm, letting the rifle settle completely between each round.
- Find the center of your group: Do not look at individual holes. Look at the three-shot cluster of bullet holes as a small triangle and mark the center point between them.
- Walk the cluster toward center: Using your optic dials, make a preliminary adjustment to push that cluster toward the bullseye. You do not need absolute perfection at 15 or 25 yards. As long as your bullets hit within an inch or two of the center mark, your rifle is ready to move back to the 50-yard line.
Dial Math: Calculating Clicks per Inch at 50 Yards
Optic adjustment dials often intimidate new shooters, but they operate on simple geometry. Your optic has two dials hidden under protective screw caps: the top dial is for elevation (the up-and-down adjustment click dial), and the side dial is for windage (the left-to-right adjustment click dial).
Each dial is marked with an arrow and an abbreviation. The top dial shows "UP" and the side dial shows "R" (Right). These labels tell you which direction your bullet impact will travel on the target when you turn the dial that way. If your shots hit low on the paper, you turn the top dial toward "UP" to lift the next shots higher. If your shots hit left, you turn the side dial toward "R" to push future shots to the right.
The trickiest part for most shooters is understanding how much each click moves the bullet. Dot sight dials are marked in MOA (a dial measurement mark known as Minute of Angle). In practical terms, 1 MOA covers roughly 1 inch on a target sitting 100 yards away. But when you cut that distance in half to 50 yards, 1 MOA only covers half an inch.
Look closely at the lettering stamped on your sight dials. Most red dots are built with 0.5 MOA clicks, though some models feature 1 MOA clicks or 0.25 MOA clicks. Here is how that math works when shooting at 50 yards:
- If your dial is marked 0.5 MOA per click: At 100 yards, two clicks move your bullet hole one inch. At 50 yards, each click only moves the bullet strike 1/4 inch. That means you must dial 4 clicks for every 1 inch you want to move your bullet on the paper.
- If your dial is marked 1 MOA per click: At 100 yards, one click moves your bullet hole one inch. At 50 yards, each click moves the bullet strike 1/2 inch. That means you must dial 2 clicks for every 1 inch of needed adjustment.
- If your dial is marked 0.25 MOA per click: At 50 yards, each click moves the bullet strike just 1/8 inch. You will need 8 clicks for every 1 inch of adjustment.
Put this into practice with a concrete example. Suppose your sight has 0.5 MOA dials. At 50 yards, your three-shot group lands 2 inches low and 3 inches to the left of the bullseye. To correct the height, multiply 2 inches by 4 clicks: turn the top dial 8 clicks toward "UP". To correct the sideways drift, multiply 3 inches by 4 clicks: turn the side dial 12 clicks toward "R".
The 50-Yard Finish: Dialing in the Bullseye
With your rough zero established at close range and the click math understood, you are ready to complete your 50-yard zero. Follow these steps to finish the job cleanly:
- Mount a fresh target at 50 yards: Use a target with high-contrast lines or a 1-inch grid pattern. Make sure the paper is stapled completely flat so target curl does not distort your visual point of aim.
- Lower your dot intensity: Set your dot brightness down so the dot is translucent rather than solid red. A fine 2 MOA aiming dot covers roughly one inch of your target at 50 yards. If the dot is turned up too bright, the red glare blooms to 4 or 5 inches wide, blocking your view of the bullseye and ruining your shot precision.
- Settle and fire your three-shot group: Settle behind the rifle. Take a slow, natural breath, let the air out halfway, hold, and squeeze the trigger. Repeat this for three shots. Do not rush. Let your barrel cool slightly between shots so heat expansion does not shift your point of impact.
- Measure your distance from center: Walk downrange or use a spotting scope to inspect the cluster. Measure from the dead center of the 3-shot cluster straight to the center of the target red dot. Measure both the vertical distance (inches high or low) and the horizontal distance (inches left or right).
- Make your dial adjustments: Turn your dials using the 50-yard click formula you worked out earlier. Count the audible clicks with care.
- Fire a confirmation cluster: Settle back onto the bench and fire three more rounds at the bullseye. The new cluster should punch clean holes directly inside the center bullseye ring. Once your shots are centered, thread your metal turret caps back on securely to protect the dials from dirt and impact.
If your shots are stringing vertically in a tall line instead of clustering in a tight triangle, check your breathing and shoulder pressure. Inconsistent cheek pressure against the stock changes how the rifle recoils into your body, which pulls shots up and down. If your shots are spreading out horizontally, you are likely jerking the trigger sideways instead of pressing it straight to the rear.
Understanding Your Trajectory: How a 50-Yard Zero Behaves at 100 and 200 Yards
Setting your rifle to hit dead center at 50 yards is widely considered the most practical zero distance for defensive carbines and sporting rifles chambered in calibers like 5.56 NATO or .223 Remington. Understanding how the bullet travels downrange helps you make sense of what happens past the 50-yard mark.
A firearm barrel does not shoot a laser; it throws a projectile on a curved arc. On a modern semi-automatic rifle, the center of the optic glass sits roughly 2.5 inches higher than the center of the barrel bore. Because the optic is mounted higher than the barrel, the barrel must angle slightly upward to meet your line of sight.
When you fire, the bullet leaves the muzzle below your aiming dot, climbs upward, and crosses your line of sight for the first time at 50 yards. Because the bullet is still rising along its trajectory arc, it continues climbing for the next several dozen yards. Around 100 to 130 yards, the bullet reaches the peak of its flight path, flying roughly 1.5 to 2 inches higher than your aiming dot.
As gravity pulls the bullet back down, it crosses your line of sight a second time around 200 yards (depending on your bullet weight and barrel length). This is often called the 50/200 yard zero. In everyday shooting, this means you can hold your red dot dead center on a silhouette target anywhere from 25 yards out to roughly 225 yards, and your bullet will strike within two inches of the dot without you having to calculate bullet drop or touch an adjustment dial.
Keep in mind that this flight path changes if you shoot heavier calibers or pistol-caliber carbines. A 9mm carbine zeroed at 50 yards will drop significantly faster past 75 yards than a high-velocity rifle cartridge. Always verify your impacts at 100 yards when your range setup allows it.
Tools That Make Sighting In Faster
While you can sight in a firearm with nothing more than standard paper targets and a box of cartridges, specific accessories save significant time, frustration, and range fees. Sighting aids help align your optic mechanically before you spend live ammunition, letting you walk onto the range with confidence that your first shot will land on target.
When selecting alignment gear and range accessories, look for options that simplify measurements and eliminate guesswork:
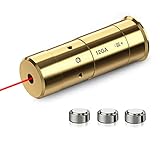
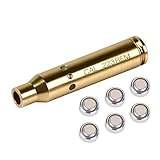
- Laser bore sights: These small tools project a visible laser beam straight down the center axis of your barrel. Some are shaped like a brass cartridge that chambers directly into your firearm, while others use caliber-specific arbor adapters that slide into the muzzle. Using a bore sight indoors against a blank wall lets you dial your red dot directly onto the laser point, guaranteeing you hit paper on your first live shot. When choosing one, check that the laser beam is bright enough for outdoor use if you plan to calibrate on the firing line, and confirm that it includes adapters matching your exact barrel caliber.
- Grid sight-in targets: Standard concentric bullseye rings make it difficult to guess exact distances downrange. Dedicated sighting targets feature bright 1-inch grid squares printed across the entire face. With a grid target, you can glance through a spotting scope, count the squares from the bullseye to your bullet hole, and instantly know whether you need four clicks or eight clicks without pacing downrange with a ruler.
- Range logbooks: A pocket notebook dedicated to your firearms lets you write down your click settings, the specific brand and grain weight of the ammunition used, and the zero distance. Because shifting to a different bullet weight changes where your shots land, keeping notes means you never have to repeat the full zeroing process from scratch.

- ARS Mark10.0
ARS Mark is a ranking system developed by bestairriflescopes.com. ARS Mark has no relationship or impact from any manufacturers or sales agent websites. Learn more
- BrandIndependently Published

- ARS Mark9.4
ARS Mark is a ranking system developed by bestairriflescopes.com. ARS Mark has no relationship or impact from any manufacturers or sales agent websites. Learn more
- BrandChris Sajnog

- ARS Mark9.2
ARS Mark is a ranking system developed by bestairriflescopes.com. ARS Mark has no relationship or impact from any manufacturers or sales agent websites. Learn more
- BrandChris Sajnog
- ARS Mark9.2
ARS Mark is a ranking system developed by bestairriflescopes.com. ARS Mark has no relationship or impact from any manufacturers or sales agent websites. Learn more
- BrandMidTen

- ARS Mark9.2
ARS Mark is a ranking system developed by bestairriflescopes.com. ARS Mark has no relationship or impact from any manufacturers or sales agent websites. Learn more
- BrandCREATESPACE

- ARS Mark8.8
ARS Mark is a ranking system developed by bestairriflescopes.com. ARS Mark has no relationship or impact from any manufacturers or sales agent websites. Learn more
- BrandAEROSHOT
- ARS Mark8.8
ARS Mark is a ranking system developed by bestairriflescopes.com. ARS Mark has no relationship or impact from any manufacturers or sales agent websites. Learn more
- BrandMidTen

- ARS Mark8.8
ARS Mark is a ranking system developed by bestairriflescopes.com. ARS Mark has no relationship or impact from any manufacturers or sales agent websites. Learn more
- BrandCVLIFE
Last update on 2026-10-02 / Affiliate links / Images, Product Titles, and Product Highlights from Amazon Product Advertising API
FAQs
Which way do I turn the dials if my rifle shoots low and to the left?
Turn the top dial in the direction marked "UP" and turn the side dial in the direction marked "R" (Right). Optic dial markings always indicate the direction you want to move your bullet holes on the paper, not the direction the internal reticle shifts. Adjusting toward UP and Right will lift your bullet holes and push them into the bullseye.
Why are my shots scattering all over the paper instead of forming a tight group?
Scattered bullet holes are almost always caused by loose optic mounting screws or an unstable shooting rest. Check that your mount is securely torqued to the rail with thread-locking compound. Make sure you rest both the front handguard and the rear stock on sturdy sandbags so your natural muscle tremor does not sway the rifle while you pull the trigger.
Can I zero for 50 yards while shooting at an indoor 25-yard range?
Yes, you can establish an offset zero at 25 yards that will be very close at 50 yards. Because the red dot sits roughly 2.5 inches above your barrel on an AR-style rifle, your bullet is still climbing at 25 yards. If you adjust your optic so your three-shot group lands roughly 1.2 to 1.5 inches below the bullseye at 25 yards, your shots will strike dead center when you move out to 50 yards.
Does the size of my red dot affect how tightly I can sight in at 50 yards?
A smaller aiming dot makes precise zeroing much easier. A fine 2 MOA dot covers roughly one inch of your target at 50 yards, allowing you to center it inside a small bullseye. A larger 4 to 6 MOA dot covers two to three inches at that distance, which can obscure your aiming point. To shoot tight groups with any dot size, turn the illumination down to the lowest setting that stays visible against the white paper.


12 Best 22 Pcp Air Rifle For Hunting of 2026 With Quiet Power

7 Best 22 Pcp Air Rifle Under 300 of 2026 For Backyard Pest Control

10 Best 22 Break Barrel Air Rifles of 2026 For Backyard Pest Control

10 Best 30 Caliber Pcp Air Rifle of 2026 For Medium Game

Top Best 177 Air Rifle Under 100: Budget-Friendly Picks for 2026

How to Safely Reload Shotgun Shells at Home

11 Best Co2 Air Rifle For Pest Control of 2026 To Ensure Humane Dispatch

12 Best Inexpensive Air Rifles of 2026 For Dependable Backyard Accuracy






