
How to Use a Multi Pin Bow Sight Without Guesswork

How to Use a Multi Pin Bow Sight often sounds straightforward until several pins appear in the sight housing and every distance suddenly feels like a mental puzzle. A missed shot rarely comes from poor effort alone. More often, confusion creeps in when the wrong pin is selected, distance estimation slips, or sight settings haven't been matched to real shooting conditions. Small details can snowball into frustrating results.
Multiple pins exist for a reason. Each one is designed to represent a specific yardage, allowing quicker aiming without constant adjustments. That convenience becomes a huge advantage once the system makes sense. Still, many archers hesitate during critical moments because they're not fully confident about which pin should be floating on target.
Pin alignment, consistent anchor points, and distance awareness all work together. Ignore one piece, and accuracy can drift faster than expected. Meanwhile, understanding how the sight picture changes at different ranges helps remove hesitation and builds a smoother shooting rhythm. Confidence usually follows clarity.
Oh, and here's something many people overlook. The sight itself isn't doing the hard work. The real improvement comes from learning how each pin corresponds to trajectory changes over distance. Once that relationship clicks, aiming feels far more natural and predictable.
Practice sessions become much more productive when every shot has a purpose. Instead of randomly sending arrows downrange, shooters begin evaluating pin gaps, arrow impact locations, and body positioning. Those observations reveal patterns that are easy to miss during casual shooting. Gradually, adjustments become more deliberate and effective.
Distance management plays a massive role as well. A target that looks close can easily be several yards farther away than expected. Even slight misjudgments affect arrow drop. Understanding how to use the correct pin for each range reduces those surprises and keeps groups tighter.
Weather conditions can add another layer of challenge. Wind, lighting, and background contrast sometimes make pins appear different than they do on a calm practice range. Learning to trust sight settings instead of making rushed corrections helps maintain consistency. Patience often beats instinctive overcorrection.
Many shooters also benefit from creating a routine. Nocking the arrow, settling into form, confirming distance, selecting the proper pin, and executing a controlled release can turn a complicated process into a repeatable habit. That routine reduces mental clutter and keeps attention focused on the shot itself.
How to Use a Multi Pin Bow Sight ultimately revolves around understanding the relationship between pins, distance, and arrow flight. The equipment provides reference points, but accuracy grows from repetition, observation, and trust in the setup. Once those pieces start working together, the sight transforms from a cluster of pins into a practical tool that supports faster decisions and more reliable shooting.

- ARS Mark9.6
ARS Mark is a ranking system developed by bestairriflescopes.com. ARS Mark has no relationship or impact from any manufacturers or sales agent websites. Learn more
- BrandN/A
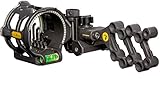
- ARS Mark9.2
ARS Mark is a ranking system developed by bestairriflescopes.com. ARS Mark has no relationship or impact from any manufacturers or sales agent websites. Learn more
- BrandTrophy Ridge

- ARS Mark9.0
ARS Mark is a ranking system developed by bestairriflescopes.com. ARS Mark has no relationship or impact from any manufacturers or sales agent websites. Learn more
- BrandCBE
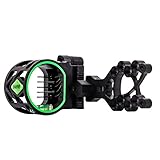
- ARS Mark9.0
ARS Mark is a ranking system developed by bestairriflescopes.com. ARS Mark has no relationship or impact from any manufacturers or sales agent websites. Learn more
- BrandLWANO
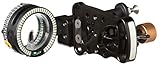
- ARS Mark8.6
ARS Mark is a ranking system developed by bestairriflescopes.com. ARS Mark has no relationship or impact from any manufacturers or sales agent websites. Learn more
- BrandTrophy Ridge
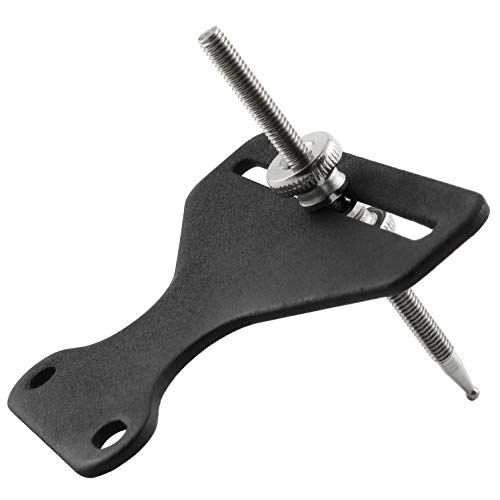
- ARS Mark8.2
ARS Mark is a ranking system developed by bestairriflescopes.com. ARS Mark has no relationship or impact from any manufacturers or sales agent websites. Learn more
- BrandSQXBK
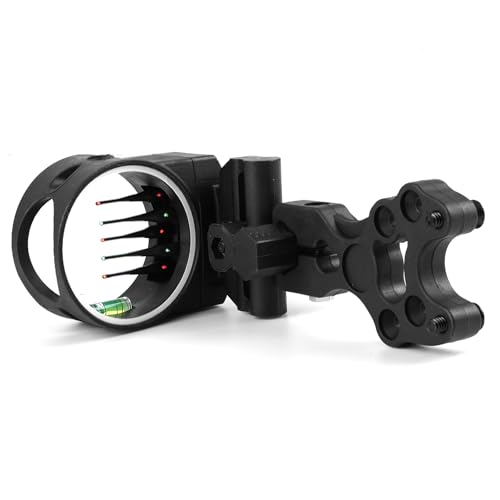
- ARS Mark7.4
ARS Mark is a ranking system developed by bestairriflescopes.com. ARS Mark has no relationship or impact from any manufacturers or sales agent websites. Learn more
- BrandMoyujian
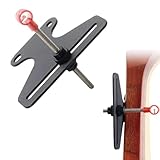
- ARS Mark6.8
ARS Mark is a ranking system developed by bestairriflescopes.com. ARS Mark has no relationship or impact from any manufacturers or sales agent websites. Learn more
- BrandKURUGEILI
Last update on 2026-08-05 / Affiliate links / Images, Product Titles, and Product Highlights from Amazon Product Advertising API
How To Use A Multi Pin Bow Sight
A clean shot can fall apart fast when the sight picture feels crowded, the yardage feels fuzzy, and the wrong pin starts looking tempting. That’s where how to use a multi pin bow sight turns from a gear question into a confidence question. The sight gives you fixed aiming references, but distance control, steady form, and calm decision-making still do the heavy lifting.
Multi Pin Bow Sight
A multi pin sight usually gives each pin its own yardage, such as 20, 30, 40, 50, and 60 yards. That setup helps you aim faster without moving a dial before every shot. The catch is simple: each pin must be matched to real arrow impact, not guessed from a chart or copied from another bow. Your bow speed, arrow weight, peep height, anchor point, and draw length all change where those pins belong.
Start by treating the sight as a reference system, not a magic fix. The top pin is usually set for the closest distance, and lower pins cover farther ranges as the arrow drops. That layout makes sense once you remember that arrows travel in an arc. Farther targets need lower pins because the arrow needs more upward launch angle to land where you want.
Newer shooters often stare at all the pins at once and feel their brain lock up. Don’t fight the whole stack. Pick the pin for the distance, let the others fade into the background, and build your shot around one clear aiming point. That small mental habit keeps the sight housing from turning into a cluttered mess.
A rangefinder helps, but it doesn’t replace judgment. Yardage still needs to be confirmed before the shot routine starts, especially on uneven ground or outdoor lanes with odd visual markers. A target that looks like 30 yards can easily sit closer to 34 or 35, and that difference matters. With a multi pin sight, distance mistakes show up as vertical misses more than anything else.
Set Your First Pin Before Chasing Distance
The first pin sets the tone for the whole sight. Most archers begin with a 20-yard pin because it gives enough room to see arrow behavior without making early mistakes too punishing. Use a stable target, repeat the same anchor point, and shoot small groups instead of judging one lucky arrow. Consistent groups matter more than single hits.
Adjust the sight toward the arrow impact. If arrows hit low, move the sight down. If arrows hit right, move the sight right. That sounds backward at first, but it’s a standard rule for most bow sight adjustments. The goal is to bring the pin and arrow group together through small, controlled changes.
Don’t rush this step just because the next pins look more exciting. A sloppy first pin creates a sloppy sight tape in your head, and every other distance starts with a weak foundation. Shoot several groups, let your form settle, and only adjust after you see a pattern. Pattern beats panic every single time.
Arrow choice also affects pin gaps. Heavier hunting arrows usually drop faster than lighter target arrows, so the space between pins may be wider. For traditional-style setups, arrow behavior can feel even more personal, especially with different spine choices and shaft materials. For a related gear angle, compare best arrows for horse bow if arrow selection is also on your mind.
Build The Rest Of Your Pin Stack
Once the first pin is solid, move back in clean distance steps. Many shooters set pins every 10 yards because the system is easy to remember under pressure. A common stack might be 20, 30, 40, 50, and 60 yards. The main point is repeatable yardage spacing, not trying to look fancy.
Move back to the next distance and shoot with the next pin, not the first one. If your second pin isn’t close, adjust only that pin if your sight allows individual pin movement. Some sights use gang adjustment for the whole housing and separate micro-adjustments for pins. Go slow because tiny movements can shift impact noticeably.
Pin brightness deserves attention too. Bright fiber optics can help in shaded woods, but overly bright pins may cover too much of the target in strong sunlight. A pin that blooms like a tiny flashlight can make precise aiming harder. The sweet spot is visible but not distracting.
Keep your sight level in the same position during setup. Canting the bow, even slightly, can throw arrows sideways at longer distances. A level bubble helps, but it only works if you actually check it during practice. Bow cant becomes more costly as distance increases.
Read Pin Gaps Without Overthinking
Pin gaps tell you a lot about your bow setup. Faster arrow setups usually create tighter gaps, while slower setups create wider gaps. That doesn’t automatically make one better than the other. The useful takeaway is that your pin spacing reflects your arrow’s trajectory.
Many missed shots happen between pins. A target at 25 yards sits between a 20-yard pin and a 30-yard pin, so you’ll need to aim between those references. This is called gap aiming, and it takes practice before it feels natural. The key is splitting the difference with control, not floating randomly and hoping for the best.
Practice awkward yardages on purpose. Shoot at 23, 27, 34, and 38 yards instead of only the clean numbers printed on range markers. Real hunting and backyard practice rarely hand you perfect distances. Those odd ranges teach your eyes how arrow drop behaves between fixed pins.
Use a notebook or phone note after practice. Write down which pin you used, where the arrows landed, and whether the miss came from distance, form, wind, or rushed execution. That little habit sounds boring, sure, but it saves a ton of guesswork later. Good notes turn random practice into useful feedback.
Anchor Point Controls The Sight Picture
Your anchor point has to stay boringly consistent. That’s a compliment, by the way. A multi pin sight depends on the same face contact, same peep alignment, and same release hand position every time. Change your anchor, and every pin reference starts lying to you.
The peep sight should frame the sight housing naturally without forcing your head into a weird position. If you have to stretch your neck, duck your chin, or twist your face to see through it, something is off. A comfortable peep view supports better alignment and less tension. Relaxed alignment improves repeatability.
Don’t bury your face into the string one shot and float your anchor the next. That little change can move impact enough to make you blame the sight. Most sight problems are actually form problems wearing a disguise. Stable form makes sight tuning honest.
Bow setup also matters before you ever touch the pins. Loose accessories, uneven grip pressure, and inconsistent release tension can all create messy groups. Even survival-style bow skills remind archers that equipment and technique have to work together. To sharpen that broader bowcraft mindset, explore best wood for bow drill as a separate outdoor skills reference.
Aim With One Pin And Let The Shot Break Clean
Pin panic is real. The sight floats, the target looks smaller, and suddenly you’re trying to force the pin dead center like you’re pinning a bug to a board. That usually creates tension. A better approach is to let the correct pin float naturally while you focus on smooth pressure and clean execution.
The pin doesn’t need to freeze. Nobody holds perfectly still, and trying to do so often makes movement worse. Let the pin hover in the scoring area or vital zone while your release process continues. Controlled float beats forced stillness.
Target focus helps too. Keep your eyes on the exact spot you want to hit, not on the pin itself the whole time. The pin is a reference, but the target is the destination. That shift keeps your shot from feeling mechanical and helps build natural aiming confidence.
Shot timing should feel patient, not sleepy. If you hold too long, muscles fatigue and the pin starts wandering more aggressively. If you punch the release too soon, the arrow leaves before the sight picture settles. The middle ground is steady pressure with no last-second grab.
Practice Yardage Changes Before Real Pressure
A multi pin sight shines when distance changes quickly. That benefit only shows up if you’ve practiced moving from one pin to another without losing your routine. Shoot one arrow at 20 yards, then one at 35, then one at 28. Random distance practice builds fast pin selection without turning your brain into soup.
Don’t stand flat-footed on perfect range lanes all the time. Practice from kneeling positions, slight uphill angles, and mild downhill angles if you can do so safely. Real shots often come from imperfect footing. Body position affects anchor, bubble level, and follow-through.
Lighting changes can also mess with your sight picture. Pins that look crisp at noon may look softer near sunset. Dark targets, shaded backgrounds, and bright gaps behind the target all change how your eye reads the pin. Practice in varied light so the sight doesn’t surprise you later.
Bowhunting and fishing lures may seem like different worlds, but both punish sloppy setup and rushed decisions. A spinner bait needs the right rigging to run correctly, just like a sight needs proper pin spacing to aim correctly. For tackle setup outside archery, use how to rig a spinner bait as a separate hands-on guide.
Common Multi Pin Bow Sight Mistakes And Easy Fixes
A solid sight setup can still produce frustrating misses if small habits start slipping into the shooting process. Many archers spend hours adjusting equipment while the real problem sits elsewhere. Tiny errors in execution often create bigger problems than a slightly misplaced pin. Fixing those habits usually delivers a faster improvement than constantly chasing new gear.
Stop Guessing Distance And Start Building References
Distance estimation causes more trouble than many shooters realize. A target that appears close can sit several yards farther away, especially in open terrain. That small mistake changes arrow impact enough to create low hits or high misses. Accurate yardage judgment, proper pin selection, and consistent shot preparation work together to tighten groups.
Practice sessions should include targets placed at unfamiliar distances. Random yardages force your eyes to evaluate distance instead of relying on memory. Over time, those visual references become easier to recognize. Distance awareness develops through repetition rather than guesswork.
Many experienced archers pick landmarks before drawing their bow. Rocks, trees, shadows, and trail features can help estimate range more quickly. Those details create useful visual checkpoints that support decision-making. Preparation before the draw often prevents rushed aiming later.
Archers interested in traditional shooting methods may notice how instinctive distance judgment develops through repetition. A useful comparison can be found in best bow instinctive shooting, where aiming relies more heavily on natural distance perception and repeated practice.
Manage Pin Clutter Without Losing Focus
A sight housing packed with multiple pins can feel overwhelming. New shooters frequently try to process every pin at once, creating hesitation during the shot. The better approach is surprisingly simple. Focus only on the pin assigned to the current distance and let the others fade into the background.
Your brain naturally wants to organize visual information. Too much attention on the entire sight stack can create confusion, especially during longer holds. A clear aiming process helps reduce mental overload. One target, one pin, and one execution sequence should dominate your attention.
Pin color choices can help separate distances visually. Many sights use green, red, and yellow fibers to distinguish individual pins. Those colors allow faster recognition without requiring conscious thought. Visual clarity becomes increasingly valuable when adrenaline enters the picture.
Lighting conditions may change how pins appear throughout the day. Bright afternoon sun, shaded woods, and cloudy conditions all affect visibility. Testing pins under different lighting situations helps prevent surprises. Adaptability matters as much as sight calibration.
Build A Reliable Shot Sequence
A repeatable shot sequence removes uncertainty. Rather than thinking about several things simultaneously, move through the same process every time. Nock the arrow, establish stance, confirm distance, select the correct pin, settle into anchor, and execute. That rhythm creates consistency and reduces mental noise.
Skipping steps often leads to preventable mistakes. Some archers rush distance confirmation. Others hurry their anchor position because the target feels easy. Those shortcuts eventually show up on the target face. Discipline keeps accuracy from becoming unpredictable.
The best routines are usually simple. Complicated checklists can create hesitation and slow decision-making. Focus on the fundamentals that influence arrow placement most directly. Anchor point, sight picture, and release execution deserve the most attention.
Pressure tends to expose weak routines. A process that works only during relaxed practice sessions isn't dependable enough. Repetition under varied conditions helps turn good habits into automatic responses. Consistency under pressure starts during ordinary practice sessions.
Use Practice Sessions To Solve Real Problems
Many archers spend entire sessions shooting the same distance repeatedly. While that can help verify sight settings, it doesn't prepare you for changing situations. Mixing distances forces quicker decisions and improves familiarity with the entire pin stack. Versatile practice produces more useful results than repetitive comfort-zone shooting.
Create simple drills that require pin changes between shots. Move from 20 yards to 35 yards, then back to 25 yards without warning. Those transitions teach your eyes to recognize pin references naturally. Fast pin identification becomes easier with repetition.
Pay attention to patterns instead of individual arrows. One stray shot may result from a release mistake or temporary lapse in concentration. Groups reveal the truth. Arrow clusters, repeatable impact points, and consistent execution provide better feedback than isolated hits.
Keeping notes can also accelerate improvement. Record distances, weather conditions, and any recurring mistakes. Those observations often reveal trends that remain hidden during casual shooting. Small adjustments become easier once recurring issues are identified.
Handle Wind And Environmental Challenges
Wind affects arrows more than many shooters expect. Even moderate crosswinds can move arrows noticeably at longer distances. Strong form helps, but environmental conditions still deserve respect. Wind awareness should become part of every shooting decision.
Targets positioned against busy backgrounds can create visual distractions. Dense brush, dark shadows, and uneven terrain sometimes make pin visibility harder. Practicing in different environments improves adaptability. Visual discipline helps maintain focus despite distractions.
Temperature changes can affect equipment behavior as well. Strings may stretch slightly, and shooting conditions can feel different from one season to another. Periodic sight verification helps confirm everything remains aligned. Regular equipment checks prevent surprises.
Changing terrain introduces additional challenges. Uphill and downhill shots alter arrow flight characteristics slightly compared to level-ground shooting. Exposure to those scenarios during practice builds confidence and familiarity. Realistic preparation often separates smooth execution from hesitation.
Know When Equipment Is The Problem
Not every issue originates from technique. Loose sight screws, worn strings, damaged arrows, and shifting accessories can affect accuracy. Routine inspections help catch problems before they become frustrating mysteries. Equipment reliability supports consistent performance.
Sight movement often occurs gradually. A pin may shift slightly after repeated use without being immediately noticeable. Checking sight settings regularly helps confirm that previous adjustments remain intact. Attention to detail protects accuracy.
Arrow damage deserves serious attention. Cracks, splinters, or bent components can affect flight and create safety concerns. Inspect arrows before shooting sessions rather than after problems appear. Safe equipment and predictable arrow flight belong together.
Accessories can influence shooting performance too. Scope mounting systems in firearm setups face similar alignment challenges. For a related equipment perspective, explore best marlin 60 scope mounts to see how stable mounting systems contribute to dependable aiming performance.
Develop Confidence Through Repetition
Confidence rarely arrives from reading specifications or adjusting equipment endlessly. Repetition creates trust. Every successful shot reinforces the relationship between the correct pin, proper form, and expected arrow impact. Trust in your setup grows through experience.
Doubt often appears after a miss. That's normal. The key is evaluating whether the mistake came from distance estimation, execution, form, or equipment rather than immediately changing sight settings. Objective evaluation prevents unnecessary adjustments.
Some days feel effortless. Other days feel frustrating for no obvious reason. Consistent routines help stabilize performance across both situations. The goal isn't perfection. The goal is creating a process that remains dependable despite normal fluctuations.
Strong shooting habits, accurate pin settings, disciplined practice, and realistic expectations work together to make how to use a multi pin bow sight far less complicated. Each practice session adds another layer of familiarity, allowing the sight picture to become more instinctive, more controlled, and more reliable over time.


12 Best 22 Pcp Air Rifle For Hunting of 2026 With Quiet Power

7 Best 22 Pcp Air Rifle Under 300 of 2026 For Backyard Pest Control

10 Best 22 Break Barrel Air Rifles of 2026 For Backyard Pest Control

10 Best 30 Caliber Pcp Air Rifle of 2026 For Medium Game

Top Best 177 Air Rifle Under 100: Budget-Friendly Picks for 2026

How to Safely Reload Shotgun Shells at Home

11 Best Co2 Air Rifle For Pest Control of 2026 To Ensure Humane Dispatch

12 Best Inexpensive Air Rifles of 2026 For Dependable Backyard Accuracy






