
How to Use a Peep Sight on a Rifle Without Guesswork

How to Use a Peep Sight on a Rifle often sounds simple until the first trip to the range proves otherwise. A small rear aperture can feel unfamiliar at first glance, yet many shooters are surprised by how naturally the eye centers the front sight once proper technique clicks into place. Accuracy usually improves not because the equipment is complicated, but because the sight picture becomes cleaner and easier to repeat. Small adjustments in head position, focus, and alignment can make a noticeable difference.
Missed shots frequently stem from chasing the target instead of trusting the sight system. The eye naturally wants to stare at the bullseye, but the real secret lies in maintaining a sharp focus on the front sight. The rear aperture should appear blurry and almost disappear from conscious attention. Once that habit develops, target acquisition feels smoother and less forced.
Frustration often creeps in when groups scatter despite careful aiming. In many cases, inconsistent cheek weld is the culprit. A repeatable position against the stock creates a stable relationship between the eye and the peep sight, helping every shot begin from the same reference point. Even a slight change in head placement can shift the point of impact.
Lighting conditions add another layer to the experience. Bright daylight tends to make aperture sights feel crisp and precise, while dim environments can reduce clarity. Understanding these limitations helps set realistic expectations rather than blaming technique. A shooter who recognizes changing visual conditions can adapt more effectively and maintain confidence.
Practice sessions become far more productive once attention shifts toward consistency instead of speed. Smooth trigger control, steady breathing, and reliable sight alignment work together as a package. Trying to rush the process usually backfires. Patience pays off because the eye gradually learns to center objects naturally through the aperture.
Many rifle owners appreciate peep sights because they offer a straightforward setup without batteries, electronics, or complex adjustments. The system encourages strong shooting fundamentals that carry over to nearly any rifle platform. Better habits often lead to tighter groups long before equipment upgrades become necessary. That's part of the lasting appeal of this classic sighting method.
Another overlooked advantage involves situational awareness. Compared with some traditional notch-and-post arrangements, a well-adjusted aperture sight can feel more intuitive during target transitions. The sight picture remains uncluttered, allowing attention to stay where it belongs. That simplicity helps reduce mental overload during practice and field use.
Confidence grows one well-placed shot at a time. Understanding how the eye interacts with the rear aperture, maintaining proper stock contact, and focusing on the front sight are the foundations of success. Those fundamentals transform a seemingly old-fashioned system into a practical and dependable aiming solution. Consistency, not luck, becomes the driving force behind better results.
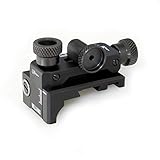
- ARS Mark9.2
ARS Mark is a ranking system developed by bestairriflescopes.com. ARS Mark has no relationship or impact from any manufacturers or sales agent websites. Learn more
- BrandWilliams Gun Sight Company

- ARS Mark9.2
ARS Mark is a ranking system developed by bestairriflescopes.com. ARS Mark has no relationship or impact from any manufacturers or sales agent websites. Learn more
- BrandWilliams Gun Sight Company

- ARS Mark9.2
ARS Mark is a ranking system developed by bestairriflescopes.com. ARS Mark has no relationship or impact from any manufacturers or sales agent websites. Learn more
- BrandAir Venturi
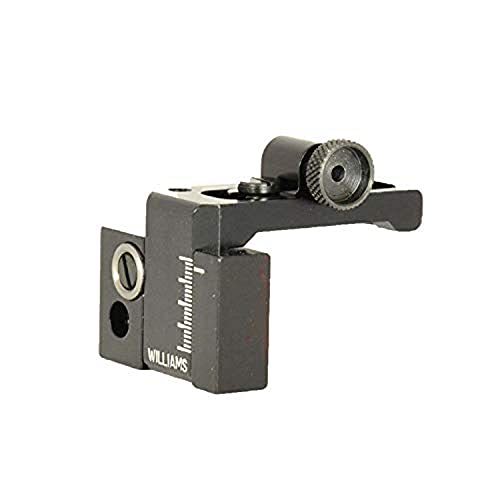
- ARS Mark9.0
ARS Mark is a ranking system developed by bestairriflescopes.com. ARS Mark has no relationship or impact from any manufacturers or sales agent websites. Learn more
- BrandWilliams Gun Sight Company

- ARS Mark9.0
ARS Mark is a ranking system developed by bestairriflescopes.com. ARS Mark has no relationship or impact from any manufacturers or sales agent websites. Learn more
- BrandWilliams Gun Sight Company

- ARS Mark8.8
ARS Mark is a ranking system developed by bestairriflescopes.com. ARS Mark has no relationship or impact from any manufacturers or sales agent websites. Learn more
- BrandWilliams

- ARS Mark8.8
ARS Mark is a ranking system developed by bestairriflescopes.com. ARS Mark has no relationship or impact from any manufacturers or sales agent websites. Learn more
- BrandEZshoot

- ARS Mark8.8
ARS Mark is a ranking system developed by bestairriflescopes.com. ARS Mark has no relationship or impact from any manufacturers or sales agent websites. Learn more
- BrandTRUGLO

- ARS Mark8.6
ARS Mark is a ranking system developed by bestairriflescopes.com. ARS Mark has no relationship or impact from any manufacturers or sales agent websites. Learn more
- BrandEZshoot

- ARS Mark8.6
ARS Mark is a ranking system developed by bestairriflescopes.com. ARS Mark has no relationship or impact from any manufacturers or sales agent websites. Learn more
- BrandSOPOGER
Last update on 2026-08-19 / Affiliate links / Images, Product Titles, and Product Highlights from Amazon Product Advertising API
How To Use A Peep Sight On A Rifle
A tiny rear aperture can humble even a careful shooter, especially after a few shots land wider than expected. The trick is that how to use a peep sight on a rifle isn't about staring through the hole like it's a telescope. It's about building a repeatable position, letting the eye center the front sight naturally, and keeping the rifle steady enough for the sight picture to mean something. Once that clicks, the whole setup starts feeling less fussy and a lot more dependable.
Peep Sight Basics
A peep sight uses a small rear opening and a front sight post or bead to create a simple aiming reference. The rear aperture should look soft or slightly blurred, while the front sight stays sharp and centered. Your eye naturally wants to center objects inside a circle, which is why aperture sights can feel surprisingly precise after a little practice. Fighting that natural centering habit usually creates more wobble than accuracy.
The biggest mistake is trying to focus on everything at once. The target, rear sight, and front sight can’t all look perfectly sharp at the same time, so the front sight focus matters most. The target should stay visible but not steal your attention. That simple shift helps clean up the sight picture and makes each shot easier to repeat.
Rifle peep sights also reward a consistent head position. A sloppy cheek weld changes how your eye lines up with the aperture, and that can move shots even when the rifle feels steady. A firm, repeatable cheek weld keeps your eye in the same place behind the sight. Think of it as building a small shooting routine before every trigger press.
Some shooters expect a peep sight to behave like a scope, but that mindset gets in the way. There’s no magnified image, no reticle, and no glass doing the work for you. The benefit is simplicity, durability, and clean alignment. Used well, it teaches fundamentals that carry over to nearly every other sighting system.
Set Your Rifle Position First
A good shot starts before the sight picture appears. Shoulder the rifle in a way that feels stable without forcing your neck forward or rolling your head sideways. The stock should meet your cheek naturally, creating a repeatable eye-to-aperture alignment. If you have to hunt for the sight every time, your position needs work before your aim does.
Breathing also matters more than many people admit. A rushed breath can lift the muzzle, tighten the shoulder, and make the front post dance around the target. Take a normal breath, let some air out, and settle into the shot without holding tension too long. That relaxed pause gives the sight picture a chance to stabilize.
Grip pressure should feel controlled, not clenched. A white-knuckle hold can pull the rifle off line, especially with lightweight rifles or smaller stocks. Keep the firing hand firm enough to manage the trigger while letting the support hand guide the rifle without muscling it. That balance supports steady aim without adding unnecessary strain.
Archery folks know this lesson well because alignment falls apart fast when the setup doesn’t match the shooter. Separate gear projects can teach the same patience, and builders who care about clean assembly may compare materials through glue for building archery bows before committing to a bow project. Rifle sighting follows a similar truth: fit, repeatability, and small setup details matter more than rushing toward the target.
Align The Front Sight Correctly
The front sight belongs in the center of the rear aperture, but you don’t need to obsess over the rear ring. Your eye will naturally center the front sight post if your cheek weld stays consistent. Let the rear aperture fade into the background while the front sight becomes the main visual anchor. That one habit removes a lot of overthinking.
Most shooters use either a center hold or a six o’clock hold, depending on the rifle, target, and sight setup. A center hold places the front sight directly over the intended impact point. A six o’clock hold rests the target above the sight like it’s sitting on a shelf. Either method can work, but switching between them without intent will scatter groups fast.
Light can change how the front sight appears. Bright sun may make the sight edge look crisp, while shade can soften the contrast and slow your alignment. A black front post on a dark target can be tough to read, so target choice matters during practice. Clear contrast gives your eye a cleaner sight picture and reduces guesswork.
Distance adds another layer. At closer ranges, small alignment errors may not look dramatic, but they can become obvious as the target moves farther out. A tiny shift in the front post position can turn into a larger miss downrange. That’s why slow, careful repetition beats quick shots during early practice.
Build A Repeatable Sight Picture
A repeatable sight picture feels almost boring, and that’s a good sign. The rifle comes up, the cheek lands in the same spot, the front sight centers naturally, and the target sits where expected. Nothing feels dramatic. That steady routine is exactly what helps turn scattered impacts into tighter groups.
Target size should match the practice goal. Huge targets make it easy to see hits, but they can also hide sloppy aiming habits. Smaller, high-contrast aiming marks force better attention to front sight alignment. Start close enough to see patterns clearly, then stretch distance only after the groups become predictable.
Trigger control can ruin a perfect sight picture in a heartbeat. Jerking the trigger pulls the rifle off target before the bullet leaves the barrel. Press straight back with steady pressure while keeping your focus on the front sight. The shot should break without a dramatic flinch or last-second shove.
Younger shooters often learn faster when the gear fits their body instead of fighting them. A small-framed setup can reduce strain, and families comparing beginner archery gear may find useful fit ideas through youth bow for 10 year old. The same principle applies here: comfort, control, and proper fit make sight training less frustrating.
Adjust The Peep Sight With Patience
Peep sight adjustments should happen after the shooter proves the rifle is being held consistently. Moving the sight too early can mask technique problems and create a messy back-and-forth cycle. Fire a careful group first, then evaluate where the group lands as a whole. A single bad shot shouldn’t drive sight adjustment.
Most rear sights move in the direction you want the impact to go. If shots are landing low, raise the rear sight. If shots are landing right, move the rear sight left or right according to your sight’s design and instructions. Small changes are safer because over-adjusting can send the next group too far the other way.
Use a stable rest during sight-in whenever possible. Sandbags, a bench, or another steady support can reduce human wobble and show what the rifle and sight are actually doing. That doesn’t replace field practice, but it gives you a cleaner baseline. A dependable baseline makes real-world practice more useful later.
Keep notes if the sight has repeatable click adjustments. Write down distance, ammunition, sight changes, and point of impact. Different ammo can shift results, even in the same rifle, so don’t assume one zero fits every load. Good notes prevent wasted rounds and keep rifle accuracy from turning into guesswork.
Practice Without Chasing Every Shot
Chasing every shot is a quick way to lose confidence. One flyer doesn’t always mean the sight is wrong. It may come from a rushed trigger press, uneven shoulder pressure, or a blink right before the shot. Judge shot groups, not single holes.
Dry practice can help if it’s done safely and according to the rifle maker’s guidance. The goal is to mount the rifle, settle the sight picture, and press the trigger without disturbing alignment. Watching the front sight during dry practice reveals movement that live fire can hide. That little wobble tells the truth.
Short sessions often beat marathon practice. Tired eyes and sore shoulders lead to sloppy technique, and sloppy technique teaches bad habits. A few focused strings with clean notes can do more than a long afternoon of random shooting. Consistency grows through deliberate repetition, not noise and impatience.
Archery training has a similar lesson around finger pressure and release habits. Shooters working with traditional bows may compare control aids like a finger tab for traditional archery to reduce release irritation and improve consistency. Rifle shooters face their own version of that problem with trigger press, where smooth control matters more than brute effort.
How To Shoot Accurately With A Peep Sight Rifle
Accuracy rarely disappears because of the sight itself. Most of the time, small habits create larger problems than shooters expect. A wandering cheek weld, rushed trigger press, or inconsistent focus can quietly pull shots away from the target. Building reliable performance with a peep sight rifle means tightening those details until they become automatic.
Handle Different Lighting Conditions
Light changes the way a front sight appears, and many shooters underestimate its impact. A bright morning can make the sight look crisp and easy to center, while overcast conditions may soften edges and reduce contrast. The target remains visible, but the eye works harder to separate important details. Better awareness of changing light helps maintain consistent accuracy instead of chasing mysterious misses.
Dark targets often create problems because the front sight can blend into the background. A black post against a dark berm may seem to disappear at certain distances. Clear target contrast makes a huge difference, especially during practice sessions. Strong visual separation supports a cleaner sight picture and reduces hesitation.
Glare can be equally frustrating. Bright sunlight reflecting from metal surfaces may distract the eye and make alignment feel less precise. Slight position adjustments sometimes solve the problem faster than equipment changes. Small corrections often protect shot consistency better than constantly tinkering with the sight.
Many experienced shooters notice that their best groups come from paying attention to conditions instead of fighting them. Adapting to available light keeps expectations realistic and prevents unnecessary adjustments. A calm approach allows the eye to work with the aperture sight system rather than against it.
Common Mistakes That Push Shots Off Target
Target fixation sits near the top of the mistake list. The eye naturally wants to stare directly at the bullseye, yet the front sight focus should remain the priority. Once attention drifts away from the front sight, alignment quality usually suffers. Tight groups become much harder to maintain.
Another common issue involves lifting the head immediately after the trigger breaks. Many shooters want to see the result before the bullet reaches the target. That early movement can disturb the rifle during a critical moment. Maintaining follow through helps preserve accuracy and builds stronger habits.
Overcorrecting sight adjustments also creates frustration. A shooter sees a group slightly left and immediately makes a large correction. Then the next group lands right, starting an endless cycle of changes. Small, deliberate adjustments support more reliable zeroing results.
Equipment can contribute to problems too. Loose sight components, damaged front posts, or neglected maintenance can affect performance. Anyone troubleshooting accuracy should first ensure the rifle remains mechanically sound. Routine care, including guides about how to clean rifle bore, helps preserve consistent performance over time.
Develop Better Trigger Control
A clean trigger press often separates average shooting from truly repeatable shooting. The goal is simple: move the trigger without disturbing the sight alignment. That sounds easy until the front sight begins wobbling and anticipation creeps in. Strong trigger discipline reduces those unwanted movements.
Many shooters unknowingly slap the trigger. The rifle fires, but the sudden motion shifts the muzzle at the last second. A smoother press keeps the rifle stable while allowing the shot to break naturally. That controlled movement protects point-of-impact consistency.
Dry-fire practice can expose trigger-related mistakes quickly. Watching the front sight during the trigger press reveals tiny movements that often go unnoticed during live fire. Those visual clues help identify flinching, jerking, or excess grip pressure. Correcting them improves shooting fundamentals faster than random repetition.
Patience matters here. Trigger control develops gradually because it relies on muscle memory and repetition. The payoff is worth it, though. Better control allows every other element of the shooting process to shine.
Use Distance Progressively
Starting too far from the target can create confusion. Large misses provide very little information about what actually went wrong. Beginning at a manageable distance allows shooters to see patterns and make meaningful corrections. Early success builds confidence and reinforces proper technique.
As groups tighten, extending the distance becomes more productive. The same fundamentals still apply, but minor mistakes become easier to spot. Small alignment errors that barely matter at short range may become obvious farther away. Distance reveals weaknesses in sight alignment and trigger control.
Longer ranges also teach patience. Rushing shots becomes more tempting when targets appear smaller. Slowing down and maintaining the same routine protects consistency. Reliable performance comes from repeating strong habits, not from forcing results.
Progressive training keeps frustration manageable. Each distance milestone creates a new learning opportunity without overwhelming the shooter. The process feels more rewarding because improvements become visible and measurable.
Maintain Confidence During Practice
Confidence grows from evidence, not wishful thinking. Keeping track of group sizes, sight settings, and shooting conditions creates useful records. Those notes show progress that might otherwise go unnoticed. Small improvements accumulate into significant gains in shooting accuracy.
Bad shooting days happen to everyone. Wind conditions, fatigue, distractions, and lighting changes can affect performance. One rough session doesn't erase previous progress. Looking at long-term trends provides a more honest view of skill development.
Comparisons can also become a trap. Another shooter may use different equipment, different ammunition, or have years of additional experience. Measuring progress against personal benchmarks creates healthier expectations. Consistent improvement matters more than chasing someone else's results.
Archery shooters face similar challenges with equipment fit and shooting form. Athletes comparing setups often evaluate options like best compound bow for tall guys because proper dimensions influence consistency. Rifle shooters benefit from the same mindset, where fit, repeatability, and comfort contribute directly to better performance.
Know The Strengths And Limits Of Peep Sights
A peep sight offers several practical advantages. The design remains durable, simple to maintain, and less dependent on technology than many modern optics. Fewer components mean fewer potential failures. That simplicity appeals to shooters who value reliability.
Target acquisition can feel surprisingly natural once the eye learns the system. The circular aperture encourages automatic centering of the front sight, reducing visual clutter. Many shooters appreciate the clean sight picture and straightforward operation. Those traits support faster alignment during routine shooting.
Limitations exist as well. Peep sights do not magnify distant targets, and low-light conditions can reduce visibility. Aging eyes may also struggle with front sight clarity compared to magnified optics. Recognizing those tradeoffs helps establish realistic expectations.
The shooters who get the most from aperture sights usually focus on fundamentals rather than shortcuts. Strong cheek weld, front sight focus, smooth trigger control, and steady follow through create a dependable foundation. Those habits turn a simple sighting system into a highly effective tool built on consistency, precision, and confidence.


12 Best 22 Pcp Air Rifle For Hunting of 2026 With Quiet Power

7 Best 22 Pcp Air Rifle Under 300 of 2026 For Backyard Pest Control

10 Best 22 Break Barrel Air Rifles of 2026 For Backyard Pest Control

10 Best 30 Caliber Pcp Air Rifle of 2026 For Medium Game

Top Best 177 Air Rifle Under 100: Budget-Friendly Picks for 2026

How to Safely Reload Shotgun Shells at Home

11 Best Co2 Air Rifle For Pest Control of 2026 To Ensure Humane Dispatch

12 Best Inexpensive Air Rifles of 2026 For Dependable Backyard Accuracy






