
How to Use a Red Dot Sight With Better Accuracy

How to Use a Red Dot Sight sounds simple on paper, yet many shooters struggle the moment they step onto the range. A floating dot seems easy enough to place on target, but small habits often create missed shots, slow target acquisition, and unnecessary frustration. The good news is that a few practical adjustments can dramatically improve consistency. Smooth sight alignment and proper eye focus often matter far more than expensive gear upgrades.
Many people expect the dot to behave like traditional iron sights. That expectation can create confusion because a red dot sight is designed to work differently. Instead of shifting focus between rear sight, front sight, and target, the eyes remain locked on the target while the dot acts as a reference point. Suddenly, tracking movement feels more natural and target transitions become quicker.
Positioning also plays a bigger role than most realize. Holding the firearm or bow with inconsistent form can cause the dot to appear off-center, leading to hesitation before every shot. A repeatable stance creates a more predictable sight picture. Little by little, confidence grows because the dot shows up where it's expected rather than forcing constant adjustments.
Brightness settings deserve attention too. A dot that's too bright can appear oversized and blurry, masking smaller targets and reducing precision. A dot that's too dim may fade against bright backgrounds or challenging lighting conditions. Matching brightness to current conditions keeps the aiming point crisp and easy to track.
Practice sessions often become more productive once realistic expectations replace common myths. The dot won't magically correct poor trigger control or inconsistent shooting fundamentals. Still, it can help reveal mistakes more clearly than traditional sights. That instant visual feedback makes improvement easier to spot and easier to maintain.
Movement changes everything. Stationary targets may feel comfortable, but shifting between multiple targets introduces a different challenge altogether. A properly used red dot sight helps maintain awareness of the surrounding area while keeping the target in view. That broader field of vision can make transitions feel smoother and more intuitive.
Then there's the mental side of aiming. Overthinking every shot often causes delays and unnecessary corrections. Trusting the dot, maintaining focus on the target, and applying steady trigger pressure usually produces better results than chasing a perfectly motionless sight picture. Sometimes less tinkering leads to more accurate outcomes.
Environmental factors can also influence performance. Bright sunlight, shadows, rain, or indoor lighting conditions may change how the dot appears. Understanding those variations helps avoid surprises during practice or competition. Consistency comes from adapting rather than fighting changing conditions.
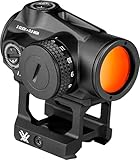
- ARS Mark9.2
ARS Mark is a ranking system developed by bestairriflescopes.com. ARS Mark has no relationship or impact from any manufacturers or sales agent websites. Learn more
- BrandVortex

- ARS Mark8.3
ARS Mark is a ranking system developed by bestairriflescopes.com. ARS Mark has no relationship or impact from any manufacturers or sales agent websites. Learn more
- BrandCVLIFE

- ARS Mark8.1
ARS Mark is a ranking system developed by bestairriflescopes.com. ARS Mark has no relationship or impact from any manufacturers or sales agent websites. Learn more
- BrandHOLOSUN

- ARS Mark8.8
ARS Mark is a ranking system developed by bestairriflescopes.com. ARS Mark has no relationship or impact from any manufacturers or sales agent websites. Learn more
- BrandVortex
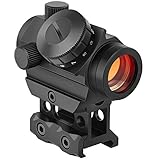
- ARS Mark7.1
ARS Mark is a ranking system developed by bestairriflescopes.com. ARS Mark has no relationship or impact from any manufacturers or sales agent websites. Learn more
- BrandMidTen

- ARS Mark7.1
ARS Mark is a ranking system developed by bestairriflescopes.com. ARS Mark has no relationship or impact from any manufacturers or sales agent websites. Learn more
- BrandFeyachi

- ARS Mark8.8
ARS Mark is a ranking system developed by bestairriflescopes.com. ARS Mark has no relationship or impact from any manufacturers or sales agent websites. Learn more
- BrandVortex

- ARS Mark9.2
ARS Mark is a ranking system developed by bestairriflescopes.com. ARS Mark has no relationship or impact from any manufacturers or sales agent websites. Learn more
- BrandSig Sauer

- ARS Mark8.4
ARS Mark is a ranking system developed by bestairriflescopes.com. ARS Mark has no relationship or impact from any manufacturers or sales agent websites. Learn more
- BrandBushnell

- ARS Mark8.9
ARS Mark is a ranking system developed by bestairriflescopes.com. ARS Mark has no relationship or impact from any manufacturers or sales agent websites. Learn more
- BrandHOLOSUN

- ARS Mark8.4
ARS Mark is a ranking system developed by bestairriflescopes.com. ARS Mark has no relationship or impact from any manufacturers or sales agent websites. Learn more
- BrandSig Sauer
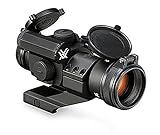
- ARS Mark7.5
ARS Mark is a ranking system developed by bestairriflescopes.com. ARS Mark has no relationship or impact from any manufacturers or sales agent websites. Learn more
- BrandVortex
Last update on 2026-08-18 / Affiliate links / Images, Product Titles, and Product Highlights from Amazon Product Advertising API
How To Use A Red Dot Sight Without Fighting The Dot
That tiny glowing dot can either make aiming feel clean and natural or turn every shot into a guessing game. A lot of frustration starts because the sight looks simple, so people skip the small setup steps that make it reliable. How to use a red dot sight starts with building repeatable habits, not just mounting the optic and hoping the dot lands where it should. The real win comes from target focus, steady presentation, and smart zeroing that matches the way the sight will actually be used.
Red Dot Sight Basics
A red dot sight helps you aim by projecting an illuminated dot inside the optic window, but the dot isn’t a laser on the target. That detail matters because new shooters sometimes chase the dot as if it should sit perfectly still. Small movement is normal, especially with hands, breathing, and body tension in the mix. The goal is to keep the dot moving inside a controlled area while maintaining safe handling and a clear target picture.
The biggest shift is learning to stay target focused. Iron sights usually demand more attention on alignment, but a red dot works best when your eyes stay on the target and the dot floats into your line of sight. That feels odd at first, especially for anyone trained to stare at the front sight. After a few focused practice sessions, the process starts to feel more natural and much faster.
Brightness settings can make or break the experience. A dot that’s too bright may bloom into a fuzzy blob, which hides fine details and encourages sloppy aiming. A dot that’s too dim can disappear against bright grass, pale targets, or sunlit backgrounds. A crisp dot should look clear enough to track without overpowering the target outline.
Mounting height also affects comfort and consistency. A sight mounted too high or too low may force awkward head position, which makes the dot harder to find under pressure. A clean setup lets the dot appear naturally when the stock, grip, or shooting position is repeated. That repeatability is where red dot accuracy begins to feel dependable instead of random.
Build A Repeatable Sight Picture
A clean sight picture starts before the dot even appears. Body position, grip pressure, cheek weld, anchor point, and shoulder placement all influence where the dot shows up in the window. If those pieces change every time, the dot will seem jumpy or hard to locate. Strong fundamentals turn red dot sight use into a repeatable process instead of a little treasure hunt.
Keep both eyes open whenever possible. This helps preserve peripheral awareness, reduces eye strain, and makes target transitions feel less cramped. Closing one eye can still work for slow precision practice, but it often limits the natural speed advantage of a red dot. A relaxed two-eye view usually makes the dot easier to pick up without feeling tunnel-visioned.
The dot does not need to sit perfectly centered in the window for every shot, especially with many modern parallax-managed optics. Still, sloppy presentation can create bad habits fast. Aim to bring the sight up the same way each time so the dot appears near the same visual zone. That consistency saves time and keeps your focus on the target rather than hunting around the glass.
Crossbow shooters face a slightly different challenge because stance, anchor consistency, and bolt trajectory all matter. To keep the setup cleaner, compare your sight routine with how to use a red dot sight on a crossbow before changing random adjustments. A crossbow may feel steadier than a handheld firearm, but poor head placement can still shift the way the dot appears. Small setup errors tend to show up clearly once distance increases.
Set Brightness For Real Conditions
Brightness should match the environment, not your mood. Indoor lanes, shaded woods, bright fields, and low-light practice all make the dot appear differently. A proper brightness setting keeps the aiming point visible without creating glare or a starburst effect. The dot should look usable, not flashy.
Start slightly dimmer than instinct suggests. Many people crank the dot up because it feels reassuring, then wonder why their aiming point looks huge. A smaller, cleaner dot helps with precision, especially on smaller targets or longer distances. Save the brighter settings for harsh light where the dot truly needs help standing out.
Eye conditions can also affect how the dot appears. Astigmatism may make the dot look smeared, comma-shaped, or doubled, even when the optic is functioning normally. Rotating the optic view, lowering brightness, or using a smaller dot can sometimes reduce that effect. The key is to judge the dot by actual hits and groups, not just by how perfect it looks in the window.
Battery habits deserve a little discipline too. A red dot sight depends on power, so weak batteries can turn a good setup into a bad day. Replace batteries on a schedule rather than waiting for the dot to fade during practice. Keep the lens clean, but don’t scrub it with rough cloth because scratches and oil smears can distort the aiming reference.
Zero The Sight With Patience
Zeroing is where the red dot becomes useful instead of decorative. The process lines up point of aim with point of impact at a chosen distance, and that distance should match the tool’s real job. A casual range setup, a defensive firearm, a hunting crossbow, and a plinking rimfire may all call for different choices. Pick a practical zero before touching the adjustment knobs.
Use a stable rest or supported position during zeroing. The goal is to remove as much human wobble as possible so the optic adjustments reflect the sight, not shaky technique. Fire a careful group, check the center of that group, then adjust from there. Chasing single shots usually creates frustration because one pulled shot can send the whole setup in the wrong direction.
Most red dot sights adjust windage and elevation through small clicks. Follow the optic’s markings and make measured corrections rather than twisting knobs randomly. After each adjustment, shoot another group to confirm movement. A slow method beats guesswork because consistent zeroing saves ammo, time, and patience.
Archery setups need the same calm approach. Arrow rest tuning, vane clearance, and bow consistency can affect impact before the sight ever gets blamed. For cleaner arrow flight before fine-tuning your optic or aiming routine, compare your setup with a best recurve bow arrow rest guide. A poorly matched rest can create left-right problems that look like sight errors but aren’t.
Practice Dot Tracking And Trigger Control
The dot tells the truth about movement. If it dips, jerks, or jumps during the shot, something in your trigger press or grip is probably adding tension. That feedback can feel annoying at first, but it’s one of the biggest benefits of a red dot sight. The optic makes small mistakes easier to see and correct.
Dry practice helps build smoother movement without burning through ammo or bolts. Keep every session focused on safe handling, a steady presentation, and a controlled press. The dot should move as little as possible while the trigger breaks or the release activates. Slow, honest reps build better habits than rushed strings that hide mistakes.
Don’t freeze while waiting for the dot to stop moving. A totally motionless dot isn’t realistic for most people, especially from unsupported positions. Accept a small wobble zone and press smoothly while the dot remains inside that acceptable area. That mindset reduces flinching because the shot no longer feels like a race against movement.
Grip pressure should stay firm but not strangled. Too much tension can push the dot off target, while too little control may let the sight wander. A balanced hold keeps the sight stable without locking the body into a stiff, shaky mess. Over time, trigger control and dot tracking start working together instead of fighting each other.
Handle Weather, Gloves, And Field Conditions
Outdoor use adds little headaches that indoor practice rarely shows. Rain can spot the lens, cold can stiffen fingers, and glare can make the dot harder to read. A red dot sight still performs well in rough conditions, but only if the setup and routine account for those details. Practical gear choices matter more once the weather stops being polite.
Gloves are a good example. Thick gloves may protect your hands, but they can reduce feel on controls, buttons, safeties, and release aids. Thin gloves give better touch but may not provide enough warmth during long sits. Balance matters because control and comfort both affect shot execution.
Cold-weather archery brings its own set of problems. Fingers lose sensitivity, sleeves can interfere with movement, and bulky material can disrupt a clean anchor. For better hand protection without making your setup clumsy, compare options through best hunting gloves for archery. The right glove should support your shot routine instead of making every step feel awkward.
Lens care should stay simple. Use a proper lens cloth, keep caps handy, and avoid wiping grit across the glass. Moisture, dust, and fingerprints can make the dot look distorted even when the optic is fine. A clean lens supports a cleaner sight picture, especially during dawn, dusk, or shaded target practice.
How To Use A Red Dot Sight For Faster Target Acquisition
A lot of missed shots happen long before the trigger breaks. The problem usually isn't the optic itself. Most shooters lose time because they struggle to locate the dot quickly after raising the firearm, bow, or crossbow. Building a routine around fast target acquisition, consistent presentation, and visual discipline helps turn a red dot sight into a practical tool rather than an expensive accessory.
Train Your Eyes To Find The Dot Faster
The dot should appear naturally as the sight enters your field of view. Many shooters make the mistake of looking for the dot inside the optic window instead of focusing on the target. That habit slows everything down and often causes unnecessary head movement. Keeping attention on the target allows the red dot to appear automatically during a proper presentation.
Short practice sessions often produce better results than occasional marathon range days. Ten focused minutes spent building muscle memory can improve consistency more than hundreds of rushed repetitions. The objective is simple: bring the sight to your eye instead of moving your eye to the sight. That small shift removes a surprising amount of wasted motion.
Dry-fire drills help expose weak spots in presentation. If the dot appears high, low, or off-center every time, body mechanics probably need adjustment. Correcting those movements gradually creates a smoother path to the target. Over time, the sight begins to feel like an extension of the shooter rather than a separate object that requires constant correction.
Patience matters here. Fast shooting is often the result of doing simple things correctly instead of trying to force speed. Consistent movement naturally leads to quicker sight acquisition and better shot placement.
Use Distance To Your Advantage
Not every target demands the same approach. Close-range shooting usually rewards speed, while longer distances place greater emphasis on precision. Understanding how the dot covers the target at different ranges helps create more realistic expectations. A larger aiming point may hide small details at distance, even though it feels precise up close.
Zero distance plays a major role in this equation. A setup intended for short-range use may perform differently at extended distances due to trajectory changes. Knowing where the projectile impacts above or below the dot helps reduce surprises. That knowledge creates predictable accuracy instead of hopeful guessing.
Pellet gun users encounter similar challenges when dealing with smaller targets and changing distances. Exploring equipment options through best pellet gun woodpeckers discussions can provide useful perspective on how optics, target size, and effective range work together. The same principles often apply across different shooting platforms.
Range estimation improves confidence because it removes uncertainty. A shooter who understands distance relationships can make smarter adjustments without second-guessing every shot. That confidence supports both accuracy and decision-making under pressure.
Reduce Common Red Dot Mistakes
Many frustrations blamed on optics actually come from technique. Jerking the trigger, inconsistent grip pressure, poor body position, and rushed shots often create larger problems than the sight itself. A red dot simply makes those issues easier to see. That honesty can feel frustrating at first, but it accelerates improvement.
Dot brightness remains one of the most overlooked settings. Excessive brightness can make the dot appear larger than it really is, reducing precision on smaller targets. Lower settings often produce a cleaner aiming point. A crisp dot generally supports better shot placement than a bright, oversized glow.
Another mistake involves constantly adjusting equipment instead of improving technique. Shooters sometimes move sights, change mounts, or alter zero settings after every disappointing group. That approach makes troubleshooting nearly impossible. Stable equipment combined with disciplined practice provides much clearer feedback.
Environmental conditions deserve consideration too. Wind, glare, rain, and awkward shooting positions can influence results. Recognizing those factors helps separate true equipment issues from normal field challenges. Better awareness leads to more reliable performance expectations.
Apply Red Dot Skills To Hunting Situations
Range conditions rarely mirror real hunting environments. Uneven terrain, moving targets, awkward angles, and changing light all add complexity. A solid foundation built through repetition allows shooters to adapt without feeling overwhelmed. Practical field skills often matter more than tiny group sizes shot from a bench.
Target focus becomes even more valuable outdoors. Wildlife rarely waits for perfect conditions, and opportunities can disappear quickly. Maintaining visual attention on the target while allowing the dot to float naturally supports faster decisions. That approach helps preserve situational awareness and reduces hesitation.
Equipment should support the mission rather than complicate it. New archers entering the sport often benefit from learning how different setups affect consistency. Reading comparisons involving the best hoyt bow beginners can provide insight into how balanced equipment choices contribute to repeatable performance. Consistency across the entire system usually produces better results than focusing on one component alone.
Field practice should include realistic movement, changing distances, and imperfect shooting positions. Training exclusively from comfortable benches creates a gap between practice and reality. Closing that gap improves confidence, adaptability, and overall effectiveness.
Build Long-Term Confidence With Your Setup
Confidence grows from repetition and verified results. A shooter who knows exactly where the dot hits at different distances tends to make decisions more quickly. That certainty reduces second-guessing and allows attention to stay focused on execution. Familiarity often becomes one of the strongest advantages a red dot user can develop.
Routine equipment checks help prevent avoidable problems. Battery replacement schedules, mount inspections, and lens cleaning take very little time but can eliminate many headaches. Reliable gear supports reliable performance. Neglecting small maintenance tasks can eventually undermine otherwise solid shooting habits.
Progress rarely follows a perfectly straight line. Some practice sessions feel effortless, while others expose weaknesses that seemed solved weeks ago. That fluctuation is normal. Consistent work focused on fundamentals, target focus, and trigger control usually produces steady improvement over time.
The most effective red dot users aren't necessarily the fastest or the most technical. They simply repeat proven fundamentals until those actions become automatic. Strong habits create dependable performance, and dependable performance is what ultimately makes a red dot sight worth using.


12 Best 22 Pcp Air Rifle For Hunting of 2026 With Quiet Power

7 Best 22 Pcp Air Rifle Under 300 of 2026 For Backyard Pest Control

10 Best 22 Break Barrel Air Rifles of 2026 For Backyard Pest Control

10 Best 30 Caliber Pcp Air Rifle of 2026 For Medium Game

Top Best 177 Air Rifle Under 100: Budget-Friendly Picks for 2026

How to Safely Reload Shotgun Shells at Home

11 Best Co2 Air Rifle For Pest Control of 2026 To Ensure Humane Dispatch

12 Best Inexpensive Air Rifles of 2026 For Dependable Backyard Accuracy






