
How to Use Sightmark Laser Bore Sight the Smart Way

How to Use Sightmark Laser Bore Sight is a question that often pops up right after mounting a new scope, red dot, or optic. A fresh setup can feel exciting at first, yet many shooters quickly realize that getting rounds on target isn't always as simple as tightening a few screws and heading to the range. A laser bore sight helps bridge that gap by providing a visual reference point before live-fire adjustments begin.
Frustration usually starts when shots land far from the intended target. A few inches off might be manageable, but missing the paper completely can burn through ammunition, patience, and range time. That's where proper optic alignment becomes valuable. A Sightmark laser bore sight projects a visible point that helps establish an initial zero, making those first shots much more productive.
Many people assume bore sighting replaces live-fire zeroing. It doesn't. The laser simply gets the optic and barrel pointing in roughly the same direction. Once at the range, fine adjustments are still necessary. Even so, starting with a closer alignment often means fewer corrections and less guesswork.
A well-executed bore sighting session can save time and reduce unnecessary trial and error. Instead of chasing impacts around the target, shooters begin with a stronger baseline. That practical advantage explains why laser bore sights have become a common tool in rifle, shotgun, and handgun setups.
Environmental factors also play a role. Lighting conditions, mounting height, optic quality, and shooting distance can influence results. Understanding these variables helps create realistic expectations and prevents disappointment during the zeroing process. Small details often make a noticeable difference.
Safety deserves equal attention. Firearms should always be unloaded and verified clear before inserting or chambering a bore sight. Taking a few extra moments to inspect the firearm isn't glamorous, yet it prevents avoidable mistakes. Safe handling remains the foundation of every sighting procedure.
Another overlooked benefit involves confidence. Seeing the laser and reticle align before stepping onto the firing line provides reassurance that the setup is moving in the right direction. That confidence can reduce rushed adjustments and encourage a more methodical approach.
While the process itself isn't complicated, consistency matters. Stable firearm positioning, careful reticle adjustments, and realistic sighting distances all contribute to better results. A rushed setup often creates more work later. A deliberate approach, on the other hand, tends to pay off quickly.

- ARS Mark8.8
ARS Mark is a ranking system developed by bestairriflescopes.com. ARS Mark has no relationship or impact from any manufacturers or sales agent websites. Learn more
- BrandSightmark

- ARS Mark8.8
ARS Mark is a ranking system developed by bestairriflescopes.com. ARS Mark has no relationship or impact from any manufacturers or sales agent websites. Learn more
- BrandCVLIFE
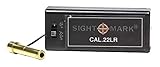
- ARS Mark8.8
ARS Mark is a ranking system developed by bestairriflescopes.com. ARS Mark has no relationship or impact from any manufacturers or sales agent websites. Learn more
- BrandSightmark

- ARS Mark8.6
ARS Mark is a ranking system developed by bestairriflescopes.com. ARS Mark has no relationship or impact from any manufacturers or sales agent websites. Learn more
- BrandSightmark

- ARS Mark8.4
ARS Mark is a ranking system developed by bestairriflescopes.com. ARS Mark has no relationship or impact from any manufacturers or sales agent websites. Learn more
- BrandSightmark
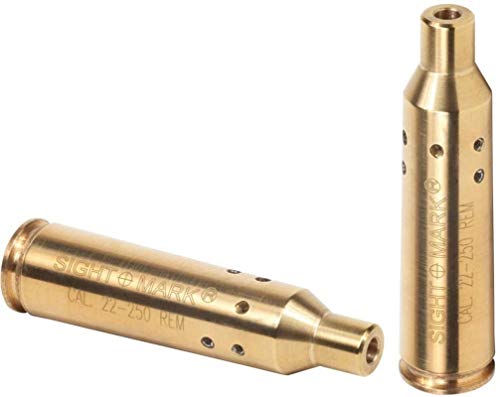
- ARS Mark8.4
ARS Mark is a ranking system developed by bestairriflescopes.com. ARS Mark has no relationship or impact from any manufacturers or sales agent websites. Learn more
- BrandSightmark

- ARS Mark8.4
ARS Mark is a ranking system developed by bestairriflescopes.com. ARS Mark has no relationship or impact from any manufacturers or sales agent websites. Learn more
- BrandSightmark
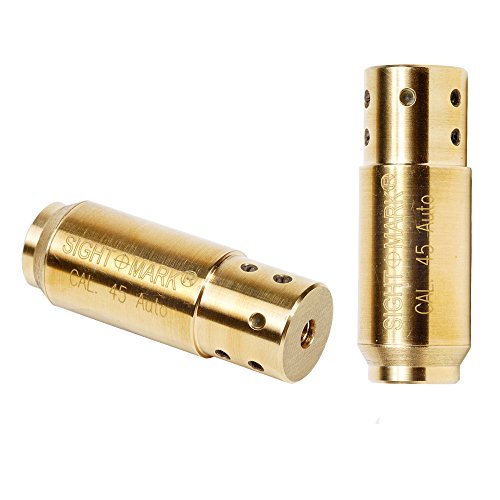
- ARS Mark8.2
ARS Mark is a ranking system developed by bestairriflescopes.com. ARS Mark has no relationship or impact from any manufacturers or sales agent websites. Learn more
- BrandSightmark

- ARS Mark8.2
ARS Mark is a ranking system developed by bestairriflescopes.com. ARS Mark has no relationship or impact from any manufacturers or sales agent websites. Learn more
- BrandSightmark

- ARS Mark7.6
ARS Mark is a ranking system developed by bestairriflescopes.com. ARS Mark has no relationship or impact from any manufacturers or sales agent websites. Learn more
- BrandSightmark
Last update on 2026-08-05 / Affiliate links / Images, Product Titles, and Product Highlights from Amazon Product Advertising API
How To Use Sightmark Laser Bore Sight
A new optic can make a rifle feel dialed in before a single shot is fired, then the first range session quickly proves otherwise. Impacts may land off paper, adjustments start stacking up, and ammo disappears faster than planned. That is where how to use sightmark laser bore sight becomes a practical skill instead of a neat little accessory trick. A careful setup gives the optic a sensible starting point, so live-fire zeroing feels less like chasing ghosts and more like making clean, measured corrections.
Sightmark Laser Bore Sight
Sightmark laser bore sight tools help align the bore with the optic before live rounds enter the picture. The laser gives a visible reference point, while the scope or red dot shows where the sighting system is currently aimed. That gap between the two points tells you what needs correction. It is not a final zero, but it can save time, ammunition, and frustration.
The first mistake many shooters make is expecting the laser to do the whole job. It will not replace live-fire confirmation, because bullet path, optic height, ammunition, and distance all affect real impact. Still, a proper bore sighting session gives you a strong baseline. That baseline matters most when the optic is freshly mounted or has been removed and reinstalled.
A stable rifle matters more than fancy technique. Rest the firearm securely on bags, a bench rest, or another safe support so it does not wobble while you adjust the optic. Even tiny shifts can make the laser appear inconsistent. A calm setup helps create repeatable alignment, which is the whole point of the process.
Safety comes first, no shortcuts. Confirm the firearm is unloaded, remove ammunition from the work area, and keep the muzzle pointed in a safe direction. A bore sight is a setup tool, not a reason to relax basic handling habits. Good habits make the entire process cleaner, safer, and less stressful.
Set Up The Firearm Safely
Start by clearing the firearm with intention, not speed. Open the action, check the chamber, inspect the magazine area, and verify everything is empty before inserting the bore sight. That step may feel repetitive, but safe firearm handling should feel routine. Rushing here is how simple tasks turn messy.
Place the firearm on a steady surface where the muzzle points toward a safe backstop or non-reflective target area. A laser dot can bounce off shiny surfaces, so avoid mirrors, glossy metal, or glass. A plain wall target or paper target is easier to read. Stability and visibility make the process smoother from the start.
The room or outdoor space should have manageable lighting. Bright sunlight can wash out the laser, especially at longer distances. Dim indoor lighting often makes the dot easier to see, though every setup has its limits. Better visibility helps you make small optic corrections without second-guessing every click.
Keep tools nearby before starting. Lens cloth, the correct adjustment caps, a small screwdriver or turret tool, and the Sightmark unit should all be within reach. Walking away from the firearm repeatedly can lead to bumps and alignment changes. A tidy bench keeps the process focused and controlled.
Insert The Bore Sight Correctly
Different Sightmark models may use a chamber-style design, an arbor, or a caliber-specific shape. Match the bore sight to the firearm’s caliber and follow the product’s fit direction carefully. A poor fit can angle the laser slightly, which throws off the whole reference point. The caliber match is not a tiny detail, it is the foundation.
Chamber-style bore sights should seat gently and evenly. Do not force the unit, because damaged edges or a stuck tool can create a headache you did not need. The bore sight should sit in place with a clean, natural fit. If it feels wrong, stop and check the model, caliber marking, and chamber condition.
Magnetic or muzzle-style designs need careful alignment at the crown. The muzzle crown affects accuracy, so avoid dragging, scraping, or banging anything against it. A clean muzzle surface helps the laser sit straighter. Small care here protects accuracy potential beyond the bore sighting session.
Turn on the laser only after the unit is seated. Then look for the dot on the target surface without moving the firearm. The dot may not appear exactly where expected, especially if the optic was recently mounted. That is normal, and it simply shows the current difference between bore direction and sight direction.
Choose A Practical Starting Distance
A short starting distance makes the laser easier to see and keeps the process manageable. Many shooters begin around a close indoor distance, then confirm at the range with live fire. The exact distance depends on available space, firearm type, and optic setup. The goal is not perfection, but a reliable starting alignment.
Using a close wall or target helps avoid wild corrections. If the dot is far from the reticle, adjust gradually instead of spinning turrets in a panic. Big rushed changes often create new confusion. Slow clicks and steady observation keep the alignment process easy to track.
For bow setup questions outside firearm bore sighting, Compare your aiming comfort with best bow sight old eyes if small pins or dim sight pictures are becoming a strain. The overlap is simple: clear aiming references reduce frustration across different shooting tools. Still, a bow sight and a laser bore sight solve different problems. Treat each setup on its own terms.
A bore sighted firearm still needs live-fire zeroing at the intended distance. A 25-yard reference, a 50-yard confirmation, or a 100-yard rifle zero can produce different point-of-impact results. Ballistics do not care how good the laser looked indoors. The laser gets you closer, while live rounds confirm reality.
Align The Reticle With The Laser
Once the laser dot is visible, look through the optic without disturbing the firearm. The reticle, dot, or crosshair may sit high, low, left, or right of the laser. Adjust the optic until the aiming point moves toward the laser dot. Work slowly, because steady alignment beats dramatic turret spinning every time.
Scope adjustments can feel backward at first because you are moving the reticle relative to the laser point. Read the turret markings and make one direction change at a time. If the reticle moves away from the laser, reverse course and continue with smaller corrections. Patience saves a lot of muttering at the bench.
Red dots and green dots follow the same basic idea, though the sight picture feels different. The illuminated aiming point should settle near the laser dot once adjustments are made. For air rifle optics, Upgrade your aiming setup with best green dot air rifles if a brighter dot helps with plinking, pest control practice, or backyard target work. A clear dot can make fast visual alignment much less fussy.
Do not chase the dot if the firearm keeps shifting. Recheck the rest, shoulder contact, and bench position before blaming the optic. A loose mount, uneven rest, or wobbly table can make good adjustments look bad. Stable support protects the value of every windage and elevation correction.
Check Mounts Before Trusting Adjustments
A laser bore sight can reveal mounting problems fast. If the reticle refuses to move predictably, the rings, base, or optic may not be seated correctly. Loose screws can mimic bad tracking and waste a full range session. A quick mount inspection protects both accuracy and confidence.
Use the correct driver size and avoid over-tightening. Stripped screws and crushed scope tubes are expensive mistakes that usually start with impatience. Follow the optic or mount maker’s torque guidance if available. Consistent pressure helps keep the optic secure without damaging the gear.
Leveling also matters. A canted optic can make elevation adjustments drift sideways, especially at longer distances. The bore sight may look acceptable up close, but live-fire groups can still wander strangely. A level rifle and straight reticle give the zeroing process a cleaner path.
Recheck the laser after mount inspection. If the dot and reticle shifted after tightening screws, that movement tells you the setup was not fully settled before. This is annoying, sure, but useful. Catching it early prevents wasted ammunition and confusing range notes later.
Move From Bore Sighting To Live Fire
After the reticle and laser are aligned, remove the bore sight before loading any ammunition. That step is non-negotiable. Check the chamber again and make sure the tool is out of the firearm. A safe transition keeps the setup process from becoming dangerous.
Fire a careful first group from a stable position instead of judging a single shot. A three-shot group usually gives more useful feedback than one lonely hole. Measure the group center against the aiming point, then adjust the optic from there. Group-based correction helps separate shooter error from true optic offset.
Compound bow setup follows a different path, but the patience carries over. Build cleaner archery alignment habits with how to sight in compound bow if pin movement, peep alignment, or distance gaps keep causing confusion. The shared lesson is simple: small adjustments beat rushed guessing. Different tool, same discipline.
Expect the first live-fire group to need adjustment. Bore sighting reduces the starting error, but it rarely lands the final zero perfectly. Ammunition type, barrel harmonics, trigger control, and shooting position all influence impact. Treat the laser as a setup shortcut, not a promise.
Fix Common Bore Sighting Mistakes
A dim or missing laser dot usually points to lighting, battery, or distance issues. Move closer, reduce ambient light, or replace the battery before assuming the unit is defective. Some lasers are simply harder to see in bright outdoor conditions. Better visibility keeps alignment checks from turning into guesswork.
A laser that appears to wander may signal poor seating. Remove the bore sight, inspect the contact area, and insert it again with care. Dirt, oil, or a slight angle can change the dot position. Clean contact helps create more consistent laser placement.
Large differences between bore sight alignment and live-fire impact can happen. Optic height over bore, parallax, ammunition, and short-distance geometry all play a role. That does not automatically mean the tool failed. It means the bore sight got you close enough to begin making real ballistic corrections.
Some shooters over-adjust after every single shot. That habit creates a messy zero and a tired shoulder. Shoot a group, adjust from the center, then shoot another group. A calm rhythm produces better information and keeps the process from going sideways.
Build A Repeatable Range Routine
A solid routine starts before the range bag leaves the house. Check batteries, pack the Sightmark unit, bring the right target, and confirm the optic tools are included. Forgetting one small item can turn a productive zeroing session into a shrug and a ride home. Preparation protects range time.
Start with bore sight alignment, then shoot from a stable rest. Record adjustment changes if the optic is new or unfamiliar. Notes help you learn how the scope tracks and how the firearm responds. That practical record becomes useful the next time something shifts.
Let the barrel cool if groups begin opening up. Heat can change point of impact, especially during repeated strings. A rushed zero often looks worse than the firearm actually shoots. Slowing down supports cleaner groups and better judgment.
Stop adjusting once the group center matches the intended zero. Constant tweaking can make a good setup worse. A practical zero should match the firearm’s purpose, the ammunition, and the expected shooting distance. The best result is not a perfect-looking laser dot, but repeatable point of impact on paper.
How To Use Sightmark Laser Bore Sight For Final Zero
Range day gets a lot less annoying once the first shots land close enough to read. The laser already gave the optic a starting point, but the real work begins when paper, recoil, and actual bullet flight join the conversation. How to use sightmark laser bore sight still matters after the first alignment because it teaches a cleaner routine for checking shifts, spotting setup mistakes, and making smarter corrections. A good zero comes from calm adjustments, not frantic turret spinning.
Confirm The First Live-Fire Group
The first live-fire group should be treated like information, not judgment. A rifle can look lined up with the laser and still print a little high, low, left, or right once bullets leave the barrel. That gap is normal because laser alignment and bullet impact are not the same thing. Shoot from a steady rest and let the group tell the truth.
Three shots usually give a better read than one single hole. A lone shot can be pulled by breathing, trigger pressure, or a shaky bench position. Group center matters more than the wildest impact. That makes point-of-impact correction easier to judge without overreacting.
Adjust the optic based on the group center, then shoot another group before making more changes. This slower pace feels boring for a minute, sure, but it saves ammo and keeps the zero from wandering all over the target. A rushed correction can turn a nearly fixed setup into a new problem. Measured turret clicks beat guesswork every time.
Keep the same aiming point for each group. Changing targets, aiming at different corners, or chasing the last hole makes the data messy. A clean target with a clear center helps you read the pattern faster. The goal is repeatable impact, not a lucky shot that happens to land where you wanted.
Watch For Distance And Height-Over-Bore Issues
Short-distance bore sighting can make an optic look closer than it really is. The sight sits above the barrel, so the line of sight and bore line start from different heights. At close range, that offset can create a noticeable gap. Height over bore matters more than many people expect.
A laser dot on a nearby wall does not show the full bullet path. Bullets rise and fall relative to the sight line, depending on distance, ammunition, and zero choice. That is why a close alignment should only be the first step. Live-fire distance is where the real zero gets settled.
Do not panic if a close bore sight leaves the first group lower than expected. That can happen with rifles, carbines, and air rifles because the optic line sits above the barrel. Instead of blaming the bore sight, adjust based on actual impacts at the distance you plan to use. Practical zeroing works best with realistic expectations.
Similar alignment habits show up in archery, even though the tools are different. Refine bow setup decisions with best bow sight mathews if pin clarity, mounting fit, or sight picture control affects your shot routine. The shared lesson is simple: clear sight alignment helps reduce avoidable misses. Different gear, same need for consistency.
Diagnose Strange Laser Behavior
A laser dot that shifts around can make the whole process feel sketchy. Before assuming the Sightmark unit is bad, check how it is seated in the chamber or muzzle. A tiny angle can move the dot enough to confuse the setup. Proper bore sight seating is a small detail with a big effect.
Battery strength can also cause trouble. A weak battery may create a dim or flickering dot, especially in brighter spaces. Replace it before making major optic changes. Clear visibility keeps laser reference points easier to trust.
Rotate-style checks can help reveal fit issues on some bore sight designs. If the laser makes a small circle instead of staying centered, the tool may not be seated straight or may not match the firearm properly. That does not mean the firearm is inaccurate. It means the bore sight reference needs a closer look.
Clean contact surfaces before blaming the optic. Dust, carbon, oil, or small debris can prevent the bore sight from sitting evenly. Wipe the chamber or muzzle area carefully and reseat the unit. A cleaner fit supports more consistent alignment during repeated checks.
Protect The Bore Sight Between Uses
A bore sight is easy to toss into a range bag, but rough storage can shorten its useful life. Small lenses, contacts, and switches do not love being knocked around with tools and loose ammo boxes. Keep it in its case whenever possible. Protected storage helps preserve the laser’s consistency.
Remove batteries if the tool will sit unused for a while. Battery leakage can damage internal contacts and turn a handy tool into junk. This is especially worth doing in hot garages, trucks, or damp storage spaces. Battery care is boring until it saves the device.
Airgun owners have their own maintenance concerns, especially around seals and pressure systems. Keep related gear running smoothly with best oil pcp air rifle if lubrication choice affects your air rifle routine. Still, oils and bore sight electronics should stay separate. Clean handling prevents residue from reaching lenses or contacts.
Wipe the exterior gently after use. A soft cloth is usually enough for fingerprints, dust, or light residue. Avoid harsh solvents unless the manufacturer clearly allows them. Careful cleaning keeps the laser window clear and the tool ready for the next optic setup.
Know What Bore Sighting Cannot Fix
A laser bore sight cannot fix a loose scope base. It also cannot correct a damaged crown, poor ammunition match, bad trigger control, or a warped mounting setup. The tool only shows a reference between bore direction and sight direction. Bore sighting limits should stay clear from the start.
Large groups after zeroing usually point beyond the bore sight. Check ring tension, action screws, ammunition consistency, rest stability, and shooter technique before chasing the laser again. A scattered group needs diagnosis, not endless turret clicks. Group consistency matters before fine-tuning impact location.
Parallax can also make the reticle appear to shift if your eye position changes behind the optic. That can trick you into thinking the zero moved. Keep a consistent cheek weld and look through the center of the optic. Consistent head position helps separate real movement from sight-picture error.
Some setups simply need more range time. A new optic, unfamiliar trigger, or lightweight rifle can take a few groups before everything feels settled. That is not failure. It is the normal learning curve behind repeatable shooting and cleaner zero confirmation.
Build A Smarter Checkup Routine
A Sightmark bore sight earns its keep beyond the first optic installation. Use it for quick checks after travel, rough handling, scope swaps, or mount changes. A short inspection can reveal whether the optic is still close before live rounds are used. Pre-range verification saves time and avoids ugly surprises.
Check alignment again after removing and reinstalling an optic. Even return-to-zero mounts can shift slightly depending on rail fit, clamp pressure, and placement. Marking the rail slot can help repeat the position. Consistent mounting keeps small errors from piling up.
Keep notes on your confirmed zero distance, ammunition, turret settings, and any major adjustments. A simple range log can explain future changes that memory forgets. If the rifle suddenly prints differently, old notes give you a starting point. Zero records make troubleshooting less painful.
Use the laser as a check, then trust paper. The dot can tell you whether the setup is close, but the target shows what the firearm actually does. That balance keeps expectations realistic and the process simple. Paper confirmation remains the final word in any zeroing routine.


12 Best 22 Pcp Air Rifle For Hunting of 2026 With Quiet Power

7 Best 22 Pcp Air Rifle Under 300 of 2026 For Backyard Pest Control

10 Best 22 Break Barrel Air Rifles of 2026 For Backyard Pest Control

10 Best 30 Caliber Pcp Air Rifle of 2026 For Medium Game

Top Best 177 Air Rifle Under 100: Budget-Friendly Picks for 2026

How to Safely Reload Shotgun Shells at Home

11 Best Co2 Air Rifle For Pest Control of 2026 To Ensure Humane Dispatch

12 Best Inexpensive Air Rifles of 2026 For Dependable Backyard Accuracy






