
How to Zero a Reflex Sight Without Wasting Ammo

Aligning a reflex sight comes down to firing a supported three-shot group and turning the adjustment dials until your bullet holes land directly behind the dot. The ideal target distance changes depending on whether the sight sits on a defensive pistol or a rifle. Taking those initial shots from a solid bench rest removes hand wobble, which ensures every dial click moves the bullet impacts in the right direction.
Pistols usually work best at ten to fifteen yards, while rifles often stretch out to fifty or one hundred yards. The adjustment screws can also confuse shooters, because turning toward the marked arrow moves where the bullet hits the target rather than shifting the dot itself. A firm mount matters just as much, since loose screws will cause the dot to wander under recoil. Getting these basic details lined up first saves ammunition and locks in your zero without any guesswork.
The Short Version
- Stabilize your firearm: Rest your handgun or rifle on sandbags or a bench rest so body movement does not pull your shots off center.
- Start up close: Place your first target at 7 to 10 yards to confirm where bullets land before moving back to your main zero distance.
- Move the bullet holes, not the dot: Dials move your point of impact on paper; turning toward "Up" or "R" shifts your bullet holes in that direction.
- Secure your mounting screws: Fasten screws with blue thread-locking fluid and an inch-pound torque tool so recoil cannot loosen the optic body.
Pre-Range Checklist: Mounts, Batteries, and Support
Before adjusting any dials, your gear must be mechanically secure. A loose optic or unstable shooting stance causes shots to wander, making true alignment impossible.
- Clear the firearm: Drop the magazine, open the action, and inspect the chamber visually and physically to verify no live round is present before working on your optic.
- Check mounting screw tension: A reflex sight experiences harsh recoil forces on reciprocating pistol slides. Check the screws securing the optic to your slide cut or standard 20mm slotted accessory rail. Apply a drop of blue thread-locking fluid to each thread. Tighten each fastener with an inch-pound torque tool to the manufacturer limit, usually between 12 and 15 inch-pounds for handguns.
- Inspect battery seating and brightness: Confirm your battery sits flat with correct polarity. Lower the brightness until the aiming dot is crisp. When brightness is too high, the dot blooms into a fuzzy shape that obscures your exact target center. If your optic has a motion-sensing auto-on function, tap the frame to confirm it activates promptly.
- Set up a rigid shooting rest: Never attempt to zero while shooting off-hand. Human muscle tremor masks whether your optic is off target. Use sandbags or a padded bench rest to support the gun frame firmly on the bench.
Choosing Your Zero Distance for Handguns and Rifles
Zeroing means adjusting the aiming dot so your shots land exactly where the dot points at a specific distance. Because bullets travel in an arc rather than a flat line, your chosen distance dictates how high or low your rounds hit at other ranges.
For defensive handguns, 10 to 15 yards is the most practical choice. At 15 yards, standard handgun ammunition matches your line of sight closely from point-blank range out to 25 yards, staying within about an inch of your aiming point. If you shoot precision target matches, a 25-yard zero provides tighter long-range alignment, though it requires greater trigger control to dial in properly.
For carbines and rifles, shooters generally pick a 50-yard or 100-yard zero. A 50-yard rifle zero creates a flat trajectory where the bullet crosses your aiming point at 50 yards, rises slightly at 100 yards, and crosses your line of sight again near 200 yards.
Always start your zeroing session at 7 to 10 yards regardless of your final distance. Firing initial shots up close guarantees your bullets hit paper. Starting immediately at 25 or 50 yards often results in complete misses off the target backer, leaving you guessing which way to adjust while wasting ammunition.
Step-by-Step Guide to Zeroing Your Dot
Follow these six steps from a stable bench rest to align your reflex sight quickly and cleanly.
- Set your target at close range: Place a paper target with grid squares or small bullseyes at 7 to 10 yards. Sit down behind your bench, settle the firearm into your sandbag support, and look through the optic window. Keep both eyes open and focus your vision on the target bullseye, letting the red aiming dot float over your point of aim.
- Fire a slow three-shot group: Squeeze the trigger smoothly three times, holding the exact same sight picture for each shot. Press the trigger straight back without rushing. Ignore where individual shots land and do not adjust your aim between rounds. You need a consistent cluster to reveal your true point of impact (where the bullets hit the paper).
- Measure the group offset: Clear the firearm, leave the action open, and examine your target. Find the geometric center of your three-shot group. Measure how many inches that cluster sits above, below, left, or right of your target bullseye.
- Dial your corrections: Turn the elevation dial (the up-and-down adjustment dial) to correct vertical errors, and turn the windage dial (the left-to-right adjustment dial) to correct horizontal errors. Count each click carefully as you turn.
- Fire a three-shot confirmation group: Aim at the bullseye and fire three more rounds. If your adjustments were correct, this group will cut into the center ring. If the holes remain slightly off, make a small secondary adjustment and fire three more shots to confirm.
- Move out to your final distance: Once you are centered up close, move your target out to your final distance, such as 15 or 25 yards for a pistol, or 50 yards for a rifle. Settle into your rest and shoot another three-shot group. Any tiny alignment error shows up clearly at extended distance. Make your final minor click adjustments, confirm with three shots, and lock down your setup.
Understanding Adjustment Dials Without the Confusion
Reflex sight dials frequently cause confusion because of how the arrows are marked. Most sights feature two dials marked with "UP" for elevation and "R" for windage. These arrows show which way you are moving your bullet impact on the paper target, not which way you are shifting the red dot inside the window.
If your shots land three inches below your target bullseye, turn the elevation dial toward "UP" to raise the bullet holes. If your group hits to the left of the bullseye, turn the windage dial toward "R" to push your bullet holes to the right. Think of it like steering your bullet holes toward the center.
Most reflex sights measure adjustments in minutes of angle, commonly written as MOA. One MOA represents an angular spread covering roughly one inch at 100 yards. As distance decreases, that angle covers smaller physical measurements:
- At 100 yards, 1 MOA equals roughly 1 inch.
- At 50 yards, 1 MOA equals roughly 1/2 inch.
- At 25 yards, 1 MOA equals roughly 1/4 inch.
- At 10 yards, 1 MOA equals roughly 1/10 inch.
Check your optic manual for its click value, which is usually 1 MOA or 0.5 MOA per click. For example, if your optic adjusts at 1 MOA per click and you are zeroing at 25 yards, each click moves your bullet hole by 1/4 inch. If your shots hit 2 inches low at that distance, turn the elevation dial 8 clicks toward "UP" to center your group.
Diagnosing Zero Shift: What to Check When Shots Wander
If you dial in your optic but your shots continue to scatter across the target, use this checklist to locate the issue.
- Loose mounting screws: Violent slide motion can loosen mounting hardware quickly if thread locker was omitted. If your groups open up erratically, clear the firearm and gently wiggle the optic housing. Any movement means the screws backed out. You can draw a thin line with a paint pen across each screw head and the optic frame; this gives you an instant visual check if a screw begins to turn loose under recoil.
- Resting the wrong parts on bags: When using bench rests, support only the solid dust cover or frame of your firearm. Never rest the moving slide, barrel, or magazine baseplate directly on a hard surface. Slide contact interferes with cycling and barrel lockup, which throws bullets off target.
- Running out of dial travel: If a dial stops turning before your bullet holes reach the center mark, examine the optic base. An uneven adapter plate, trapped debris under the housing, or mismatched screw lengths can tilt the optic, using up all available internal adjustment.
- Anticipating recoil: If your shots group low and to the left (for right-handed shooters), the cause is usually trigger flinch rather than sight misalignment. Jerking the trigger right before ignition forces the muzzle down. Practice dry firing on an empty chamber to confirm the dot stays steady when the striker drops.
What to Look for in a Dot Sight That Holds Its Zero
Getting a quick zero depends heavily on the mechanical build of your optic. When a sight lacks structural integrity, you end up wasting ammunition chasing wandering groups.
Look for sights featuring crisp, distinct adjustment clicks. Inexpensive optics often have mushy dials with no positive tactile detents, making it difficult to track your adjustments accurately. Positive clicks ensure internal adjusters stay parked under recoil shock.
Inspect the optic footprint and recoil lugs. The footprint is the specific screw-hole pattern cut into the sight base. Reliable optics feature sturdy recoil lugs, which are raised pins that mate into the slide cut to absorb recoil force. Sights relying solely on screws will eventually shift or shear their hardware. Finally, choose an aiming dot size suited to your use: a fine 2 MOA to 3 MOA dot covers less of the target bullseye for precise zeroing, while a 4 MOA to 6 MOA dot offers faster acquisition on defensive handguns.

- ARS Mark9.0
ARS Mark is a ranking system developed by bestairriflescopes.com. ARS Mark has no relationship or impact from any manufacturers or sales agent websites. Learn more
- BrandCVLIFE

- ARS Mark9.0
ARS Mark is a ranking system developed by bestairriflescopes.com. ARS Mark has no relationship or impact from any manufacturers or sales agent websites. Learn more
- BrandSightmark

- ARS Mark8.8
ARS Mark is a ranking system developed by bestairriflescopes.com. ARS Mark has no relationship or impact from any manufacturers or sales agent websites. Learn more
- BrandCVLIFE

- ARS Mark8.8
ARS Mark is a ranking system developed by bestairriflescopes.com. ARS Mark has no relationship or impact from any manufacturers or sales agent websites. Learn more
- BrandEZshoot

- ARS Mark8.6
ARS Mark is a ranking system developed by bestairriflescopes.com. ARS Mark has no relationship or impact from any manufacturers or sales agent websites. Learn more
- BrandFeyachi
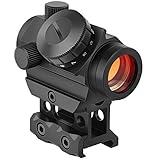
- ARS Mark8.6
ARS Mark is a ranking system developed by bestairriflescopes.com. ARS Mark has no relationship or impact from any manufacturers or sales agent websites. Learn more
- BrandMidTen

- ARS Mark8.6
ARS Mark is a ranking system developed by bestairriflescopes.com. ARS Mark has no relationship or impact from any manufacturers or sales agent websites. Learn more
- BrandFeyachi
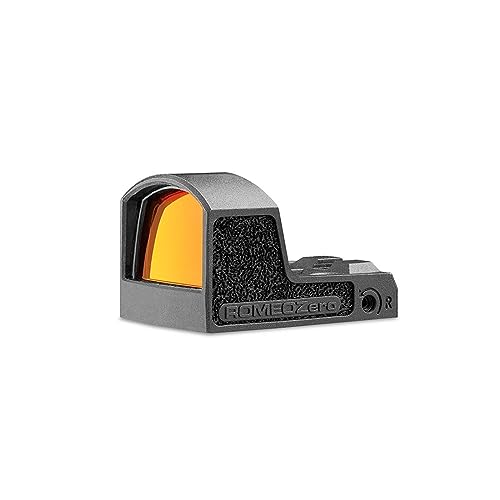
- ARS Mark8.2
ARS Mark is a ranking system developed by bestairriflescopes.com. ARS Mark has no relationship or impact from any manufacturers or sales agent websites. Learn more
- BrandSig Sauer

- ARS Mark7.6
ARS Mark is a ranking system developed by bestairriflescopes.com. ARS Mark has no relationship or impact from any manufacturers or sales agent websites. Learn more
- BrandBushnell

- ARS Mark7.6
ARS Mark is a ranking system developed by bestairriflescopes.com. ARS Mark has no relationship or impact from any manufacturers or sales agent websites. Learn more
- BrandJORMIX
Last update on 2026-10-01 / Affiliate links / Images, Product Titles, and Product Highlights from Amazon Product Advertising API
FAQs
Do I need a laser bore tool before going to the range?
No, a laser bore tool is completely optional. While projecting a laser dot onto a wall helps you establish a rough alignment at home, starting your live shooting at a close 7 to 10 yard target gives you the exact same ammo savings without buying extra gear.
Can I co-witness my iron sights to zero my red dot faster?
Yes, if your firearm has tall backup sights visible through the lower part of the window. By lining up your backup iron sights through the optic glass, you can dial your red dot until it rests directly on top of your front sight post. This rough mechanical alignment ensures your first shot strikes paper at the range.
Why does my red dot look like a blurry starburst instead of a round dot?
A distorted or smeared reticle is usually caused by astigmatism rather than a defective optic. To verify this, look at the dot through your smartphone camera screen. If the dot appears round and sharp on screen, your optic is fine, and lowering the brightness setting will help sharpen the image for your eyes.
How often do I need to re-zero my reflex sight?
A properly torqued reflex sight will hold its zero across thousands of rounds. You only need to adjust the dials if you remove the optic from the gun, switch your ammunition brand or bullet weight, drop the firearm on a hard surface, or notice your shots drifting during routine practice.


12 Best 22 Pcp Air Rifle For Hunting of 2026 With Quiet Power

7 Best 22 Pcp Air Rifle Under 300 of 2026 For Backyard Pest Control

10 Best 22 Break Barrel Air Rifles of 2026 For Backyard Pest Control

10 Best 30 Caliber Pcp Air Rifle of 2026 For Medium Game

Top Best 177 Air Rifle Under 100: Budget-Friendly Picks for 2026

How to Safely Reload Shotgun Shells at Home

11 Best Co2 Air Rifle For Pest Control of 2026 To Ensure Humane Dispatch

12 Best Inexpensive Air Rifles of 2026 For Dependable Backyard Accuracy






