
How to Zero a Red Dot Sight in Under Fifteen Rounds

Tighten the mounting screws on the optic base before heading to the firing line. A loose sight wobbles under recoil, so securing it firmly lets you match the aiming dot to your bullet holes with minimal ammunition. Rest the firearm on a steady sandbag, fire a clean three-shot cluster at your target, and turn the adjustment dials to walk the impact point straight to the dot.
The exact target distance depends on the firearm on the bench. Handguns are usually aligned at ten to fifteen yards, while rifles need twenty-five or fifty yards to match how the bullet travels downrange. Optic dials also shift where the bullet strikes rather than moving the glass, so turning the screws in the right direction saves plenty of wasted brass. Here is the simple process to line everything up smoothly.
Lock Down Your Mount and Check the Battery Before Heading Out
Always clear your firearm before you touch a single screw. Drop the magazine, rack the slide or bolt open, and look inside the chamber with your own eyes to confirm it is completely empty. Safe handling comes before any optic adjustment.
Most sighting problems start with a loose mount rather than bad aim. Check that your optic sits flat on its footprint, which is the specific screw-hole and recoil-lug pattern cut into your slide or adapter plate. If you are mounting to a rifle or shotgun, confirm the clamp grips the standard Picatinny or 20mm slotted accessory rails evenly without canting to one side.
Use an inch-pound torque tool to tighten every mounting screw to the exact tightness listed in your optic manual. For most small optics, this means between 12 and 15 inch-pounds. Add a tiny drop of blue non-permanent thread-locking fluid to the threads so firearm recoil does not rattle the screws loose during rapid fire.
Turn the aiming dot on and inspect your power source. Sights equipped with motion-sensing auto-on wake up immediately when you nudge the firearm and go to sleep when resting on a shelf to preserve battery life. If your optic uses a top or side battery door, confirm the cap is snug so shooting vibration does not cut electrical contact mid-string.
Before you pack your range bag, align your backup iron sights through the optic glass. This setup, known as co-witnessing, allows you to use your regular sights right through the window. If you want a dependable dual-sighting setup on your firearm, take a look at the best iron sights for cowitness with red dot sights in 2026 to ensure your sight heights line up properly.
Choose the Right Zero Distance for Your Specific Firearm
Every barrel launches bullets in a slight curved arc rather than a laser-straight line. Because of that curve, zeroing simply means adjusting the aiming dot so your shots land exactly where the dot points at one specific distance. Picking that distance depends directly on whether you are shooting a handgun, a pistol-caliber carbine, or a rifle.
For defensive handguns, 15 yards provides a balanced zero for real-world distances. At 15 yards, your bullet impacts stay within an inch or two of your aiming dot from point-blank contact distance out to 25 yards. Dedicated target shooters using rimfire pistols often prefer a 25-yard zero for pinpoint accuracy. If you shoot a dedicated target pistol, you can explore the best red dot sight for Ruger Mark in 2026 to see which small-dot options suit paper punching at long range.
For defensive rifles, a 50-yard zero remains the most practical standard. A rifle zeroed at 50 yards will strike near the center of the dot at 50 yards, rise about an inch or two at 100 yards, and drop right back onto the dot around 200 yards. This gives you a point-and-shoot setup across normal rifle distances without requiring mental ballistics math.
Dot size also shapes how you see the target at these ranges. Optic reticles are sized in MOA, which is a standard adjustment scale that measures how much of the target the dot covers. A fine 2 MOA dot covers about half an inch at 25 yards and two inches at 100 yards, giving you a clean sight picture for precise shots. A larger 3 to 6 MOA dot covers more paper but appears much faster to your eye during defensive drills with a carry pistol.
Fire Three-Shot Clusters From a Rock-Solid Bench Rest
Never try to zero an optic while standing on your feet unsupported. Your natural body sway and breathing add too much wobble to your sight picture, which tricks you into chasing bad shots with your adjustment dials. Sit down at a sturdy shooting bench and support both the firearm and your wrists.
Follow these steps to dial in your dot quickly:
- Set up your rest: Rest the dust cover or forward rail of your firearm on a firm shooting bag or padded rest. Never rest the bare barrel directly on a hard surface, because recoil vibration against wood or concrete flings shots in unpredictable directions.
- Rough-align before live fire: Insert a bore sight, which is a barrel laser used to rough-align the dot before live fire, straight into the chamber or muzzle. Adjust your windage and elevation click dials until your red dot sits right on top of that laser dot at 10 yards. Remove the laser tool completely before loading live rounds.
- Shoot your first three-shot cluster: Load three rounds, place the center of the aiming dot on the bullseye, and press the trigger smoothly three times. Do not look at where the bullets land between shots. Focus only on holding the dot perfectly still on the target mark.
- Measure the group center: Walk downrange or look through a spotting scope to locate your grouping, which is the cluster of bullet holes on the target. Find the geometric center of those three holes and measure how many inches it sits away from your aiming bullseye, both up-and-down and left-to-right.
- Dial your adjustment turrets: Turn the adjustment screws the required number of clicks to move the bullet strike toward the center bullseye.
- Fire a second three-shot cluster: Shoot another three rounds using the exact same rest and target hold. If your math was correct, this second cluster will land inside or touching the bullseye ring.
- Fire a three-shot confirmation group: Make any tiny final single-click tweaks, then shoot three more rounds to verify your zero. You have now established a reliable zero using nine to twelve rounds of ammunition.
Turn the Turrets to Chase Your Bullet Holes on Paper
Optic adjustment turrets confuse many shooters because the dials show arrows labeled UP, DOWN, LEFT, or RIGHT. These markings tell you which way the bullet impact will move on paper, not which way the glass lens inside tilts. Think of your adjustments as chasing the bullet holes: if your shots land low, you must dial UP to bring the bullet strike up to your dot.
Every optic uses two dials to move the reticle. Windage is the left-and-right adjustment screw located on the side of the housing. Elevation is the up-and-down adjustment screw located on the top of the housing. When you turn these screws, you will feel and hear mechanical clicks that represent specific measurements.
Most red dot sights move either 0.5 MOA or 1 MOA per individual click. At a distance of 100 yards, a 1 MOA adjustment shifts your bullet impact by approximately one inch on paper. But when you zero at closer ranges, that same single click moves the bullet impact by a much smaller distance:
- At 100 yards, a 1 MOA click moves bullet impact roughly 1 inch.
- At 50 yards, a 1 MOA click moves bullet impact roughly 0.5 inches (two clicks move 1 inch).
- At 25 yards, a 1 MOA click moves bullet impact roughly 0.25 inches (four clicks move 1 inch).
- At 10 yards, a 1 MOA click moves bullet impact roughly 0.1 inches (ten clicks move 1 inch).
If your handgun optic has 1 MOA clicks and your three-shot group lands two inches low and one inch left at 25 yards, the math stays straightforward. To move the bullet impact two inches up, you need eight clicks in the UP direction. To move it one inch right, turn the windage turret four clicks toward the R or RIGHT arrow.
Diagnose Wandering Shots Before Blaming Your Optic
When bullet holes scatter randomly across paper with no consistent pattern, shooters often assume their red dot is broken. In most cases, wandering groups come from small mechanical oversights or shooter habits that you can fix in minutes at the bench.
- Check for slide or base play: Grasp the optic body with your fingers while the firearm is completely unloaded and try to wiggle it. If you feel any clicking, shifting, or rocking, the mounting screws are bottoming out in the screw holes before fully clamping the optic body down. You may need slightly shorter screws or a fresh adapter plate.
- Turn down excessive brightness: Setting the aiming dot too bright causes the light to flare and bloom across the lens, hiding your target bullseye. Lower the brightness until the dot becomes translucent enough that you can see through it to the exact target ring underneath.
- Watch your trigger press: Anticipating the loud blast of a handgun causes your wrist to dip downward right as the firing pin drops. This flinch pushes shots low and left for right-handed shooters. Have a friend load dummy training rounds randomly into your magazine to reveal if you are dipping the muzzle during trigger pull.
- Check your eyesight for astigmatism: If your aiming dot looks like an uneven starburst, a comet, or a cluster of grapes, your eye may have an uncorrected astigmatism. Look at the dot through a smartphone camera lens. If the dot appears as a crisp round circle on your phone screen but smeared to your naked eye, your vision is distorting the light, not the sight itself.
Look for Recoil Ratings and Easy Dials When Buying an Optic
Choosing an optic with solid internal construction prevents zeroing headaches before you even unpack your range gear. Handgun optics face punishing slide recoil forces that throw hundreds of gravities of shock against internal glass and circuit boards with every shot. Rifle sights must handle sharp bolt impacts and field bumps without losing mechanical position.
When selecting a sight, pick an optic built with an aluminum housing and rated for high shock resistance. Enclosed tube sights shield the emitter and lens inside a sealed nitrogen-purged tube, making them exceptionally tough for foul-weather hunting or duty rifles. Open-window sights leave the glass exposed on an open frame, providing an unobstructed view and a lighter profile that works nicely on concealed-carry handguns.
Check the turrets before making a final choice. Look for adjustment screws with tactile, crisp clicks that you can feel through your fingertips or hear in quiet surroundings. Mushy dials with faint click stops make it difficult to count adjustments accurately at the bench. A quality laser bore sighting kit is also worth keeping in your range kit, as roughing in your dot at home eliminates the frustration of firing blind into the dirt.

- ARS Mark8.8
ARS Mark is a ranking system developed by bestairriflescopes.com. ARS Mark has no relationship or impact from any manufacturers or sales agent websites. Learn more
- BrandCVLIFE

- ARS Mark8.8
ARS Mark is a ranking system developed by bestairriflescopes.com. ARS Mark has no relationship or impact from any manufacturers or sales agent websites. Learn more
- BrandCVLIFE

- ARS Mark8.6
ARS Mark is a ranking system developed by bestairriflescopes.com. ARS Mark has no relationship or impact from any manufacturers or sales agent websites. Learn more
- BrandFeyachi
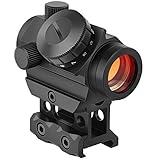
- ARS Mark8.6
ARS Mark is a ranking system developed by bestairriflescopes.com. ARS Mark has no relationship or impact from any manufacturers or sales agent websites. Learn more
- BrandMidTen

- ARS Mark8.4
ARS Mark is a ranking system developed by bestairriflescopes.com. ARS Mark has no relationship or impact from any manufacturers or sales agent websites. Learn more
- BrandCVLIFE
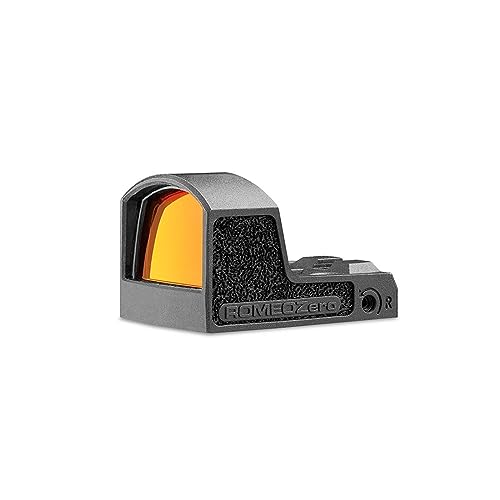
- ARS Mark8.2
ARS Mark is a ranking system developed by bestairriflescopes.com. ARS Mark has no relationship or impact from any manufacturers or sales agent websites. Learn more
- BrandSig Sauer
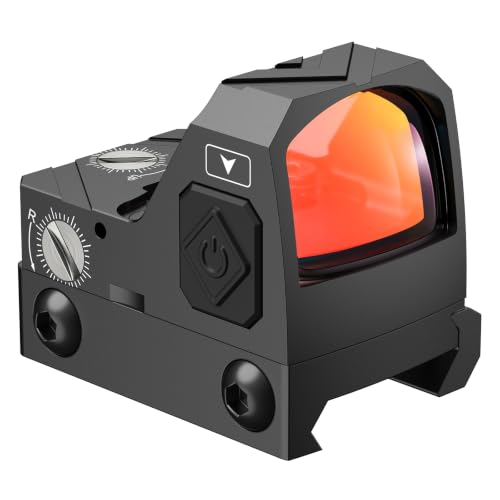
- ARS Mark7.6
ARS Mark is a ranking system developed by bestairriflescopes.com. ARS Mark has no relationship or impact from any manufacturers or sales agent websites. Learn more
- BrandCVLIFE

- ARS Mark7.6
ARS Mark is a ranking system developed by bestairriflescopes.com. ARS Mark has no relationship or impact from any manufacturers or sales agent websites. Learn more
- BrandBushnell
Last update on 2026-10-01 / Affiliate links / Images, Product Titles, and Product Highlights from Amazon Product Advertising API
FAQs
Can I zero a red dot sight at home without firing live ammo?
You can rough-align your red dot at home using a laser bore sight tool placed in the barrel or chamber. Adjust your dials until the optic dot sits directly over the laser beam against an indoor wall. This gets your firearm on paper, but you must still fire live rounds at the range to establish an exact true zero based on bullet recoil and trajectory.
What should I do if I run out of dial adjustments while zeroing?
If your elevation or windage turret stops turning before your shots hit the bullseye, stop turning immediately so you do not strip the fine internal threads. This issue almost always stems from an uneven mounting plate, misaligned slide cut, or loose rail clamp. Loosen the mount, clean off any debris trapped underneath the base, check your plate alignment, and reinstall the sight using a proper torque tool.
Why does my zero shift after firing fifty rounds?
A shifting zero happens when mounting screws back out under recoil or when an optic lacks sufficient shock resistance for your caliber. Check whether you applied non-permanent thread locker to the mounting screws when you installed the unit. If the screws are still tight to spec but the dot shifts position under recoil, the internal springs holding the optic emitter may be slipping, requiring factory service.
Do I need to re-zero my red dot if I change ammunition?
Yes, changing ammunition brands, bullet weights, or powder loads alters how fast the bullet leaves the barrel and where it impacts downrange. A handgun zeroed with lightweight target ammunition will often strike at a noticeably different point on paper than heavy hollow-point defensive rounds. Always shoot a fresh three-shot verification group whenever you switch to a different carry or hunting cartridge.


12 Best 22 Pcp Air Rifle For Hunting of 2026 With Quiet Power

7 Best 22 Pcp Air Rifle Under 300 of 2026 For Backyard Pest Control

10 Best 22 Break Barrel Air Rifles of 2026 For Backyard Pest Control

10 Best 30 Caliber Pcp Air Rifle of 2026 For Medium Game

Top Best 177 Air Rifle Under 100: Budget-Friendly Picks for 2026

How to Safely Reload Shotgun Shells at Home

11 Best Co2 Air Rifle For Pest Control of 2026 To Ensure Humane Dispatch

12 Best Inexpensive Air Rifles of 2026 For Dependable Backyard Accuracy






